Find us on Google+ Inventor Tales

Tuesday, August 16, 2016

Lessons in Manufacturing from 75 Year Old Airplane.

Have you ever looked at a manufacturing process and thought, "When was that process developed?"

I had that moment looking at a set of ailerons for a Seversky AT-12 Guardsman at Planes of Fame Air Museum, where I volunteer on the weekends.

The Seversky AT-12 Guardsman at Planes of Fame
Stripped of the fabric that normally, covers them, I had a rare opportunity to see the structure beneath.

Typically Structures of the era would be made of wood, or riveted aluminum like the images below.

An example of  riveted aluminum. 

A typical aluminum control surface.
This is in the process of being recovered in fabric. 
Instead, these structures were made of welded stainless steel that had been spot welded together.

A close up of the stainless steel structure.  The spot welds are the dark spots on the ribs.
And speaking of the era, the ailerons still bore their manufacturer's data plates.  Built by Fleetwings, in 1940.


My curiosity piqued, I looked up the company on the internet.

I found that Fleetwings started in the mid 1920s, and pioneered the use of stainless steel in aircraft structures.

It seems that this set of ailerons represents a small milestone in manufacturing of aircraft structures. The use of stainless steel.

It's an interesting note in manufacturing history!  All prompted by looking at a set of old ailerons.


 With so many tools that we have, we can be better, faster, and more efficient.  But don't forget to use those tools to be come something else. 

Become more curious, and always keep learning! 

Monday, August 08, 2016

The Art of Development - Give Your Content a Chance to Mature!


Today is a "5 minute" post.  Just a little idea I had while working in Autodesk Inventor. 

In my current engagement, I've taken on creating custom content in Autodesk Inventor's Content Center.  That means creating tables, upon tables of various hardware.  Mostly NAS and NASM hardware.  

It's not difficult, but it takes time, and it takes patience.  And that means there are times that I have to leave content incomplete, not ready to use, but it's still in the shared content database, exposed to the users. 

So that left me with a conundrum.  How do I make sure the users don't accidentally use the content before it's ready to release?  

I thought of the traditional route, which is to put "Do not use" or something similar in the family description, but then I had an idea I liked a lot better. 

I decided to use an image.  Just how graphical images are used to convey important information quickly

You can see the image I used in the screen capture below. 

Can you guess which one you shouldn't use?  


So enjoy the bit of humor I used to break up a long, tedious day.  And perhaps think of how you can use that in your daily projects, for both practical purposes, and maybe a little bit of humor! 

Tuesday, August 02, 2016

Embedding Designs in Autodesk Fusion 360 - My Practical Case

Wrapping up an aircraft maintenance class is a bittersweet experience for me.

On one hand, I miss sitting in a hangar full of airplanes, doing homework, while chatting with my classmates about.... airplanes.

What gearhead wouldn't want a classroom like this? 
On the other hand.... I suddenly have my weeknights back to relax! 

So how did I spend one of my first evenings free?  I took a fundamental lesson I learned in class, and integrated it into Autodesk Fusion 360.  

What was the lesson?  

It starts with something my aircraft maintenance teachers, both my formal instructors and my colleagues with far more experience have continually reinforced. 

"Know your references to your information!  Book, chapter, page, and paragraph!"  Sometimes they would add, "And because your buddy said so does not count!"

That meant looking through a lot of books, real paper books.  If I was lucky, I had a PDF that I could scan through.  But even that took time.

Manuals in Aircraft Maintenance are big, heavy, and required! 


I quickly learned to write down key class info in a small composition book, naturally, I included the relevant book, chapter, page, and paragraph.

My little composition notebook.
But next came rivet spacing.  It's the standard spacing found in the FAA Advisory Circular AC43.13

The image from AC43.13. 


Sure, I can write it down in my composition, and naturally, I did!   But I also decided that I would build it in Fusion 360, just for a little practice.

The completed rivet pattern in Fusion 360


But as I finished up my little practice exercise,  My teachers words echoed in my mind.

How can I make the most use of this.  How can I make the information available.

Why?  It's available to anyone with the link, and it's a good visual representation of the finished product.  (Note that AC43,13 is referenced in the title block)


It's a link in the chain of information.  Just like I was taught, it's part of knowing where to find the information.

And it's not about knowing the information, it's about knowing where to find it!

So here's another example of embedded information in Fusion 360.  If you'd like to see the full steps, I wrote a post on that subject here.

Take a look!  And see if it can help you! .  

Sunday, July 24, 2016

5 More Things Aircraft Maintenance Taught Me.

I've been busy.  Crazy busy.  It's why I have been really bad about blogging.

The last five weeks, I've been taking an Aircraft Maintenance class.  This class is mostly book work, as a matter of fact, it's all book work!

It means many a night of being the first up in the morning, and the last to bed at night.

My days start at 4:30 AM.  They end at 11 PM at night.

But while it's time consuming, and at times frustrating, it's good to learn new things.

This includes everything from basic math, to FAA rules and documentation, to Calculations of Weight and Balance.

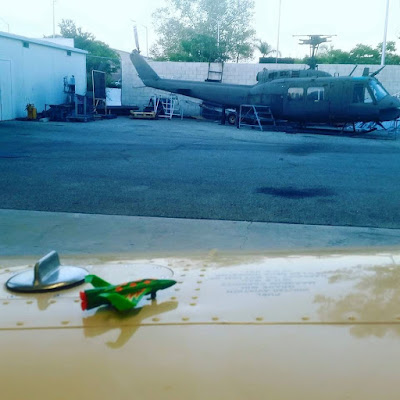
My text book.  I found the toy airplane laying on an airport tarmac.
Being a strange place to find a toy, I took as my "learning'" totem.
It reminds me to find joy in learning new things.

I could bore you with the details  of moments, engineering notation, Form 337, and AC43.13, but that wouldn't be much fun, would it?  Calculating the empty weight center of gravity of an aircraft isn't exactly the pinnacle of excitement!

Empty weight CG calcs.  With my learning totem.
I'm sure you can hardly contain your excitement.

And I get more out of these classes than that.  These are lessons beyond the syllabus, things I've observed in those times I look up from my textbook and observe the environment around me.

So what things did I learn?

1) Look for the inspiration of others. 

I look around my classroom and see many a 20 something "kid".  And some of them struggle with the course material.

I suppose I could make some snarky comment about the failure of public education or "those lazy millennials".

But the truth is, I've seen many of these students curse under their breath, then put their nose back into the book and try again.  And again.  And again.

They refuse to give up.  And then they succeed.  They succeeded because they were just to stubborn to give up.

2)  Class May End, but the Learning Doesn't

Being in a constant observation mode has made me better at learning.  And learning everywhere. I go. Sometimes its a document I find doing research for work has applications at school, sometimes its realizing that knowing how to safety wire means I'm better aware what it takes to make a design work.

Sometimes it's knowing when to listen when an old mechanic has something to teach you.

Safety Wire that I tightened.  Not bad, but it could be better.
Next time, it will be better. 


The lessons are many, and they breed other lessons.

3) An Ounce of Patience Can be Worth a Ton of Rework. 

One habit I continually struggle with is the desire to hurry.  Much of my career has been spent in the "hurry up corporate offense".  But many times the plan needs to look like
  • Read the manual
  • Form a plan
  • Reread the manual
  • Adjust the plan
  • Execute the plan
Why?  I've mad the mistake of hurrying.  Then had to redo something because I rushed the job.  The result?  The whole thing took a lot longer than just doing it right the first time. 

Obvious?  It should be, do I always follow that advise?  Not as often as I should.
\
But I follow it a lot more than I used to.

4) Experts Know What They Don't Know.

The best aircraft technicians, and best mentors I've had, have the repair manual close by.  Do they know their job?  Absolutely.  They're some of the best you'll find.  

But they also taught me, "When in doubt, you'd better check that manual!". Why?  They know that they can't memorize every last little detail.  But the manual has everything they need.  

Maintenance Manuals.  The best friend you can have. 


When I first started taking these classes, I figured I would be working on my own, spending a lot of nights studying.  But something quite amazing happened. 

Help came.  It wasn't help I asked for, it was help that came to me. 

People found out I was taking these classes, and they helped me. They shared their knowledge.  Sometimes it was a few helpful tips.  Sometimes they handed me a drill and said "You're going to learn how to drill out a #30 rivet today".  

Sometimes, it was a few kind words of encouragement when the long days seemed to be too much to bear. 

I didn't go seeking these people.  I simply found myself in the right place at the right time.   And when they saw me trying to help myself, they helped me stand taller than I could on my own. 

All it came with was a silent request that I return the favor when someone else needed it.  And I promise them that I will. 

In Conclusion

Here are 5 more things I learned from my Aircraft Maintenance classes.  Do I expect you to take your own maintenance classes?  No.  Of course not. 

But I'd encourage you to find your own "5 things".

Never quit learning, never quit looking for inspiration, and look for it in whatever form it takes. 


Sunday, July 10, 2016

Busy, Busy - I Haven't Posted in a While.

InventorTales has been quiet of late, as you may have noticed.   And it because I've been wrapped up in a few of my other pursuits. 

One of those?  Yet one more Aircraft Maintenance Technician class, this time, "Basic Science".  In this class I'm learning weight and balance, regulations, and documentation. 

Maybe not as exciting as building things, but just as important! 


My Basic Science book.  The toy plane is my totem to remind me to always enjoy learning!
My little totem with some of the "instructional airframes".
Remember, learning doesn't always happen in a classroom.

I've been busy Saturdays at Planes of Fame, enjoying my time as a proud member of the fabric restoration team.  The current project for our team is recovering the ailerons on a Seversky AT-12 Guardsman

It's quite the amazing project!  One I'm privileged to be a part of! 

 
The aileron frame. Made in 1940, it's spot welded stainless steel!

The aileron in the process of being covered in fabric. 
So that's an update of what's going on with me.  I haven't forgotten about this blog!  I'm hoping to follow up with some CAD posts soon!  

Thursday, June 16, 2016

Finding Internal Volumes Using Autodesk Fusion 360 - A Nice Little Trick!

Just this week, I had to figure out how to find the internal volume of a hollow structure.

Liquid in a bottle is the typical example.  And I'm using a bottle in my example, but I threw a bit of a twist on it. 

I mad the bottle a little crazy.  You know, for fun! 

Here's a shape to get the internal volume for! 
Finding internal volumes can be a bit of a feat sometimes.  Many hollow vessels have stiffeners, valves, risers, or some other nook or cranny that doesn't make this a simple task.

Here's how I was able to crack this particular nut in Fusion 360. 

1) Seal up the volume. 

The first step, is to close up the volume and make it "watertight".  In other words, you have to make sure that there are no gaps in the envelope defining fluid volume.

Looking at the bottle, the neck is an opening, so that has to be closed.  You can close with a solid, with a surface, or in this case, I'm using a workplane. 

The workplane is added. 

2) Fire up the Boundary Fill tool

Step 1 defined the boundary, now it's time to fill it!  The Boundary Fill tool will be the one that will help us fill the boundary we will define.

You'll find that under the Create pulldown menu. 

Filing up the Boundary Fill command

3) Start picking what to fill! 

Now comes the trick! When the dialog box for Boundary Fill appears, pick the lower half of the bottle and the workplane that defines the fluid level in the bottle with the Select Tools options highlighted.

Selecting the boundaries of the volume.  Only the work plane
is selected in this picture.
Once you have the lower part and the bottle selected, choose the Select Cells option and choose the volume you want to fill.  

You do this by selecting the check box that corresponds to the volume you want to fill.

Selecting the volume to fill.
Once you have it, choose OK!

4) Verify the solid you just created! 

If you check the browser, you should see an additional body in the browser.

The volume highlighted.  I've turned the visibility of the workplane
off to make the solid easier to see.

You can toggle the visibility of the bottle, leaving just the body representing the volume of the fluid inside.

The volume created by the boundary fill command.
5) Check the volume! 

All that's left to do, is locate the body in the browser, and choose Properties.

Locate the body and select properties.

Search through the options and find the volume, and your set!


In Conclusion

This tool can be a great addition to your arsenal.  I've used it a couple of times, and it's been a nice asset for me.

One thing I will say, is give it a little practice.  It takes a little time to get the process down pat.  But don't worry!  It's not too hard to get the hang of.

Do make sure to give it a try!  I think you'll find it's well worth it!


Tuesday, June 07, 2016

Fusion 360 - Learning to Create Drawings.

Even as the CAD world steams at flank speed toward the "Land of 3D", many of us, even most of us, still need to generate a 2D drawing.

As I created a design to take me through the process of creating parts and assemblies, I have at last reached the point of creating drawings.

So how does Fusion 360 create drawings?

It all starts with the model that you want to create the drawings from.  In this example, I'm going to use the end table I used in my last post.

Revisiting the this coffee table.
To create a drawing, choose the File icon and choose New Drawing.  You'll have the option to create a new drawing From Design or From Animation.  In my example, I'm going to use the Design.  Mostly because I haven't had a chance to try out animations yet!

Creating the Drawing
The next screen will give you options to choose from to create the drawing.


 From the top, the options are:

  • A check box allowing you to create a drawing from the Full Assembly
  • A pulldown allowing you to choose American Society of Mechanical Engineers  (ASME) or International Organization for Standardization (ISO) standards for your drawing.
  • The units for your drawing (inches vs millimeters)
  • The size for your drawing, A,thourgh E for ASME, and A0 through A4 for ISO
Clicking OK will create the drawing.  And you can be off creating your assembly drawing! 

The drawing getting created.

Choose your options to place your view. A quick summary of the options are: 
  • A pulldown allowing you to choose the view orientation you want (Top, Bottom, Left, Right, etc.)  
  •  A pulldown with line styles (visible edges, visible and hidden edges, shaded with visible edges, shaded with visible and hidden edges) 
  • A Tangent Edge pulldown allowing you to show full length tangent edges, foreshortened tangent edges, or turn them off. 
  • A pulldown to turn interference edges on or off. 
  • A pulldown to turn thread display on or off
Clicking OK will place the view, and get you started.  Now your off and running with a drawing! 

But what about creating drawings of just the components?   What if you want piece part drawings? 

That's where we can return to the Create Drawing dialog box, you can uncheck the Full Assembly option to create drawings of individual components.  You'll have an option to select the component, or components, you want to create the drawing from. 

Creating a drawing of piece parts.
Note two components are selected.
So there you are!  Creating drawings from assemblies and components  


But there is one, last final tip.  You can also create a drawing from a component, by right clicking on it in the browser, and choosing Create New Drawing


It's another neat little trick to get started creating drawings!

Have fun, and enjoy!

Wednesday, May 25, 2016

Life with Fusion 360 - Copying and Pasting Components in Assemblies

My adventures diving into Fusion 360 continue.

As I've been adventuring into assemblies this week.  I chose a simple wooden table for my project.


The wooden table.  A work in progress.
I chose the project not for the modeling challenge, but as an opportunity to go through the process of building assembling, and documenting.

One of the first things that I encountered was the need to duplicate a part. That including creating a copy of the same part (a new instance), as well as creating a copy of a part in order to create a similar part.

I was pretty thrilled to find out that it wasn't difficult at all.

In my example, I'm going to duplicate the table legs.

To make the process simpler, the process of copying parts are nearly identical whether your creating a copy of an existing component, or using that component as the starting point for a new part.

To start the process, right click on the desired part and choose Copy.

Copying the component.


With the part copied, now it's time to paste the new component.  This is accomplished by right clicking in the modeling screen and choosing paste.

But there are two options.  Paste, and Paste New.


You may have already guessed that Paste will create a second instance of the component.  That is, and exact copy of  the existing component that will change with it's siblings.

However Paste New will create a new part, based on the old one, but it's entirely independent from the component it was spawned from.

But one of the other neat tools to check out are the handles that let you orient the part immediately after the component has been pasted into your design.

You can use the arrows for linear translations, the squares for planar translations, and the arcs for angular rotations.

Give them all a try!


Handles make it easy to position your parts
  There's also the option of typing in distances if you like.

The part after being moved.
Regardless, you can get the part positioned where you'd like.

All that's left to do now is right click and click OK, and then follow it up with precise positioning by joints later!

Hit OK to complete the move.
So that's it for the tonight.  My adventures in Fusion continue.  The deeper I go, the more I like its flexibility.

But there's still a lot more for me to learn, and I'll be sharing that as I go!  Stay tuned!

Sunday, May 22, 2016

Fusion 360 as a Viewer - Another Step in the Learning Experience

If you've spent any time at all looking into Fusion 360 you'll likely hear "the data is stored in the cloud" touted as one of it's big advantages.  

And it really is an advantage!  Here's one case that I've found where Fusion has helped augment Autodesk Inventor, but that's just the beginning!

Here's the end in mind!
What's the Scenario?

I was attending a design review for a small assembly, I may not be able to bring in my laptop, IT may not be able to install Inventor or Vault in time.

In other words, I may be on my own.  Time to think of a backup plan.  

Since I started out this post discussion Fusion 360, you may safely assume that Fusion 360 is part of the solution, and indeed it was.  

I also used A360 as a key part of my solution too. And that's where this story starts.

In short, I used Fusion 360 as my viewer. It was similar  to Inventor and I was comfortable using it. On top of that, the Fusion client is much simpler to install than Inventor, and can be done much more quickly.

Here are the steps I used to "get there from here".  In the interests of full disclosure, I'm using a sample file because the original file is proprietary.  Sorry, no peeks to that!

Here we go!

The first thing was to upload my assembly into A360 Drive.  Make sure to use the Assembly option under the Upload button.

Uploading into A360
Once that was done, browse to the folder containing the top level assembly, in this case, Engine MKII.


After hitting OK, there will be a few more questions to answer, the biggest one is which file is your actual parent file.  In this case, it's going to be Engine MKII.iam.

Choosing the parent file.  It's listed among it's candidates.

With the parent assembly selected, hit the Upload button, and the upload process will begin.

Ready to go! 

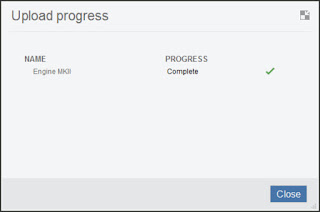
Now, the process of uploading to A360 will begin.  After a few moment, you'll get the indication that the assembly has been uploaded.


Time to Call Fusion 360

Now it's time to browse to the location you saved the file.  When you find the assembly, right click on it, and choose Create Fusion Design.

Creating a Fusion Design
Now, the converting process begins.

The upload is running

Give it a little time, and the conversion is completed.

And we're done! 
Make sure to refresh your project, and the newly created Fusion Design will appear.

The design is converted!


All that's left to do now, is double click on the file and you're ready to go with your new Fusion Design!

It's now ready to go in Fusion 360!

So what I ended up with was a quick way to use my design, without a heavy client install.  If necessary, I could even use the machine that was kept in the conference room!

I could navigate and control the visibility of parts.  Everything I needed at the time.

It was a great option that relieved a lot of stress.

Did you have any challenges uploading the file into Fusion?

I sure did!  I had some challenges loading the hardware, which was a combination of Inventor Content Center and iParts.  It wouldn't upload until I put it in the same folder as the components.

I don't know exactly why this is, but I'm going to poke around a bit more and see what I can find out.

Some of you may have a few questions on why I choose this direction.  Here are some answers to some questions you might be thinking of asking. 

Why didn't you use A360 as your viewer? 

I absolutely could have.   But I wasn't familiar with A360, so I made a decision to go with what I know.  Fusion worked great, but I know I can use A360 in the future.

Why didn't you use Project Leopard

Just like above, I knew it was an option, but I had less that 24 hours to make my decision, and very little experience with Project Leopard.  So I chose the path I knew.  Will I consider it the future?  Absolutely!

Did you use any of the review tools in Fusion 360?  

No.  I didn't.  And it's not because the tools don't work.  In truth, I haven't had a chance to try them yet.  The scenario simply didn't suit those tools.  But these tools do have my interest, and I'm looking for the opportunity to explore them!

And that's a wrap for this post... A little bit of what I've learned, and a few things to try in the future.