Find us on Google+ July 2013 ~ Inventor Tales

Sunday, July 28, 2013

An Introduction to Autodesk Configurator 360

You're giving a gift, so finish that process. If you configure it for them, your sweat is in it.”
Alfred Huger

Back on July 9th, 2013, Autodesk announced Autodesk Configurator 360.  It's a cloud based configurator where Autodesk Inventor files can be hosted and configured given parameters and iLogic rules online. 

All that's required is to upload a model to Configurator 360, select the desired options, and release it into the wild.  There are even options to control who can access the configuration.

So with all this cool stuff, how is Configurator 360 accessed?

First, you need something that can be configured.  In this example, I'm using an assembly powered by iLogic.

This is a template for a router jig for use in wood working.  This is a template that can be copied, then modified to fit the part it's going to cut.  The iLogic rules drive the size of the base, and the position of the handles and stop on the base.


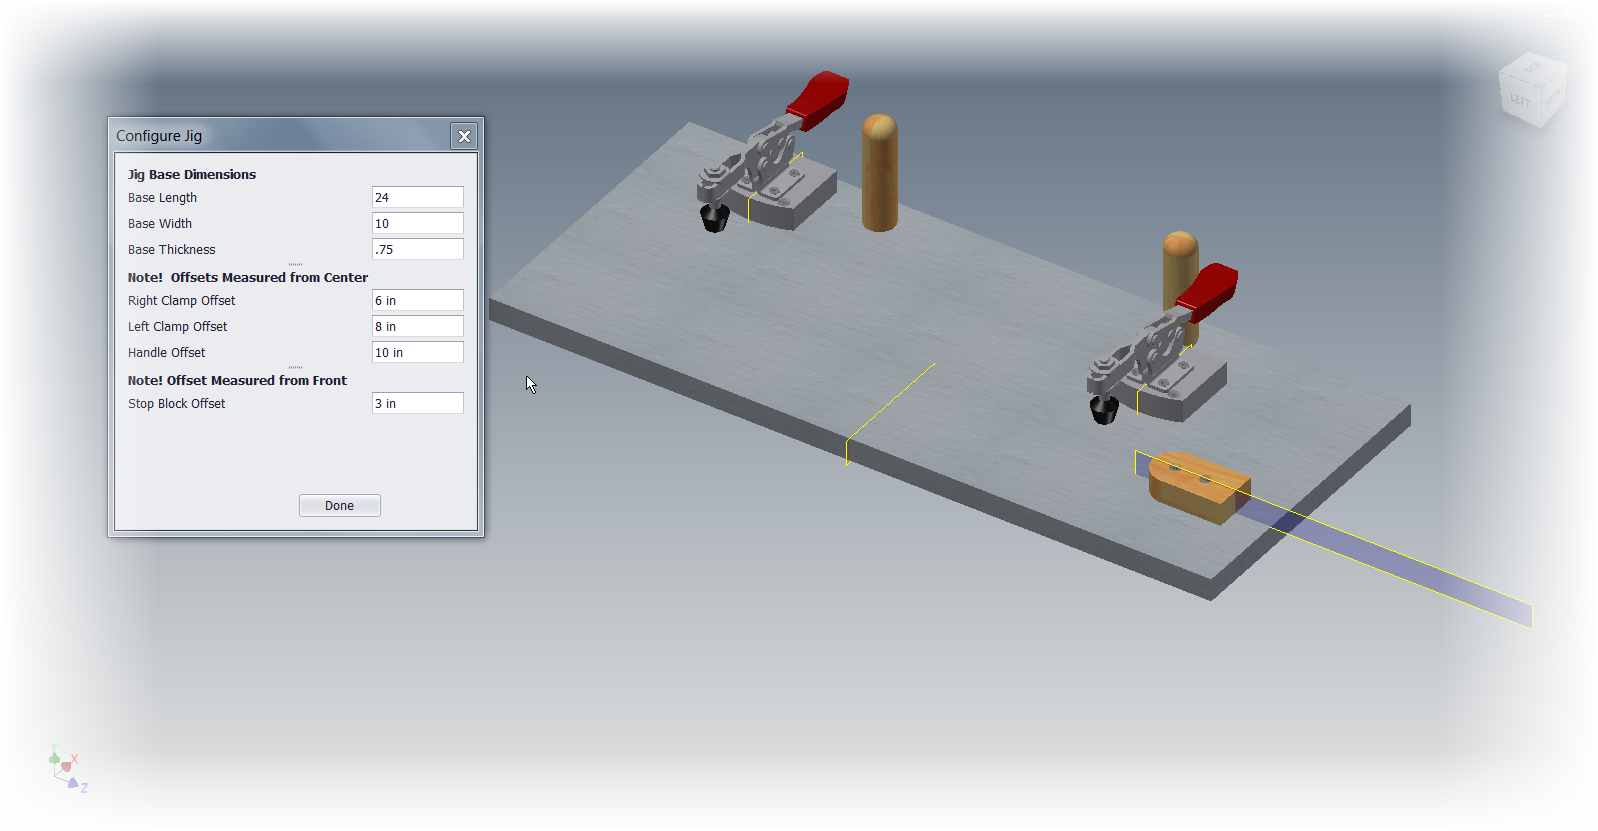
The router jig template, showing the iLogic form that drives it.


Next,   access to the Configurator 360 site is needed, which isn't difficult, a 90 day trial can be obtained here. 


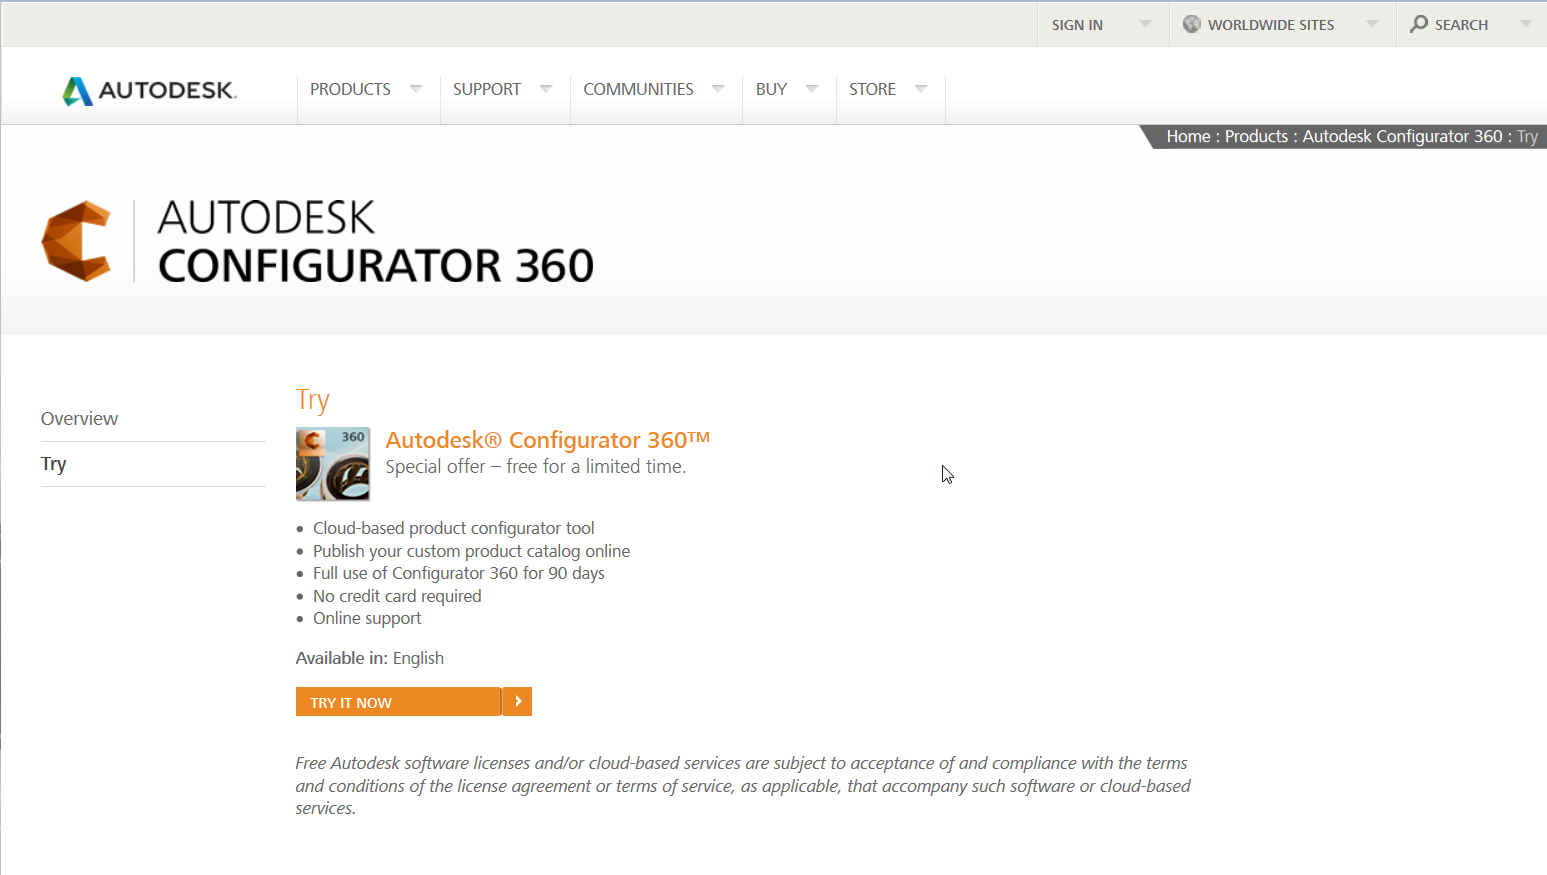
The Configurator 360 site

Once a trial is obtained, I can go ahead and log into Configurator 360 site, I'm going to take this folder, in a zipped format and upload it to my Configurator 360 site.

I upload my design by choosing the Designs tab, and clicking the New Design icon.

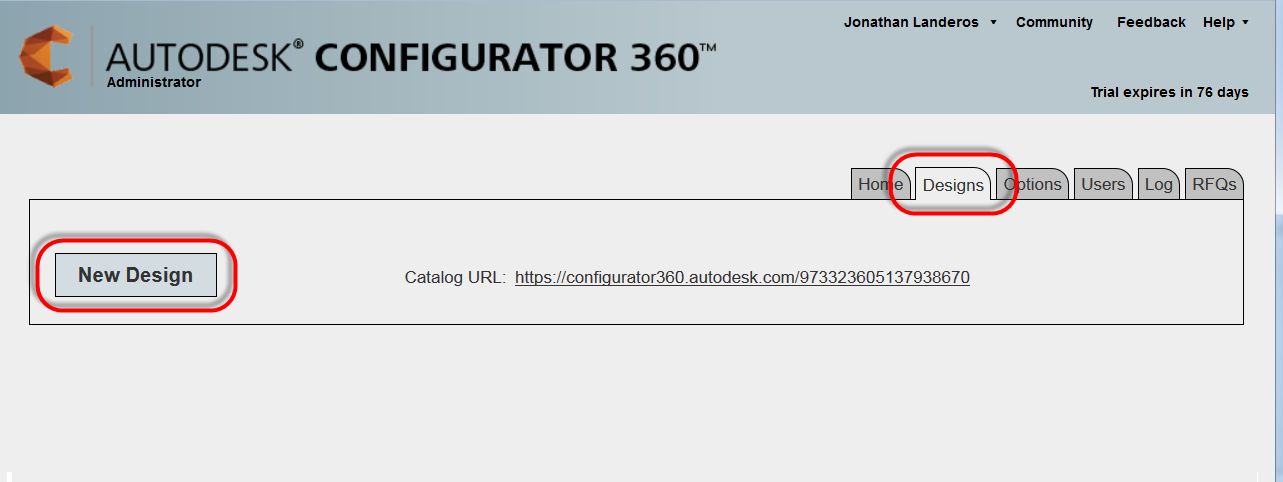
Adding a new design to Configurator 360


The screen to upload the file will appear. I'll have the option to name the project, choose a format to upload the files in (*.iam, zipped *.iam, ipt, or zipped ETO). 

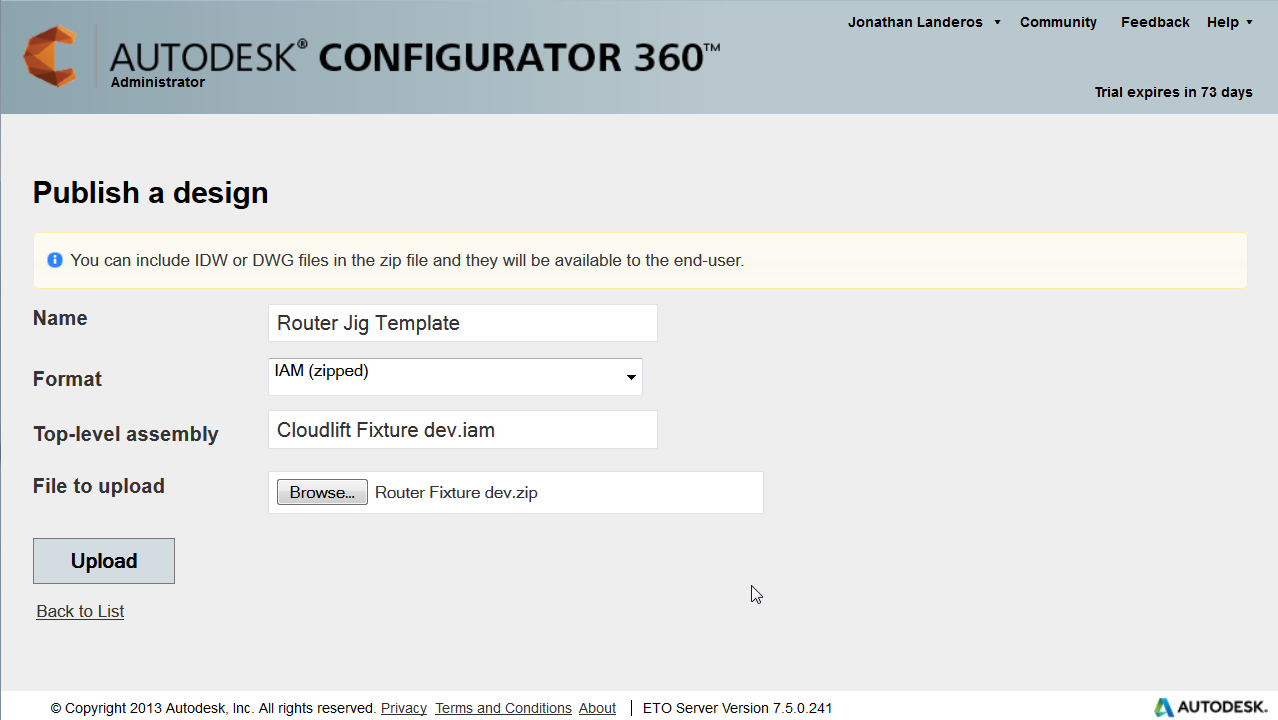
Adding an assembly to Configurator 360

Now, all I have to do is click the upload icon to upload the file to Configurator 360. Note that at first, the webpage may have to be refreshed to get the files to appear.


Once the webpage is refreshed, the Configuration appears, and it can now be edited by selecting the icon in the picture below. 


The first tab that appears is the "Access" tab.  This tab provides a place to change the display name, create a description, and control access permissions to this particular configuration.


Clicking on the Parameters tab, options to control parameter name, order, and if a parameter is read only or not can be set here.  Here, parameters can be set to read only, or minimum or maximum values can be set.


Now, that this is accomplished, I can make the configuration available. for users, where they can change, values, and download files as needed, to make use of the configuration that has been provided to them via Autodesk Configurator 360.


So have a look at the configuration I created at the link here, and see for yourself if something like this might be helpful to your business..

If it is, have a go at the free trial on the Configurator 360 site!

And take a look at the video below!


Sunday, July 21, 2013

Points for Style - Creating an Offset Workplane and Sketch in One Step in Autodesk Inventor

“You can't do sketches enough. Sketch everything and keep your curiosity fresh.”
John Singer Sargent

Some of my favorite tricks in Autodesk Inventor are the simple ones.  They may not be flashy and they may not save hours of time, but they're nice little tricks that just make the day to day operations flow by a little smoother.

One of these, is the ability to create an offset work plane and sketch at the same time.

Typically, to create a sketch on an offset work plane there are a few clicks involved.

First, I have to start the work plane tool, and create my offset work plane.

Creating the workplane

Next, I have to place a sketch, on that newly created work plane.

Creating a sketch on that work plane

There aren't a lot of clicks involved, but it's always nice if there's a way to do it with even fewer clicks. 

How can that be done? 

Instead of going to the Work Plane tool, I'm going to start the 2D Sketch tool directly.

By clicking and holding on the planar face I want to offset from, I can drag the offset work plane, and create both the sketch, and the plane at the same time.


It's a simple thing, but it really does make things flow a bit more smoothly.

Give it a try! 

And take a look at the steps shown in the video below!


Sunday, July 14, 2013

Making the Work Plane Tool in Autodesk Inventor "Stick" and Stay on Until You're Done!

“The possibility of stepping into a higher plane is quite real for everyone. It requires no force or effort or sacrifice. It involves little more than changing our ideas about what is normal.”
Deepak Chopra

Today is a quick blog post.  I broke my routine today and took a road trip to Camarillo, Ca.  and cruised a picturesque little town from my childhood. 

I also took some time with the Southern California Wing of the Commemorative Air Force, and saw a few of the incredible aircraft they have at their facility.


Here are just a couple of the aircraft that make their home at Camarillo Airport.

d

A Curtiss C-46 Commando (yes that's my finger in the picture)

A Griffon powered Spitfire MkIV. 


It was a nice change of routine, but it did hurt the blog post!    But nonetheless, here is a short post!

One setting I love to change in Autodesk Inventor is the default behavior for work features like Work Planes, Work Axis, and Work Points

In Inventor the default behavior is to place one work feature, then exit the tool.

So if you want to place more than one, you have to restart the tool and place the next work feature.

What many users out there may not know, is that this behavior can be changed.  There's a way to make the tool "stick"  so as many work features can be placed in succession without having to restart the tool every time.

In order to make the tool "sticky" use the steps below.  I'm going to use a Work Plane, but it's the same steps for Work Axis and Work Points.

1) Start the tool.  In this case, Work Plane


Starting the Work Plane Tool.
2) Now that the Work Plane tool is active, right click and choose Repeat Command.  Make sure the option is checked as shown in the screen shot below.


Make sure Repeat Command is checked


And it's all done.  This setting will stay on until it's changed, and from this point forward, the Work Plane command will stay active until cancelled.


So give it a try and see what you think.

And for the video portion, here it is below!


Thursday, July 11, 2013

Autodesk Configurator 360 - Something new from Autodesk

“You're giving a gift, so finish that process. If you configure it for them, your sweat is in it.”
Alfred Huger

Today, it's just time to talk about something from the news desk. 

As of yesterday, Autodesk has released Autodesk Configurator 360

This cloud application allows the user to upload Autodesk Inventor components, select key parameters, and let someone, such as a customer, configure the components via a cloud application. 

It's brand spanking new, so new it's still got that "New Software Smell".  So I can't say that I know all of it's ins and outs.  But here's a video to take a look at. 


It comes with a 90 day trial, so it might just be worth taking a look at! 


Sunday, July 07, 2013

Recalling an Old Filename for a File Renamed in Autodesk Vault

History will be kind to me for I intend to write it.
Winston Churchill

One of the nicest functions of Autodesk Vault is the ability to rename a file easily, as well as track the versions of files, and the history of files. 

But what happens if after renaming a file, it becomes necessary to recall the previous name?

Fortunately, Vault as a field designed for just this purpose.

It's called: File Name (Historical)

When this file is added to the Preview Pane in Vault, the old file name (before it was renamed) will be seen.

Now that we know that, how is the field added to Vault Explorer?

First, right click on the title bar in the Preview Pane, and choose Customize View.  Don't use the Browser Pane.  This one only shows the current file, and it's the files in the past we're after.


Customizing the view

Once the dialog box appears, click on the Fields icon.

Click on the Fields icon


Locate the File Name (Historical) field and add it to the title bar.


Locate the field and click Add
The field will move to the right column

 Once the field shows in the dialog box, click OK to close the dialog box, and click Close on the dialog box after that.

The and the field will now show in the title bar.


The field showing in the pane

But since the file "8 Sided Die.ipt" only has one version, there isn't much to see.  However, now I'm going to rename the file to "D8.ipt" to match the naming convention for the other dice I have in Vault (D4.ipt for a 4 sided die, D6. for a 6 sided die, etc.)

To rename the file, I'm going to right click on it, and choose Rename, and step through the wizard to rename the file.


Right clicking to rename the file.

To see all the details for renaming a file in Autodesk Vault, they can be found in my earlier post here.

Once the file is renamed, I'll see two lines in the Preview Pane.  The File Name column will show the current file name, but the File Name (Historical) field will show what the name of the file was before! 

The history is visible, right there!

And for one last tip, try searching for the old file name.  Since Vault still remembers the history, the file can still be located by the old file name!

Searching by the old file name
And now, for the same steps in a video version, take a look at the video below!

<iframe width="545" height="409" src="//www.youtube.com/embed/A1GbPbtn7zo" frameborder="0" allowfullscreen></iframe>

And on a final note, if you're interested in the dice models that are used in this example.  You can find them at my GrabCAD site here!