
Albert Einstein
When I train an Autodesk Inventor class, I make a point to try to tell my students what settings I change solely for the purpose of my own preference. There's no reason to change that setting if they prefer a different setting.
Everyone has different preferences, and everyone should be allowed to choose for themselves.
I'll often speak of "settings Jon changes on every new install of Inventor".
And one of them is "Look at Sketch Plane on Sketch Creation". It's found by choosing Tools>Application Options and finding the Sketch Tab By default it's turned on in Inventor. I turn it off right away.
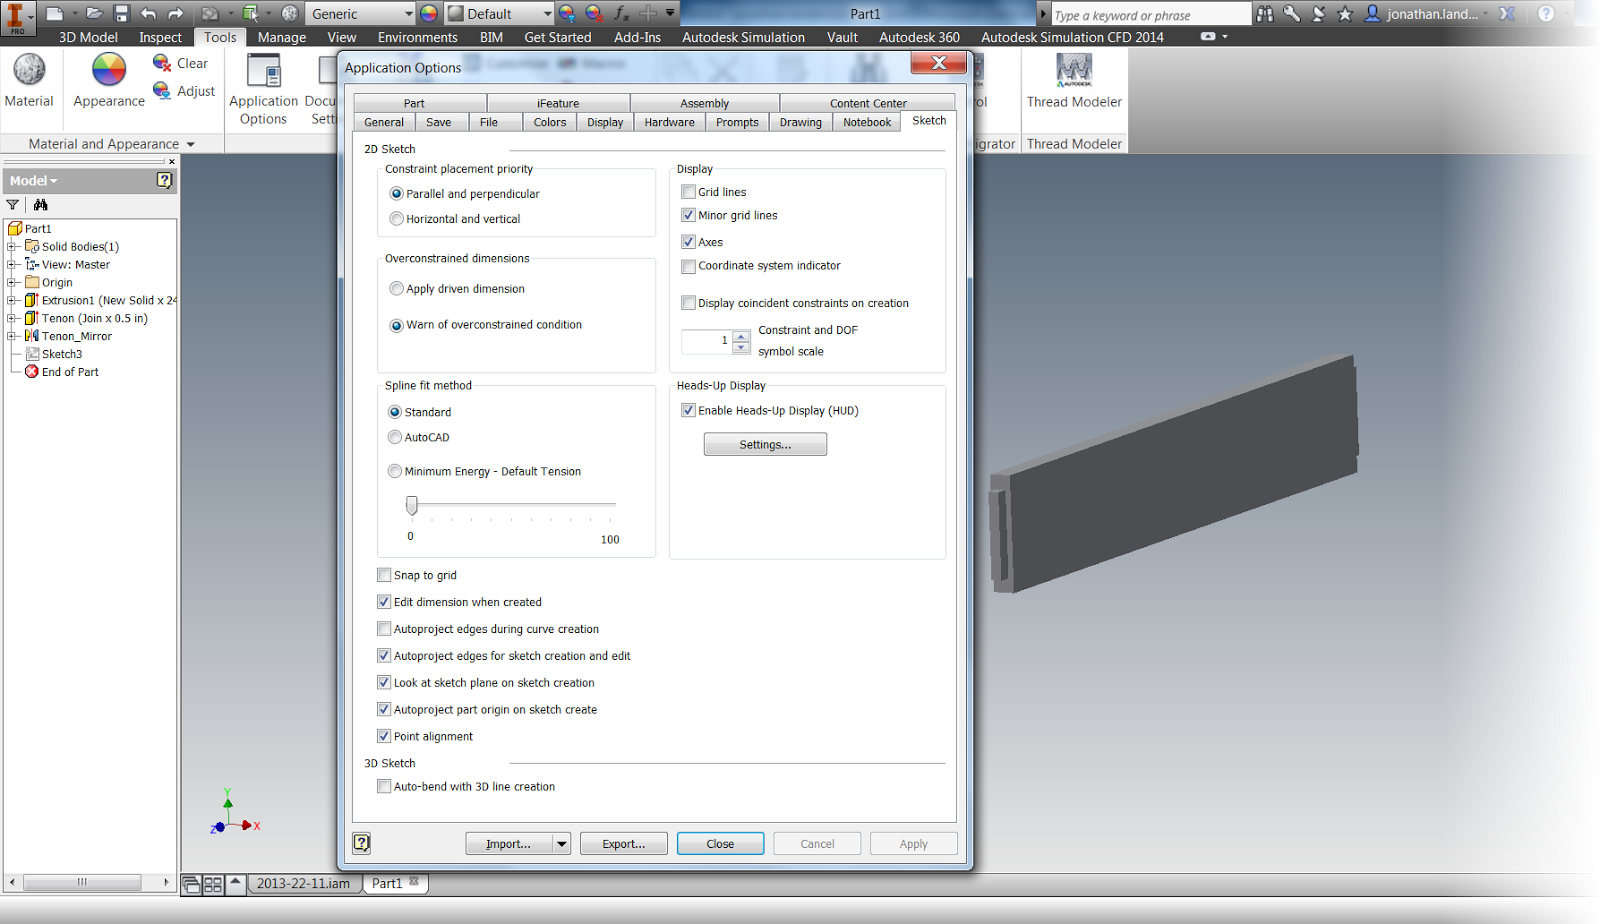 |
| The default settings. |
Before creating the sketch, I have the view rotated in an Isometric view
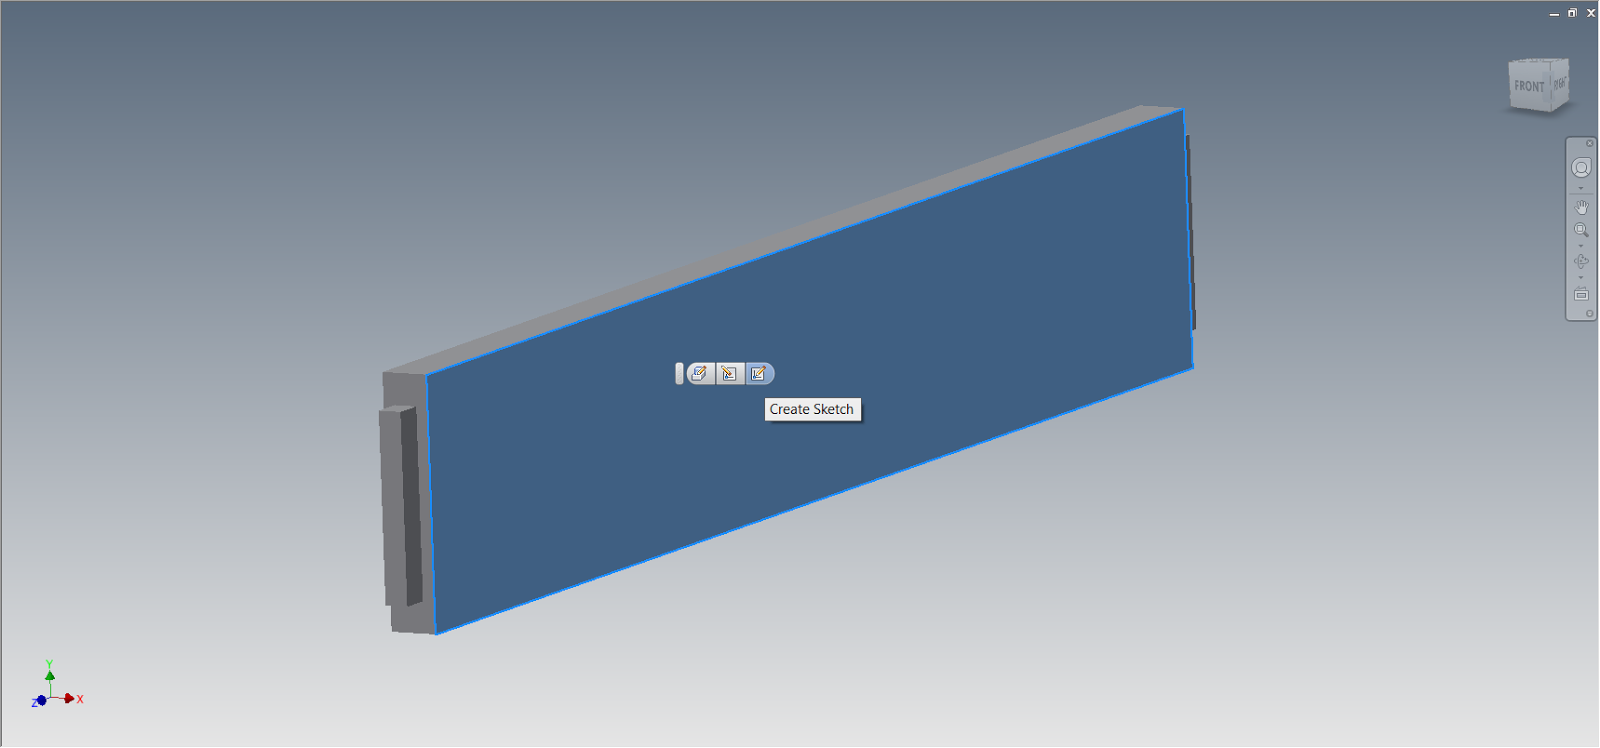 |
| Before creating the sketch |
After creating the sketch the view is rotated so the view is perpendicular to the sketch.
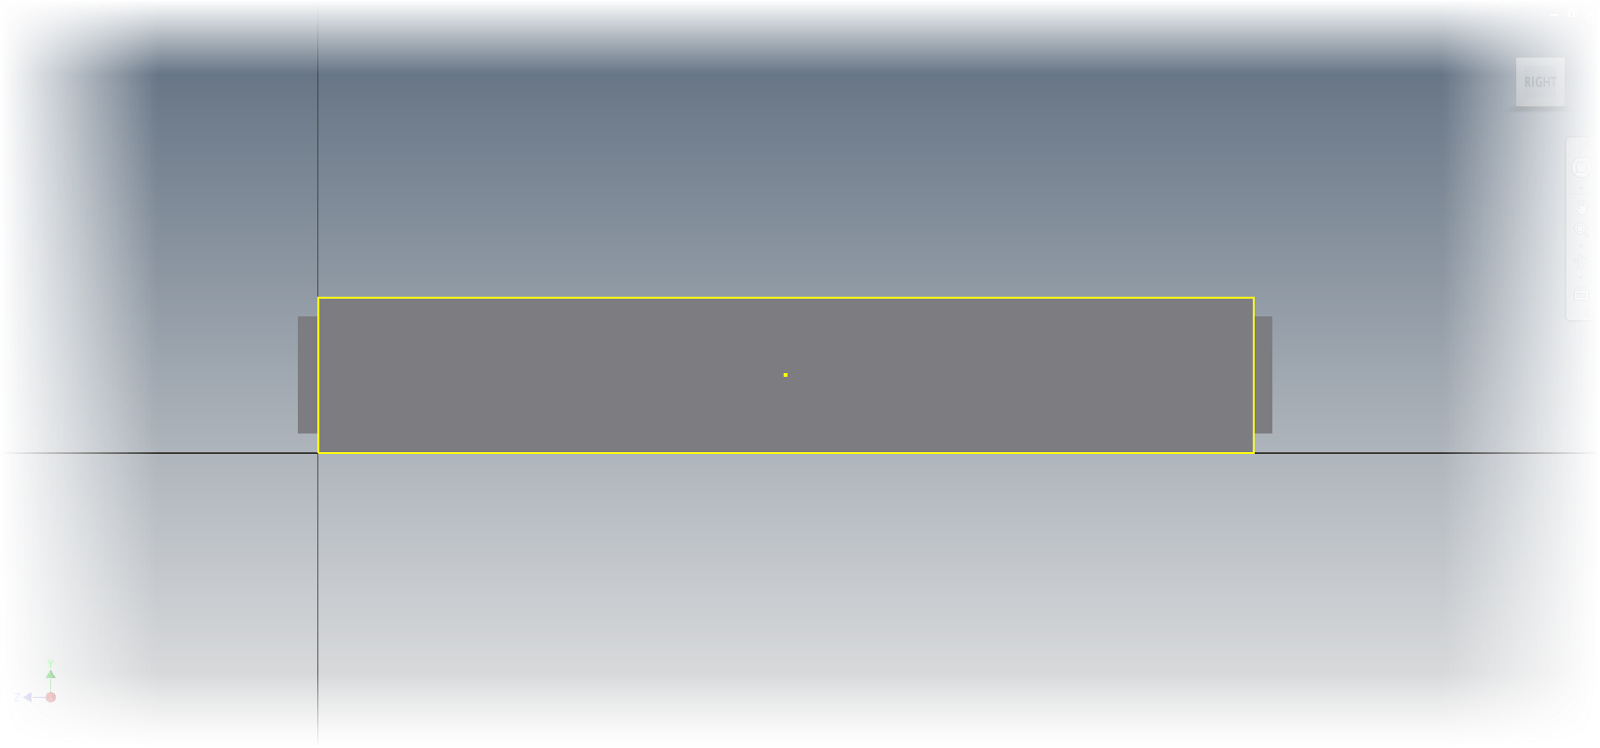 |
| After creating the sketch |
I know that there are many who like this setting. However, personally, I'm not a fan. I always found I was rotating the view back most of the time. So what to I do?
I turn it off! Just like I have below.
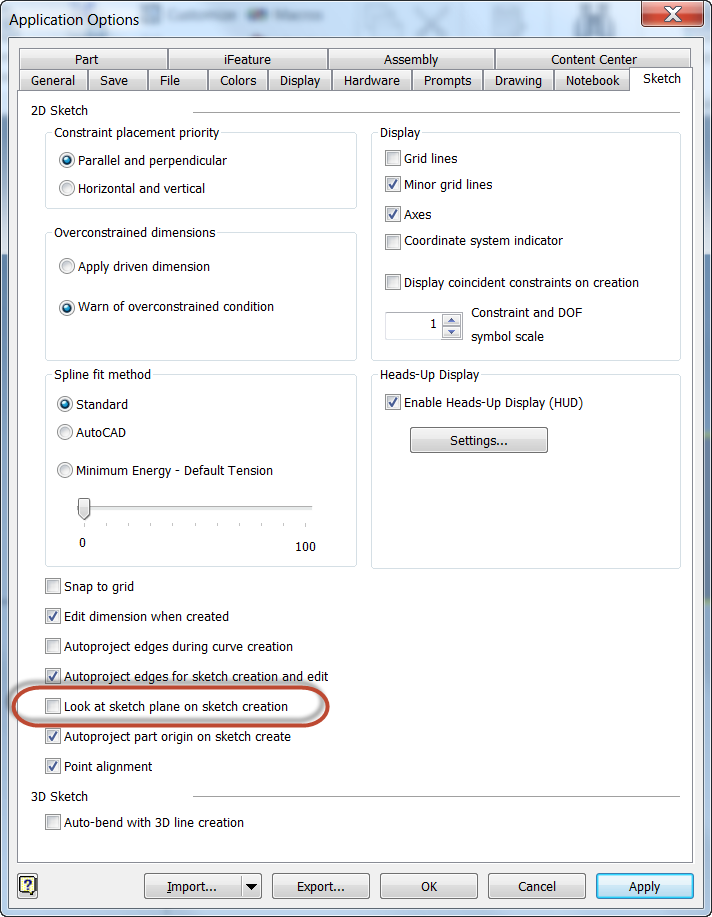 |
| Turning the setting off |
So there it is! A setting that I change, and why I change it, which really just boils down to personal preference.
What do you think? Do you prefer the default behavior? Feel free to drop a comment!
And for the video version of this setting, take a look below!


