“Artificial intelligence is a wonderful thing. I told my computer that today is my birthday, and it said that I needed an upgrade”
Anonymous
Anonymous
An important step in migrating to a new version of the Autodesk Products is the upgrade of Autodesk Vault. While this step is important, it's not necessarily difficult, but it does require some planning to make sure things go smoothly.
Before even looking at your shiny new installation files, there are a few things you should make sure of:
- Do you have a valid backup of you Vault filestore and database? Check. Then double check. Then think about the consequences of losing all your data. Check again.
- Make sure you allot for downtime! The installation takes time, not to mention that databases need to be migrated. This can take a while, especially if you have a large amount of data.
- An additional consideration to this. You can only skip one version while migrating a Vault. For example, you can jump from Vault 2012 to Vault 2014, but if you're trying to go from Vault 2011 to Vault 2015, you'll have to jump to Vault 2012 or 2013, then to Vault 2014. Take this into consideration for your planning.
- Recall that Vault server can run one version back of many of the Autodesk Products. For example, Vault Server 2015 can run 2014 based applications, and 2014 Server can run 2013 based applications. Take this under consideration. It might be wise to update the server, while saving the clients for later.
- EDIT 18-June-2014 See comments below! David pointed out that the 2015 version of Vault server can run 2014 AND 2013 versions of the clients! I mistakenly thought it was only the 2014 version! Make sure take note, and thanks David for the correction! Check out the Readme Here for all the details.
Also note that the Vaults have to be common (Professional to Professional, Workgroup to Workgroup, etc. - Consider a test migration on a separate server! While most migrations go off without a hitch, that doesn't help if you're the one exception to that rule. It's not paranoia if something is really out to get you.
- Did you check that backup? Make good and sure. The test migration in step 4 can be a way to verify your backup. It's worth considering if you have the resources.
Once the deployment is planned out, go ahead and install the new Vault server from your installation files.
The Autodesk Vault Install will help guide you through the rest!
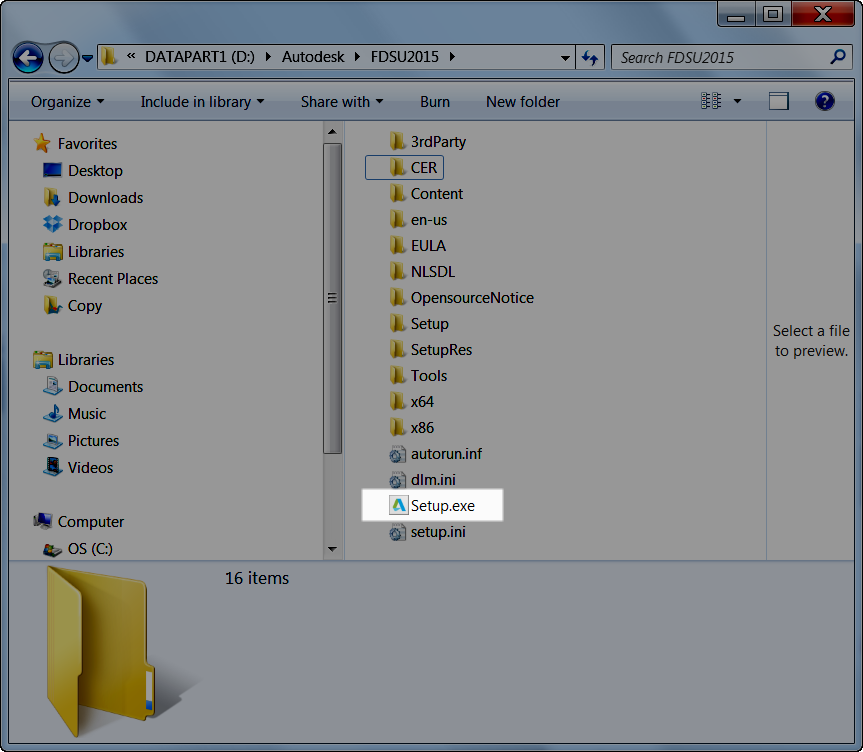
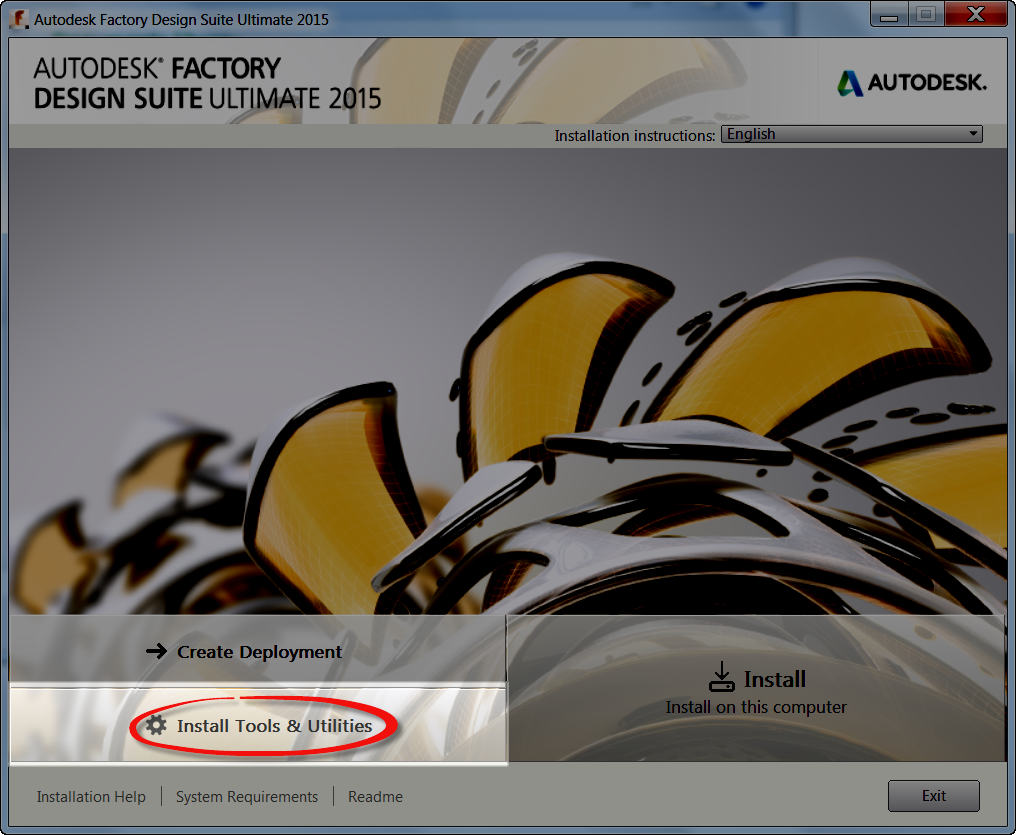
The process begins by starting the install from the Setup.exe file, found on your downloaded files, or USB media.

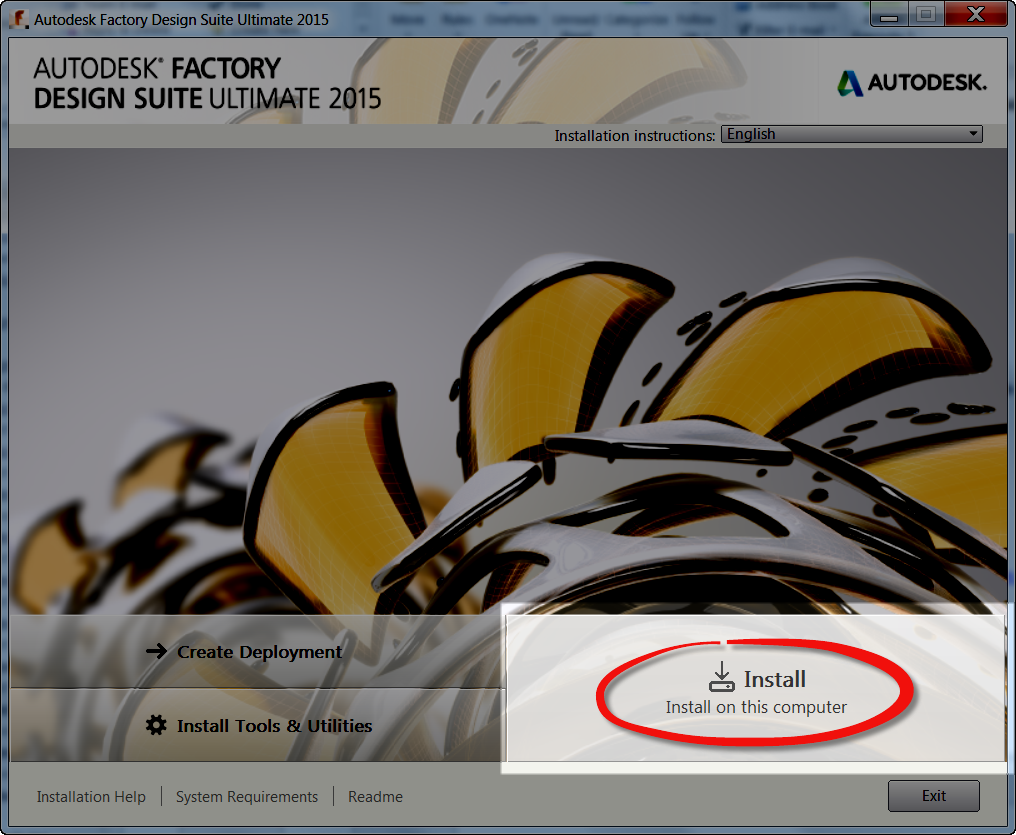
The first screen that appears will have three options, to install the Autodesk Vault Server, choose the Install Tools & Utilities Option.
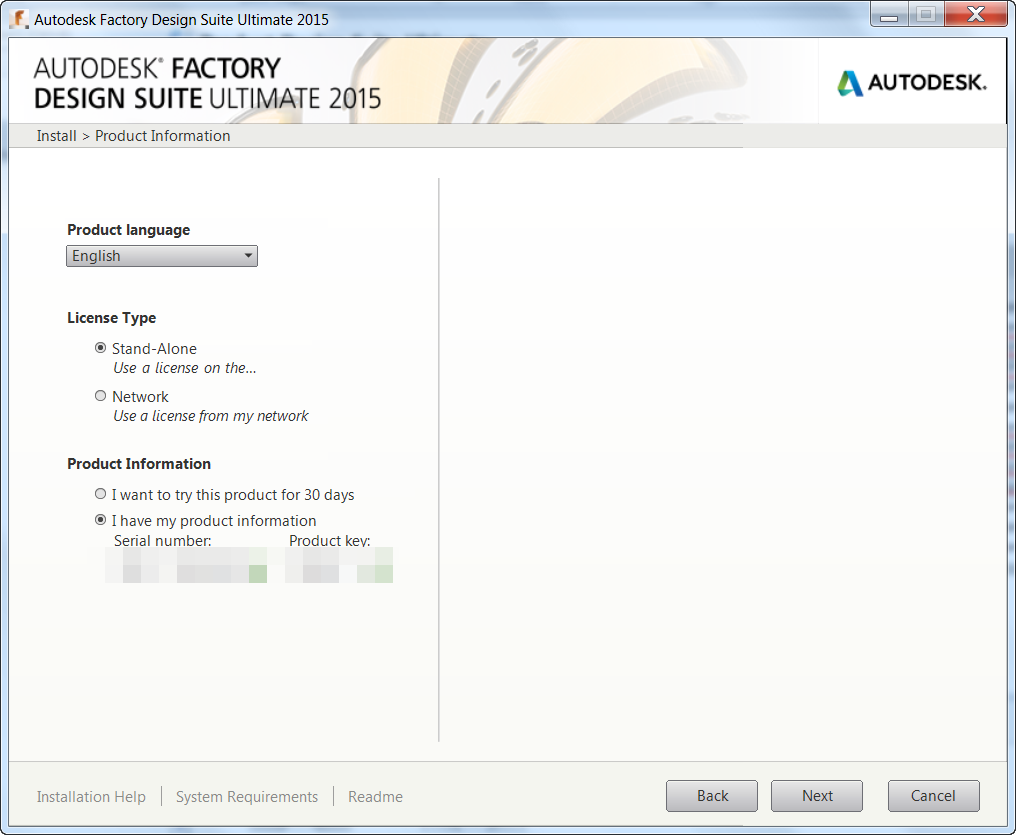
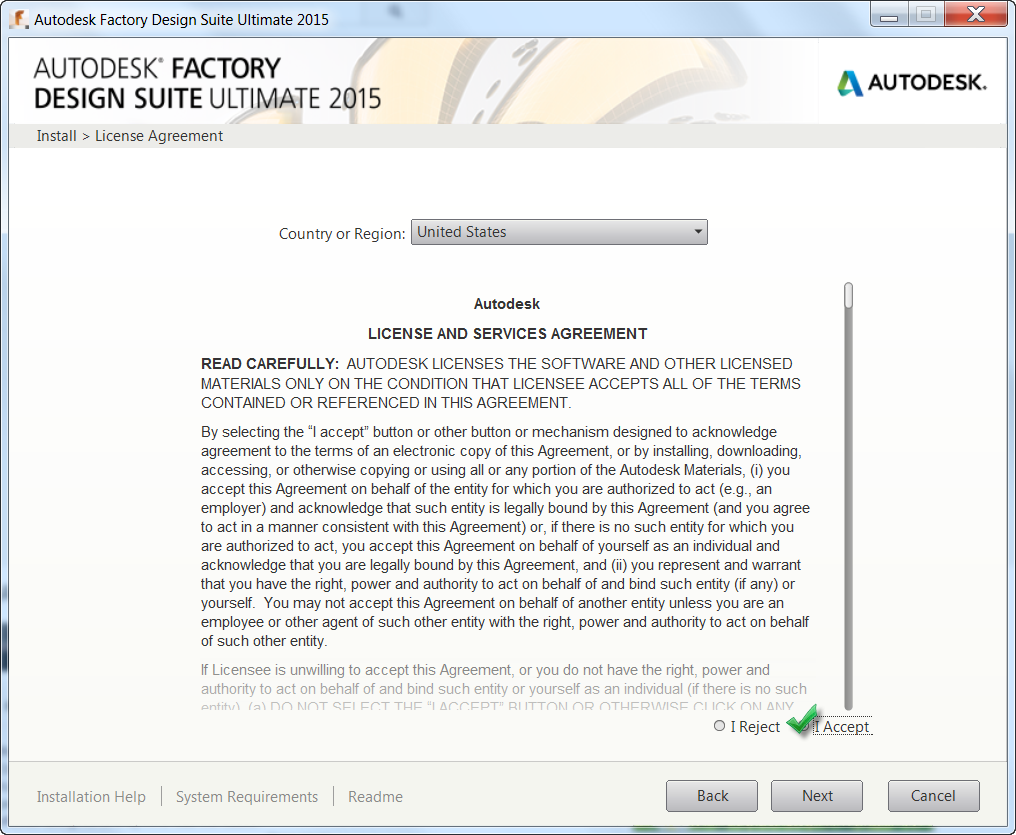
Next, the End User License Agreement, or EULA appears. I have to agree to this to proceed, so that's what I'll do!
The Vault installation informs me that it sees an upgradeable version of my Vault. This is my 2014 version, which I do indeed want to upgrade. I'll choose that option.

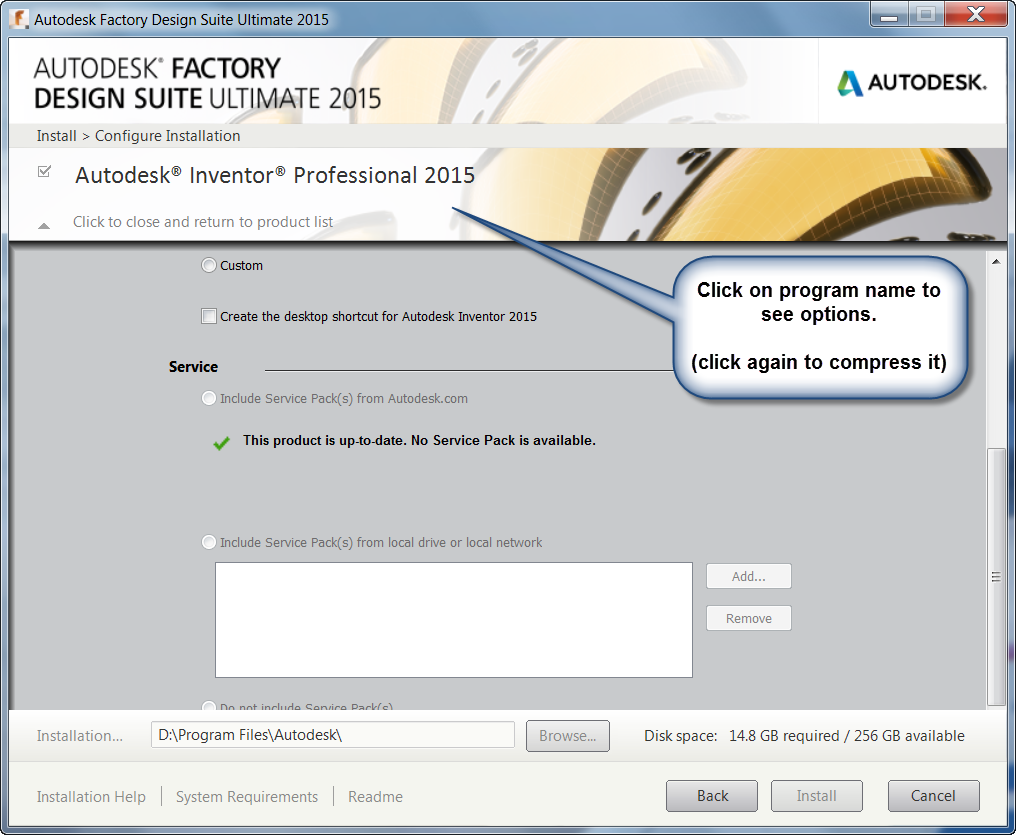
Moving to the next step allows for the selection of which programs I'd like to install. At this point, I'm interested in installing Autodesk Vault Basic Server 2015.
I've already installed Autodesk Content Service with Factory Design Suite Ultimate, in my previous post.
Content Center is downloaded for Inventor 2015. Hovering over the "information shows this information.

Also note that the Network License Manager can't be installed. This is due to the fact I've already got a copy installed. Hovering over the "No Smoking" symbol will give this information.

Finally, I place my Vault on my D: drive. This is because my C: is a smaller partition, and I want to put programs like the Vault Server on my larger data drive.

Finally! I can click the install button, and get the installation going!
The installation will take some time. This is part of where that "allotting for downtime" note comes into play!
After a little time, the installation will wrap up. I close the final screen, and this is where I get to take a moment. The installation is done, but the migration is next.
Now it's time to open the newly installed Vault Data Management Console The first part of the migration starts.

But there are still a few more steps. I'll need to log into my Vault, where I'm presented with a message indicating that I need to migrate my Vaults and Libraries, and asking me if I want to do so.
Of course, I'm going to agree! I can't use the Vault until I do.

At last, the end is in sight!
Now, a message asking me if I want copies of my custom Content Center Libraries created for Inventor 2014, Inventor 2015, or both.
You're options might be different here, based on whether or not you have custom Content Center Libraries or not.
In my case, I'm going to make sure I have libraries for Inventor 2014, and 2015, because I am going to be using both.

Now! Vault is ready to go. But there are a couple of last things that need to be done!
I'll update any scripts that are maintaining my Vault. The installation paths have changed! Backups won't run unless the scripts are updated!
If you're doing your own migration, don't forget this important step!
And if you prefer, I've also created a video of the steps too! Check it out below!
Moving to the next step allows for the selection of which programs I'd like to install. At this point, I'm interested in installing Autodesk Vault Basic Server 2015.
I've already installed Autodesk Content Service with Factory Design Suite Ultimate, in my previous post.
Content Center is downloaded for Inventor 2015. Hovering over the "information shows this information.
Also note that the Network License Manager can't be installed. This is due to the fact I've already got a copy installed. Hovering over the "No Smoking" symbol will give this information.
Finally, I place my Vault on my D: drive. This is because my C: is a smaller partition, and I want to put programs like the Vault Server on my larger data drive.
Finally! I can click the install button, and get the installation going!
The installation will take some time. This is part of where that "allotting for downtime" note comes into play!
 |
| Add caption |
Now it's time to open the newly installed Vault Data Management Console The first part of the migration starts.
But there are still a few more steps. I'll need to log into my Vault, where I'm presented with a message indicating that I need to migrate my Vaults and Libraries, and asking me if I want to do so.
Of course, I'm going to agree! I can't use the Vault until I do.
At last, the end is in sight!
Now, a message asking me if I want copies of my custom Content Center Libraries created for Inventor 2014, Inventor 2015, or both.
You're options might be different here, based on whether or not you have custom Content Center Libraries or not.
In my case, I'm going to make sure I have libraries for Inventor 2014, and 2015, because I am going to be using both.
Now! Vault is ready to go. But there are a couple of last things that need to be done!
I'll update any scripts that are maintaining my Vault. The installation paths have changed! Backups won't run unless the scripts are updated!
If you're doing your own migration, don't forget this important step!
And if you prefer, I've also created a video of the steps too! Check it out below!