Find us on Google+ Inventor Tales: Autodesk Showcase
Showing posts with label Autodesk Showcase. Show all posts

Wednesday, February 01, 2012

Tolar Manufacturing - Autodesk Inventor of the Month for January 2012

“Neither team has anything but pride to play for at this point, but our guys have got a lot of heart and they've shown me that all year.”
Jamie Keefe

Sometimes when you return from vacation, you find that something unpleasant has "hit the oscillating cooling device", and the day you took off is now getting made up in the overtime you're working to fix whatever has broken loose.

This time, when I returned from my snowboarding trip, I was greeted by something far more pleasant.

Tolar Manufacturing was announced as the Autodesk Inventor of the Month!

Tolar Manufacturing makes bus shelters for cities all over.  They're designed in Autodesk Inventor, and their presentations are shown in Autodesk Showcase.  They're storing all that CAD goodness inside of Autodesk Vault.

Example of a Tolar Bus Shelter rendered in Autodesk Showcase

Between using Inventor, Showcase, and Vault.  Tolar is able to design, present, store, and reuse all their data.  Inventor makes the data more robust, Vault allows the file to be tracked, located, and reused, and Showcase allows them to present the design intent to the cities that will be using their products.

It's a nice little engineering circle of life.

So why am I beaming with pride?  I helped set up their Vault, install their Inventor, and train them on Showcase.  It's really exciting for me to see where they've gone. 

Does that mean I was an indispensable part of the team?  That they "could have done it without me?" 

No, I just played my small part.  They took the tools, and ran with them.  The credit is truly all theirs.

I'm just happy that I got to play that little part!

So here's a video!  Not mine though.  This one is all about Tolar, and what they've been able to accomplish! 

Maybe it'll inspire all of us to look again and our tools, and make sure we're using them to their full potential!


Thursday, January 19, 2012

KETIV's 2011 Autodesk Manufacturing Academy Recordings are Out!

“Nothing has really happened until it has been recorded”
Virginia Woolf

At long last!  After much hard work, the bow tie on the 2011 edition of KETIV's Autodesk Manufacturing Academy!

The videos!  They're all up and ready for download!

So if you've attended the classes presented by the the KETIV technical team, or even if you didn't attend, and want the benefits of the course materials.  Take a swing by the session archive and download all the materials!

Click HERE for the link to download the materials!  

Fire away and start eating up some bandwith!  ;-)  You can even download the 2010 and 2009 materials too!

I hope those who attended took some useful things away!  Go

I hope to see you all, (and a few more) at the next 2012 KETIV AMA!


And as a trailer for the movie, here's a sample of the classes on Autodesk Showcase, so you can get an idea of what's available!

Special thanks to Tolar Manufacturing for providing us with some great real world samples to use in the session!

Autodesk Showcase Part 1 - Importing Models


Autodesk Showcase Part 2 - Changing Environments


Autodesk Showcase Part 3 - Assigning Materials


Autodesk Showcase Part 4 - Changing Materials


Autodesk Showcase Part 5 - Adding Lights

Thursday, September 22, 2011

Life Lesson: The Temp Directory is not Infinite!

Yeah, it felt a little like that!

Sometimes it pays to check the obvious!  Occasional "spring cleaning" of your CAD machine is always a good idea too!

Just today I was working with Autodesk Showcase, prepping some models for KETIV's Autodesk Manufacturing Academy.

I notice Showcase has started to slow down.  I'm not over-tasking it, I've run larger models at higher resolutions.  

But it's still seeming sluggish.  I perform the "three finger salute" (Ctrl + Alt + Delete) and check the task manager.

My machine is running fine.

I'm getting ready to try a new video driver, although I wasn't having problems a few weeks ago....  Why so slow now?

Then I think, "I wonder what my Temp directory looks like?"

I open up Windows Explorer and type "%temp%" to take a peek under the hood. 

My Temp directory looks like the aftermath of a frat party that was simultaneously hit by an hurricane. 

In other words, it's a mess!

I use "Ctrl +A" to select all the files.  I hit delete.  I don't even bother checking the size of the directory.  It's time to get serious.

And with this Temp directory, I wanted to be SURE!

Windows counts the files as it prepares to delete them.  The total size of the collected files climbs like an altimeter on a space bound rocket.

Finally, the numbers settle at nearly 5GB worth of  files!

Suddenly, I can hear Adam Savage of Mythbusters fame proclaming; "There's your problem!"

After a few minutes, the Temp directory is as clean as I can get it.  There are always some files in use, so you can never get every last one.

I open up Showcase, and try the same model.

It was night and day!  Showcase maneuvered around as smoothly as my memories recalled.

What's the lesson!  Check that temp space!  It clutters up over time, and keeping it clean can really help your performance!

Don't let it get to 5GB like I did! 


Wednesday, February 09, 2011

Setting the Stage - Creating Backplates in Showcase

“I gave them the kind of backdrop to make them feel 'I really have arrived,'”
Morris Lapidus

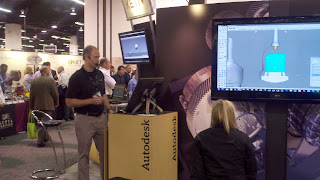
While I was at the Pacific Design and Manufacturing Show in Anaheim today, I had the pleasure of watching Autodesk Solutions Engineer Extraordinaire, Paul Schmucker put on one heck of an amazing presentation.  (BTW, you can see Paul today at booth 3609!).

Paul in action
While I was watching his presentations, I was reminded why I like to watch others present products I know.

You always learn something new.

Paul took a picture of the attendees at the show, created a backplate in Showcase for use in his rendering.

Needless to say, my jaw hit the floor.  I knew it wasn't that difficult, but watching Paul create it really brought it home.

So what was the first thing I did when I got back to my laptop?  I brought one in myself! 

So before I go ahead and share what I learned from watching Paul, what exactly is a backplate?

A backplate is a flat image behind your model instead of the panoramic environment.  The big advantage is their quick, and you don't need to do a lot of processing to get it in the model!

It's great if you want to take a picture from the front of a building, conference room, etc, and put something in front of that.  And the best part, is it only takes a few minutes to do.

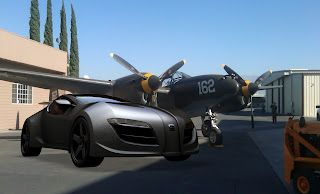
I did this at the show with a picture I'd taken a few months ago of the Planes of Fame P-38 Lightening

The New and the Classic

So here's the video of how I did it. 


And if you're interested in the actual Planes of Fame P-38 Lightening at Planes fo Fame.  Here's a picture of it taking to the air in February!

Sunday, January 16, 2011

Autodesk Showcase Revisited - Doodling on a Friday Evening

“Sometimes we strive so hard for perfection that we forget that imperfection is happiness”
Karen Nave

Friday night I decided to take a wood working project I've been working on in Autodesk Inventor, and import it into Autodesk Showcase, just to have some fun. 

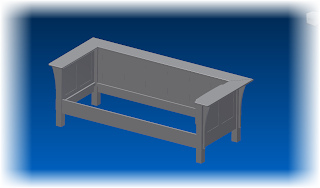
The project is a Prarie Sofa out of the book Shop Drawings for Craftsman Furniture.  I've been redoing the plans in Inventor

The sofa, up to know

Yes, this is what I do on a Friday night.  :-)


As I did this, I revisted some of the challeges that come from disconnecting my 'designer's brain', which I've found I need to disconnect when I start working in Showcase.

So what do I mean when I say I have to disconnect my designer' brain?

Well, my designer's brain thinks in decimals and tolerances.  It argues that ".1875" = "3/16? and anyone who uses ".188" isn't doing it right.  My designers brain thinks in right angles and precise calculations.

When you're working in Showcase, this line of thought can get in the way, believe it or not.  In reality, many things don't work in precise inputs.  No edge is perfectly straight, no angle perfectly aligned. 

Reality, by definition, is a bit imprecise.

So what did I try to do to create some of life's natural imperfections? 

First, I added in some cushions to the sofa.  Since Showcase can't create, them, I added them in Inventor.

With the cushions added

Looking at the sofa, I realized it was going to look too 'sanitized' in Showcase.  People would look at it and say: "That looks cool, Jon.  But I dunno, something isn't right."

Trust me, it's happened to me before!

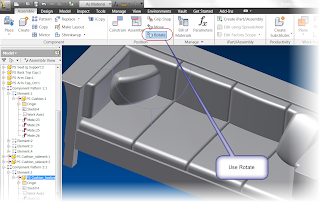
So I went a step further.  I added two extra cushions to the sofa, but used the rotate tool on Inventor's Assembly ribbon to reposition the cushions.

Rotating the cushions
Now if you have a designer's brain, this part may make your eyelid twitch. 

Don't worry about rotating a given amount, just position it until it looks good. 

That's right.  I said 'eyeball' it.

In the end, I think you'll  be happy with the results.  Doing things like this breaks up those perfect lines, and gives you something that looks much more realistic, and therefore, much more appealing. 

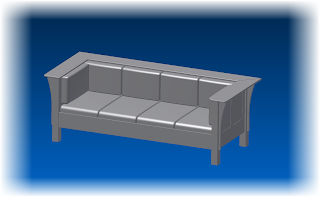
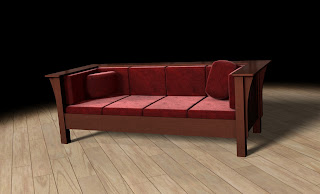
Here's the finished result in Showcase.

Here it is, the end result!
I think addin the two pillows, rotated randomly added a bit of realism to it.  In the end, I'm glad I did it. 

As a matter of fact, I may go back and move some more cushions around, just to see if I can improve it. 

So if you find your self doing any presentation like this, be it in Inventor Studio, Showcase, or any rendering program.  Remember that in reality, nothing is quite perfect.

And that's the beauty of it! 

Wednesday, February 03, 2010

Whats Wrong with My Environment? - Part 2


“Nothing helps scenery like ham and eggs.”

Mark Twain


As promised. Here's part 2 of creating an environment inside of Autodesk Showcase. What's the biggest lesson I've learned so far? There's a TON still left to learn!

But that doesn't mean I can't share what I've learned so far.

So in the last Showcase blog post, I talked about where to get environments. Now, what to do once we have them.

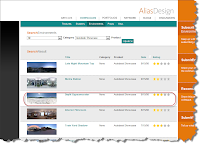
So first, I've downloaded a *.hdr image from the Alias Design website. In this case, I've grabbed the 'Daylit Gypsumcrater' *file. You'll find them in 'Environments' under the 'Downloads section.


First, the Image
(click to enlarge)

Once downloaded, now we switch gears and jump into Showcase. First, we get our scene open.

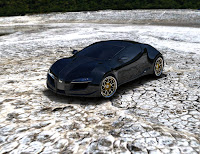
Our Car in its Natural Environment
(click to enlarge)

But, today it's about creating a new environment, so now, we have to go to the 'Scene' pulldown, and activate our Environments menu.

Accessing our Environments
(Click to Enlarge)

Now. click the 'Create' button to load up our environment


Finally, the Fun Part!
(Click to Enlarge)

Showcase will ask you if this is a Backplate Environment(a flat environment) or a Geometric Environment (a 3D Environment). In this case, I'm using a Geometric Environment.

What Type of Environment do we want?
(Click to Enlarge)

Now, we bring in our *.hdr file. Shown in the screen capture below.


(Click to Enlarge)

Now we can finally adjust our Environment. There's a lot going on here, and yes, I'm definitely still learning a lot here myself. I can say that I've adjusted exposure most often, since this adjust how bright an environment will appear.

If your not sure, just take the defaults go from there. You can always go back and adjust!

The Help button is definitely your friend for reference. I'll definitely post more tricks as I learn.


The Create Environment Adjustment screen
(Click to Enlarge)

Once you've made your adjustments, hit create, and Showcase will crank for a bit as it creates the environment.


The Car in a Whole New World
(click to enlarge)

So these are the steps to create the environment. You'll even notice the new button (named 'Generic' by default) attached to the environments tree.

Of course, there's a good chance you may want to go back and make adjustments. In this case, right click on the newly created environment and choose properties.

Now, we can 'tweak' our enviroment
(Click to Enlarge)


There's a lot going in here as well, so for this part, I've shown two common areas that I change. First, is the name. The second, is the shape of the dome. The dome shape can affect the look of the environment. I definitely suggest trying different dome shapes to get the best one. This will vary based on how the *.hdr file is used.


Even MORE Adjustments You Can Make!
(Click to Enlarge)

Finally, the result!

(Click to Enlarge)

One last note. Right click on the new environment, and you can save it to your library. This makes it available for future scenes, and saves you the trouble of having to repeat these steps unnecessarily!

Time to Save This For Later!
(Click to Enlarge)


Whew! There's a lot going on, and I didn't go into all the details. But it's definitely a start. And as I start learning more, I'll start posting the tricks!

As for what's next? I'll be at the Pacific Design and Manufacturing Show in Anaheim next week helping out at the Autodesk booth. So if you're at the show, come by booth 3609 and say hi!

Monday, February 01, 2010

What Wrong with My Environment?!? - Autodesk Showcase


“One of the Internet's strengths is its ability to help consumers find the right needle in a digital haystack of data.”

Jared Sandberg


If you've been paying attention, I've not been as good about Sunday night blogging. This week is no exception. I spent my Saturday at Planes of Fame being a volunteer museum guide.


Planes of Fame's two P-51 Mustangs. They both flew Saturday.
There's nothing quite like the sound of a Merlin engine purring.
(click to enlarge)

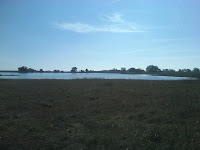
Sunday, I hiked to the vernal pools in Murrieta, which only fill with water during the rains.


Unfortunately, due to teh conditions, we couldn't get much closer.
(Click to enlarge)

Needless to say, Sunday night, I was more about an early bedtime then a blog post. But, at last, here we go!

Today, I'm going to talk about environments in Autodesk Showcase.

Environments in Showcase are something I've not worked with for one reason and one reason only.

I've never gotten around to it. (I say this with a sheepish grin).

But twice last week, I was asked by two different users where to find environments, and how to bring them in.

Granted, this isn't the first time it's come up. But I finally told myself that I was going to take the opportunity to blog this information.

So first of all, what is an environment?

An environment is, essentially, the scenery behind your model. For example, if the P-51s in the picture above were the models I was showing, the hangar and airfield could be considered my environment.

The environment is made of a High Dynamic Range image (HDR), which can be either flat (called a backplate) or three dimensional (such as cylindrical or spherical).

An example of a car in an enviroment
(click to enlarge)


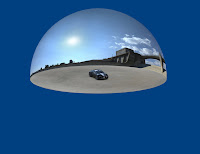
An example of the same car, showing the extents of it's environment.
(click to enlarge)


So now that we know WHAT an environment is, where can I get some.

There are some that are included with Showcase, and those can get you pretty far, but you also may reach a point where you'd like a few more options.

One thing is for sure, I don't have the complete, definitive list. But here's some places that I've either had recommended to me, or I've used personally.

Alias Design - Registration is free, and they have a nice selection of free environments that you can download. The environments are also free.

HDR Mill - They have a small free sample section, and you can purchase images from HDR Mill at fairly reasonable prices. I've used them before, and liked the results. If I was in the market for some new environments, I'd definitely consider them.

Dosch Design - One big disclaimer, I've not used this personally, so I don't feel I can truly recommend them. At about $150 USD for around 30 images. They're a bit rich for my blood, since I just haven't run into a place where I need that many environments. But that being said. I have seen them recommended consistently by several users, and several sites. So I went ahead and gave them a shout out.

With that being said, should I want to have an arsenal of environments at my disposal, I would be willing to try them, based on the recommendations I've received.

So there's where to get some environments. Importing them into Showcase is not that difficult, but there are always tricks.

Don't worry, I'm not going to abandon you. My next post will be taking an environment, and importing it into Showcase.

But for now, back to my Monday!

Monday, December 28, 2009

I'm ready for my close-up. Generating Stills from Autodesk Showcase.

“I am enough of an artist to draw freely upon my imagination. Imagination is more important than knowledge. Knowledge is limited. Imagination encircles the world.”

Albert Einstein


I'm back from my snowboarding trip, and it was a great trip. But alas, all good vacations must end.

With Christmas now over, many of us wait calmly for New Years to come around. In my case, I started reflecting on some of the challenging questions I was asked over 2009.

Here's an interesting one.

"How can I batch publish still images from Showcase?"

I had to think about that one a bit. I've never tried it. I tend to be a 'shot at a time' type of guy.

There isn't a button like File>Batch Render, or similar, so the head scratching began.

It turns out, that there is away, although it's not 'in your face obvious'

You can create a series of stills by using the Save As Movie option!

At first, it might be a little non-intuitive. After all, a movie implies motion, not stills. But a movie is just a series of stills moving so quickly that there's an illusion of motion. This is where we can take advantage of some Showcase settings.

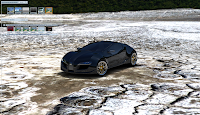
The first thing you want to do, is create shots at the angles you want to see. Create as many as you need.


(Click to Enlarge)

This will get the proper shots, but watch out, the number of stills created is based on these things.

1) The type of transition between shots. I can't say I know all the ins and outs of this one, but if the shot has a transition set to use any type of animation, you'll get extra frames there as well.

2) The frame rate rate the movie is set for.

If you have Showcase set to animation frame rate, you'll get a still for each frame. For example, if your frame rate is set at 25 frames per second, you'll get 25 stills for each shot! Obviously, that's going to increase your render times dramatically.


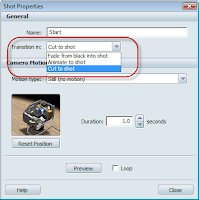
To address item 1, right click on each shot, and choose 'Properties'.

(Click to Enlarge)

Once in properties, change the Transition setting to 'Cut to Shot'. This will eliminate extra shots created by the transition.


(click to enlarge)

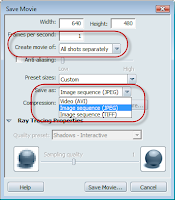
Now the renders can be saved out as stills. Go to File>Save Movie As. The following screen pops up.
Notice that the frame rate has been reduced to just 1, and that 'Image Sequence' is selected. Also, the 'Create movie of' option is set to 'All Shots Separately'.


(Click to Enlarge)

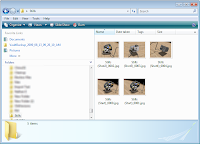
Now when you choose 'Save Movie', you'll get the following in your destination directory.


(Click to Enlarge)

Notice that you'll still get an extra shot. There's an extra shot for the beginning of the sequence. I haven't yet found a way to eliminate that one.

But if you need to generate several renders that might take a while, such as big images with ray tracing. You can let your computer work away while you're out doing other things.

Like what? For me, that either means snowboarding or heading out to Planes of Fame for a little volunteer work after Christmas.

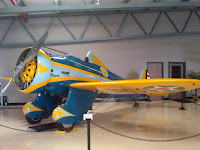
While I was there, I grabbed a picture of the Museum's P-26 Peashooter with my cell phone.


(Click to Enlarge)

Built in teh 1930s, it boasted innovations like all metal construction. About 150 were built. Now only two are left. One is in the Smithsonian, and the other is in Chino, California.

Only the one in Chino (pictured here) is flyable.

That's it for now!

Happy (almost) New Years everyone!


Sunday, November 29, 2009

Working with files in Showcase. The Beauty of Simplicity.


“Our life is frittered away by detail ... simplify, simplify.” Henry David Thoreau

Since my last blog post, I've found myself working with Showcase lately on some projects. During this time, I've found myself trying to answer the age old question: How much detail is enough?

In Inventor, my answer has always been: 'Exactly as much as is needed to build the part, and not one bit more'.

When I say this, my goal here is the perfect point where there is enough detail to remove any ambiguity in the design intent, but not so much detail that you spend a bunch of extra time building unnecessary features into a model.

For example, do you REALLY need to put .010 radius fillets to show that you've broken the sharp edges, or will a note do the job just fine? Likely, a note is sufficient in most cases (although I'm sure there are exceptions).

I can't share the particular components I was working on in this case (sorry, I promised the guys who own the files), but imaging an assembly that requires a certain amount of detail to be manufactured correctly, number of parts, detail of parts etc.

But when I imported it into Showcase, the performance takes an immediate turn Southward. Just importing it took forever (like an hour), and manipulated it was painful.

So, what to do? When it comes right down to it, I didn't need to see that much detail in Showcase, after all, what is the end game for Showcase? A good looking rendering.

So instead of using the assembly, we created a single component that had what I'll call the 'macro details'. Everything that you'd need to see to make a good Showcase rendering, but eliminating the small details like screws and internal components, that will never be seen anyway.

Sure, this took a little bit of up front work, but think of it like building a fixture for a long run of parts in the shop. The time spent up front will save a lot more time, money, and heartache, than it costs you.

Sure enough, in my case, the import took much less time (on the order of a few minutes), and was much easier to manipulate than the large assembly.

Ultimately, it saved me time, and of course headaches. And I can definitely use a few less headaches!

Monday, November 02, 2009

Making a rendering 'Pop'. Normal maps in Showcase.

Indiana: Meet me at Omar's. Be ready for me. I'm going after that truck. Sallah: How? Indiana: I don't know, I'm making this up as I go.

Indiana Jones (Harrison Ford), and Sallah (John Rhys Davies) in Raiders fo the Lost Ark.

Since Autodesk Manufacturing Academy, I've been working on some recordings, which have been fun, but time consuming. I find that you're never done, you just have to move on! I'm hoping to get a few up on the blog, but I've been head down quite a bit lately!

As part of my recordings, I've been creating renderings in Showcase to add a little 'artistic flair' to them. As always, there's another challenge to overcome.

I've learned, both from others, and through my own experience, that the accuracy a computer brings can work against you in Showcase. In a rendering that's trying to create a realistic look and feel, the perfect, sharp angles the computer brings are a dead giveaway that this is a rendered model.

In this case, I was rendering a valve to make a nice little illustration for a Powerpoint slide. Nothing crazy, just something to look pretty, and catch the eye.

My first test was without a bump map. Sure enough, it's too perfect. It screams fake. At this point, I've learned enough to not be surprised when the first test comes out like this.

Definitely too perfect
(click to enlarge)

So what next?

In a previous post, I talked about using bump maps and normal maps to create the illusion of a wavy, or imperfect surface when the computer creates a perfect surface. Making the rendering look more realistic.

Showcase comes with maps inside of it, and you can find several through your favorite search engine at no charge. I've just typed 'Normal Map' into Google and searched the image area. I can usually find anything I want pretty quickly.

I decided that making the body of the valve look cast would do the trick. So I started by scanning the directory of normal maps to see what I could find.

There was no 'cast metal' map that I saw, and I didn't feel like hitting Google, even if I have had pretty good luck. It was late, and I was getting tired.

So now, I had to shed my engineers brain... You don't NEED a normal map that has a cast texture, you just need one that LOOKS like it's a cast texture.
Bingo. I allow myself a clever smile.

Hitting the normal map directory again, I try a couple of other maps, and finally find one that works.

Which is it? Leather. That's right, I used a leather texture to simulate cast metal.

(Click to enlarge)

If it's crazy, and it works, it's not crazy? Right?

So that's the big trick. Don't limit yourself to what should work. Look at what does work.

Because in the end, I got what I needed in about an hours work. I got a rendering that was good enough for my Powerpoint. I wasn't after something to manufacture to, just something to look good.


That'll do!
(click to enlarge)


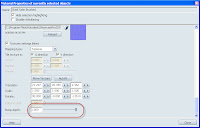
One last trick, don't forget to play with the bump depth! Most of the time, I find it's too deep to make for a good rendering. I cut mine down to as low as .015, depending on the look . This one is pretty deep for me, .25. The default is about 1.0 usually, which is almost always too deep for my tastes.


In other news! Inventor Fusion Technology preview 2 is available on Autodesk Labs. I've been hoping to get a video on it, but no luck so far (much to my chagrin), but I'm hoping soon. I'm really liking where they're going with it so far.

And for the trivia buffs out there. 3D Connexion's Space Explorer put a cameo in G.I.Joe, the rise of Cobra. Now that the movie is hitting DVD, look for it when Baronness fires the missile in the Paris chase scene!


A Space Navigator in the G.I. Joe movie. I don't think controlling missiles was on the list of supported apps.
(click to enlarge)

Monday, September 14, 2009

Codecs, Codecs Everywhere...and Which One to Use for Showcase?

“I realize that if I wait until I am no longer afraid to act, write, speak, be, I'll be sending messages on a Ouija board, cryptic complaints from the other side” Audre Lorde

A question from a user prompted me to write this post, and while I can't say that I know it all, that doesn't mean I can't share what I know.

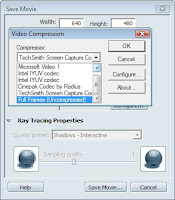
Something that I've found is a bit of a mystery in Autodesk Showcase is, which codec to when animating a movie. I can't say I have it all figured out. I can only say that I've learned a few things by trial and error.

First, let's define what a codec is:

It's a small program that compresses and decompresses (that's where codec comes from. COmpressor-DECompressor). Wikipedia has a nice definition HERE

We're all familar with the trial and error method. It goes something like this.

1) Try to create something
2) Fail miserably.
3) Shake your fist and curse your computer.
4) Repeat until you get a desireable result.
5) Repeat step 4 until you figure out how you stumbled onto the desirable result.
6) Promise to take better notes next time.

So which have I used so far?


I've tried most of these at one point or another, of the 'standard' ones, and of the standards, yields the best results.

The downside? The files are HUGE. And when I say huge, I mean really HUGE. I'm talking 50+MB, and it's not that hard to get through the 100MB ceiling.

If you can live with this, it works pretty well.

I've tried Intel UYUC, and although I haven't used that one too much, it seems to work well too.


Screen Shot of a movie using the Intel UYUC Codec. Results are pretty good.
(click to enlarge)

The one that seems to have given me the poorest results, is Microsoft Video 1. In my experience (which may be subject to user error), it takes really good Showcase videos and produces pretty pixelated videos from them. And when I mean pixelated, I mean Atari 2600 pixelated.


Screen shot of a movie using the Microsoft Video 1 Codec. What can I say. UGLY. I haven't found a setting to improve it.
(click to enlarge at your own risk)

If you don't know what an Atari 2600, think of it as a prehistoric X-box or Playstations. Neanderthals and Prehistoric Humans played them. The Neanderthals lost, and due to the terms of set prior to the games. Neanderthals had to go extinct.

My favorite codec is from Techsmith (the folks who make Snagit and Camtasia). You can download the codec (TSCC.exe) from HERE.

So far, my experience has made the Techsmith codec my favorite.

Screen Capture of a video using the Techsmith codec. My favorite.
(click to enlarge)

The only (in my opinion) downside of the Techsmith codec? If your sending the files to another person to view, they'll also need the Techsmith codec (so you'll have to send them the file, or link). The file is small, but not everyone is comfortable installing software.

Are there more codecs? Absolutely. More than I know of. I'm still looking for more good ones, but so far, the Techsmith codec has kept me pretty happy.

Still, if you have any suggestions, I'm always happy to hear the input!

Autodesk Manufacturing Academy is back! Check it out HERE

Wednesday, September 09, 2009

Showcase vs. Showcase Pro. What's the difference?

“There is but an inch of difference between a cushioned chamber and a padded cell.” G. K. Chesterton quotes

As I'm sitting here tonight, I'm getting ready for a class tomorrow, just running through some of the data sets, refreshing my mind. I'm also thinking of the differences between Showcase and Showcase Pro. Yes, there is a Showcase and a Showcase Professional.


A raytrace from my practice for the night!
(Click to Enlarge)

The differences are listed on a PDF file from the Autodesk Website here.


But, for a quick summary, here's the one's that caught my eye:

1) Import FBX files from other programs (Max, Maya, etc) - FBX files are an animation program that can be exported from other rendering systems. You can import them into Showcase Pro and reuse them in Showcase.-
2) Batch and distributed tesselation. - I confess, I've never come close to using this one myself. Probably for the advance user, but if you're importing a lot of files, this might come in handy.

3) Storyboards - Create a quick way to move from different variations of your components

4) Remote Collaboration - Use your Showcase Pro to collaborate across the web. Could be useful for those design 'jam sessions'.

5) Side by Side Comparision - Show alternative designs side by side for quick comparing and contrasting of different iterations and variations

6) Cluster Support - Support showing images across multiple screens or projectors.

7) External user interface - Customize your own interface with html or flash. Useful for putting a 'company face' on Showcase Pro.

So that's the skinny on the difference between the two. Other than the cost of course.

Which one is right for you? Ultimately, it's the one that meets your needs. For some, Showcase will give you everything you need, for others, they get a little 'foamy in the mouth' when the see some of Showcase Pros abilities. Personally, I like having the Storyboards, and Side by Side comparision.

But at least now, you can take a little longer look and decide which is right for you.

That's it for now!

Jonathan Landeros

Tuesday, July 28, 2009

Beauty and the Eye of the Beholder - Textures in Autodesk Showcase


Everything has beauty, but not everyone sees it. ~Confucius


I've blogged on bump mapping in Autodesk Showcase before, but with so many things in Showcase, it seems like it's as much art as science.

Of course you can add materials in Showcase, and in previous blogs (click here) I talked about how you can use bump maps to add 'character' to a material.

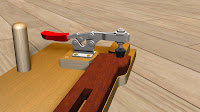
But at times, when trying to use bump maps, you end up with a ray traced image that seems to be grainy. Look at the clamp below. Everything seems fine, but the clamp definitely has that 'grainy' appearance.


(click to Enlarge)

You're first instinct might be to crank up the resolution, but it doesn't seem to help. Trust me on this: I've tried it. It eats up processor time, and doesn't improve the quality of the image. It also tends degrade the temperament of the operator.

But there is hope for both the image quality, and operator mood!

As with many things with Showcase, this is somewhat subjective, but one things that operator instinct seems to be to make a bump map far deeper than it needs to be.

Even looking at the bump map that I've used (unaltered from the Showcase material library) has a bump depth of 1.0, which is pretty high. You might think it's the highest possible setting, but I've found that typing in a higher number will let you go higher than 1.0.


(click to enlarge)

The solution that I've found? I drop the depth of the bump map down. And when I say down, I start cranking it WAY down. I usually cut it in half, then half again, and repeat that process until I get to the result I like. So if I start a 1.0, I go down to 0.5, then 0.25, etc.

You should be able to find a value that works. In this case, I found that I got to a value of .125before I was happy with the result.

So you can see how just changing that bump map can change the look of the file. Other settings you can user are the angle of a bump map, as well as the scale. (For example, I also changed the angle and scale of the wood grain to make it more appealing).

(click to enlarge)

While subtle, each of these settings play their part in
helping create a rendering that is really eye catching.

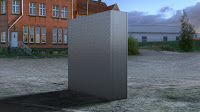
As another example, here's a box with only the bump depth changed. In the first image, the bump depth is at 1.0. I refer to this as 'having a brushed finish applied with a chainsaw). Feel free to use that, but I want the credit! :-)

(click to enlarge)

Now, setting it to .032 (with a few iterations in between), we get to something that's a little bit more subtle, and far more compelling, I think.


(click to enlarge)

Have fun trying different settings, and try something a little bit 'crazy'. You may find that it makes the rendering really 'pop'.

In which case, you get to make the transition from 'crazy' to 'visionary'.

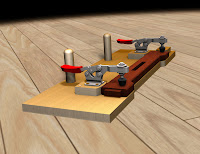
As for the jig? Here's teh full image, I cleaned up a few things, and gave it a tilt. Here it is in all it's ray traced glory.

(click to enlarge)

Enjoy, and have a little fun trying different variations of these settings. I find it's when I'm having fun, I do my best work in Showcase.

Monday, July 13, 2009

People are People... Importing Humans into Autodesk Showcase

There are two types of people - those who come into a room and say, "Well, here I am!" and those who come in and say, "Ah, there you are."

Frederick L. Collins


This question was posed to me about a week ago: "How do I get human forms into Autodesk Showcase?

Since Showcase doesn't build models, we need to get them from somewhere else. One of the most common places is from Charlie Bliss's site HERE. I've used 'iMike' a number of times.


(click to enlarge)

The people here are great for the concept of scale in a project, but they're not very realistic looking.

There is a way to do it, although it does take a bit of determination. But once that grunt work is done, you have something that you can place in your library, and (hopefully) never have to change it again.

Whats the big secret. Look for files 3ds files (the native Autodesk 3ds Max format). There are models of people to be found out there.

I found a decent selection on Klicker HERE. This is a great starting point.

But now we have a challenge to overcome. Showcase doens't import 3ds models. So now what?

Well, if you have AutoCAD and a will, you have your way.

In AutoCAD, you can go to the Insert Ribbon and choose Import. Also, if you're in the classic setting you can go to File>Import, or if you're an old school typist like me, just type 'import'.


(click to enlarge)

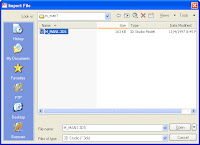
One of the options on import is a 3ds file. I'm using one of the samples I downloaded from Klicker.


(click to enlarge)
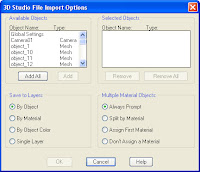
When you hit open, the import options appear. You can choose what and what not to import (such as lights for example). I click 'Add all' and hit 'OK'.


(click to enlarge)

AutoCAD will crunch a while, and you'll see a polyface mesh of the imported data (in this case a man).

(click to enlarge)

Now all you have to do is save this file as a *.dwg.

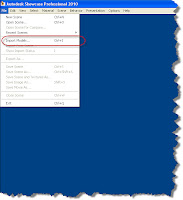
With the file saved as a dwg, you can open up Showcase and go to File>Import Models, and choose the dwg you just created as the file to import.


(click to enlarge)
Showcase will chug a bit, and you should see your import appear now!


(click to enlarge)

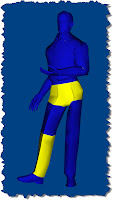
You're almost there. You may need to check the normals (not well adjusted people, the surface normals). There's a chance that not all of them are facing the correct direction.

You can do this by hitting 'F2' to show the normals. When they face the correct direction, they'll be blue. If they're yellow, select them, and hit 'F3' which will reverse them.

Why do we want to correct them? If we don't they may not show lighting and shadows correctly, which will make those areas look dark.

Here two surfaces face the wrong direction.


(click to enlarge)
Normals corrected.

(click to enlarge)
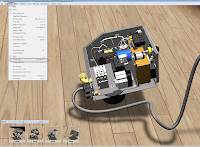
Now a few tweaks to materials and the addition of an enviroment, you have a much more realistic looking person. It's certainly not on the level of something you'd see out of a Hollywood special effects department, but it has more realism that iMike (not to insult him).


(click to enlarge)
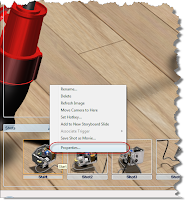
Aside from the fact that he's taller, better looking, and thinner, I think he bears a striking resemblance to me.

Now just save him in a directory where you can use him over and over again if you need him.

One last thing. Will ever single model come in this slickly? In a word: No. I've had some that have been pretty tough.

I've been able to bring these into Autodesk Inventor and clean them up and bring them into Showcase, but I'm still pinning down the best way to do this. Once I get that nailed down, I'll share that too!

Happy Monday everyone!