
Wendell Phillips
In last week's blog post, I showed how Pack and Go could be used from within Autodesk Inventor. But what if we're using Autodesk Vault?
It's got a Pack and Go too, and it has a few extra options that aren't found in the Autodesk Vault version.
For this example, I'll use the same jig I used last week.

To begin, how does one access Pack and Go in Vault?
- First, I choose the assembly to pack up, and go to the File>Pack and Go Pulldown.
 |
| Starting the Pack and Go |
- This will bring up the dialog box with the options I can choose from.
 |
| The Pack and Go dialog box |
- There are several options I can choose from. I'll briefly mention each, and tell you which I prefer. Naturally, your options may vary. It all depends on what you like, and what you're trying to accomplish.
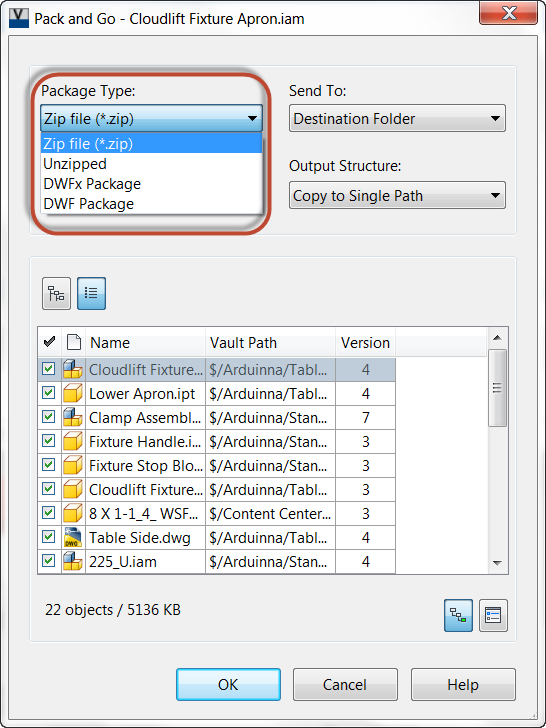 |
| What format do you want? |
- First is the Package Type, where I can choose from the following options
- Zip file (my preference): Places all the files in a zipped file in a location I choose
- Unzipped: Places all the files in a location I choose, in an unzipped format
- DWFx Package: Places visualization files in a DWFx format in a folder I choose
- DWF Package: Places visualization files in a DWF format in a folder I choose
- Recall that Vault remembers versions of the files placed there. The Pack and Go tool allows me to choose which version to use. I'm usually sending out the latest file.
 |
| What version do you want? |
- Next is the "Send to" option. Where do I want to send the files?
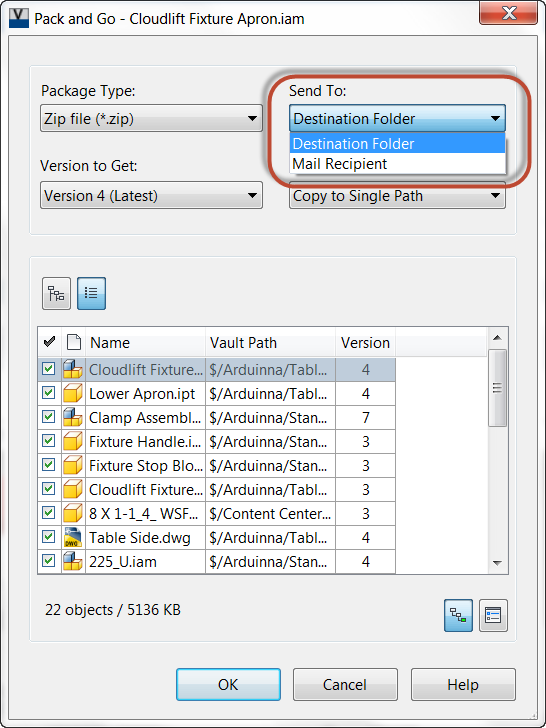 |
| Where do you want your files sent? |
- Destination folder: Places the files in a folder I choose
- Mail recipient: Opens up my email program to send the files out. If you choose this option, make sure the collected files aren't so big, your e-mail system can't send them! This size varies from mail system to mail system!
- The next option is output structure. It defines how the folders of the files is configured.
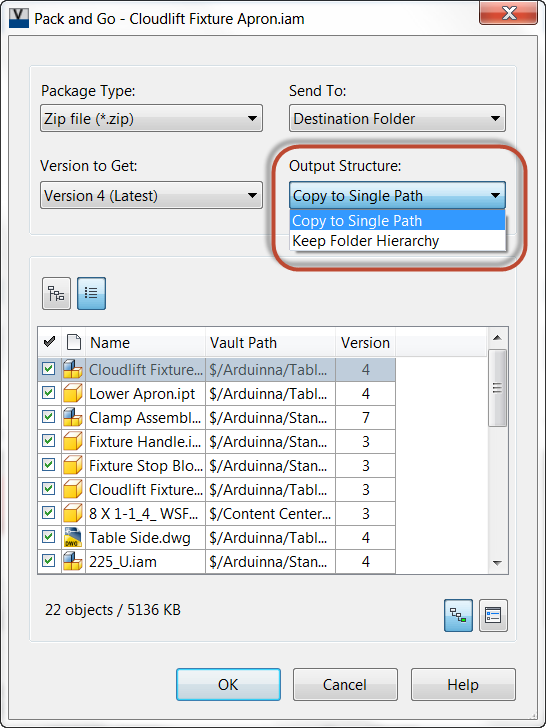 |
| How do you want your files delivered? |
- Single Path: Condenses all the files into a single path. I like this option when I'm not using zipped files.
- Keep Folder Hierarchy: Maintains the Vault folder structure in the exported files.
- The next option is a preview option. The indicated icons let me choose between viewing via the folder structure (left), or list view (right). I prefer list, but which you choose is up to you!
 |
| The Preview options |
- The next icon indicated at the bottom of the dialog allows for the fine tuning of the files. I can choose to include dependents (clicked), or exclude them (unclicked). The preview will show what files are exported. I prefer to include dependents.

- The final icon is for settings. This option brings up a second dialog box that allows me to find tune my Pack and Go options.

- The screen capture shows my preferences. But here is a quick summary of what I prefer.
- Include Dependents: This is actually the same setting as above. It chooses whether or not dependent files are included.
- Include Attachments: This includes any files attached using Vault's "Attach" tool
- Include Library Files: Includes any files placed in a library folder
- Include dependent files: This includes any files that depend on the files I've selected for Pack and Go. This can include drawings, so select this one carefully! I keep this checked.
- Include Visualization Files: Includes visualization files in a dwf or dwfx format
- Exclude Visualization Files: Excludes any visualization files (this is my usual preference)
- Visualization Files Only: Exports visualization files only, and excludes the model files.
So there it is! Autodesk Vault's Pack and Go in a big nutshell. There are a lot of options, so I hope this helps out. This can be a great tool for sending files to vendors or contractors, and can even be a way of archiving files.
Take a look and see how it might help you!
And as always, check out the video below!
No comments:
Post a Comment