Find us on Google+ September 2014 ~ Inventor Tales

Wednesday, September 24, 2014

Lessons from the Real World. Bending Sheet Metal the Old Way

Remember, Jonathan.  Everybody knows something you don't. 
Tony the "Phantom Phixer" and one of my valued mentors

I just completed another 4 week stretch taking Aircraft Maintenance at Mount San Antonio College, and find myself reflecting on what I've learned.  What an experience!  The engineer in me enjoys getting my hands dirty again, and this time it meant driving rivets and bending a little metal (not always on purpose)

One project in my class involved creating a sample of an aircraft former.  A curved piece of structure that forms the framework of an aircraft.

It meant going through the process of tracing a template


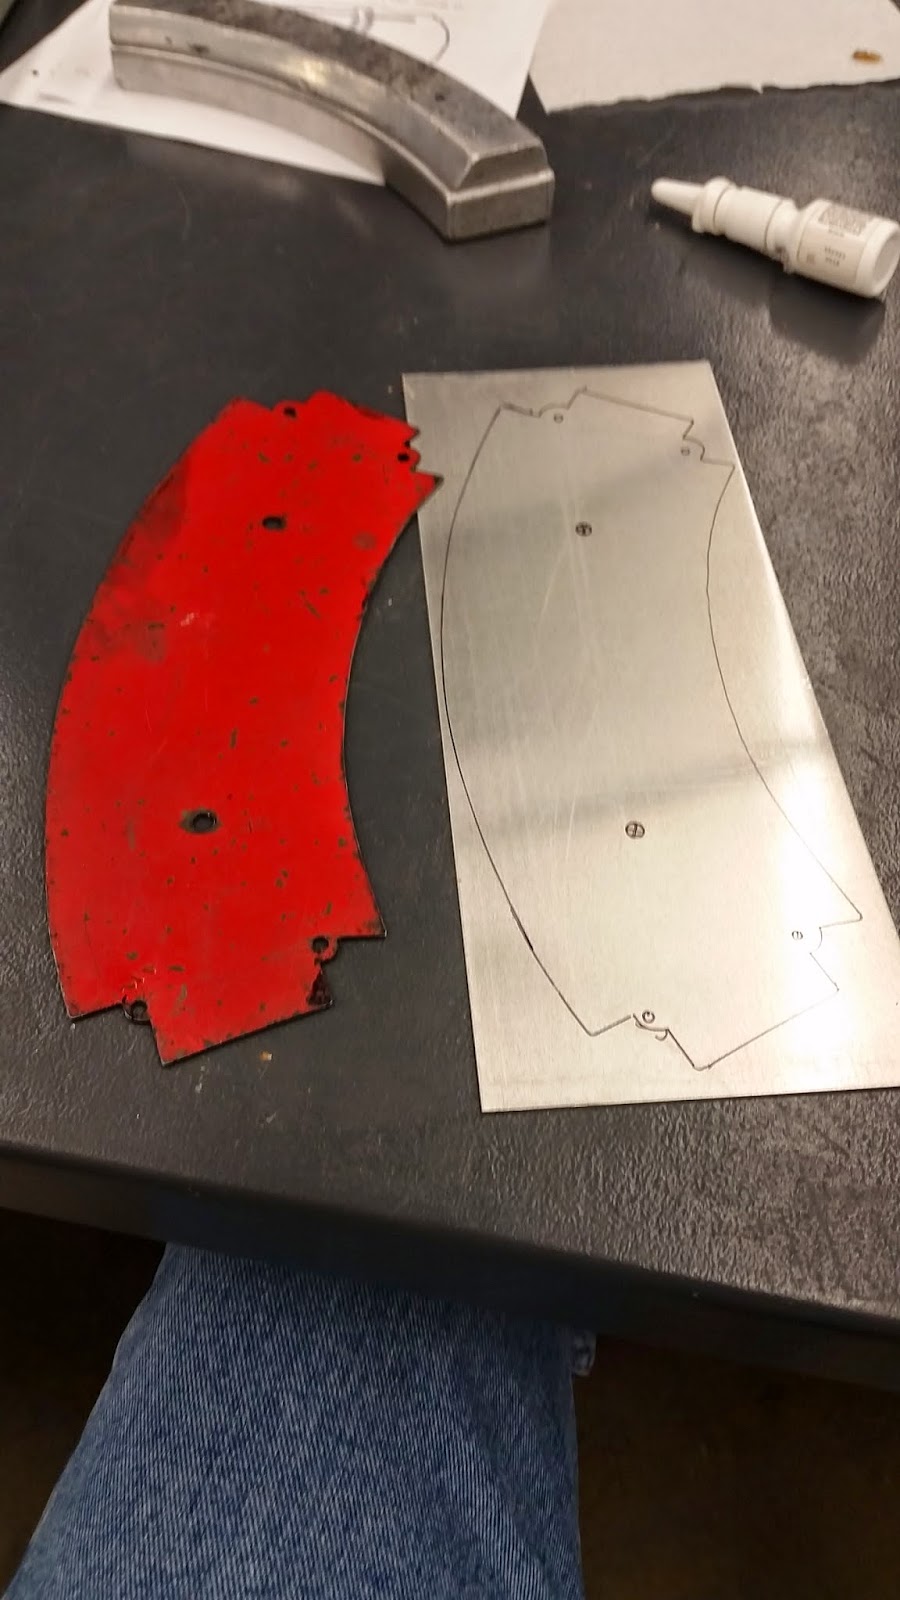
Template and blank.  Note the aluminum form block in the background
Here's a video (courtesy of the Experimental Aircraft Association) showing steps similar to what I did.  Note we had the red template with the proper dimensions, and didn't need the "magic washer".

I wasn't able to embed any of the videos.  So click here to follow a link!


After that I cut the template using Tin Snips out of 2024-0 aluminum.  2024-0 is soft, and very easy to form, but not very strong.


Tin snips. Yep, they're big scissors for metal.
Here's another video from EAA showing how tin snips are used.

To see the video click here.


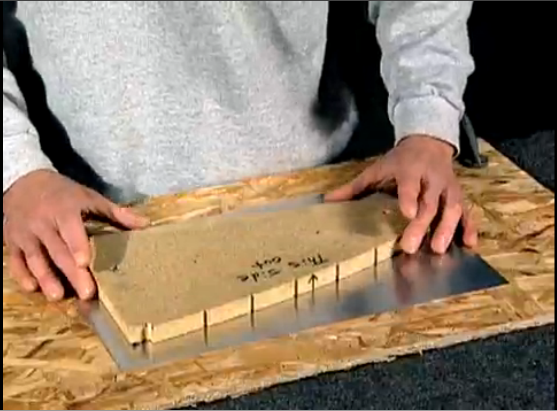
I cut the part a little oversize.  Then I formed the blank over an aluminum form block using a shaped block of wood and a soft hammer.

The partially formed block of metal


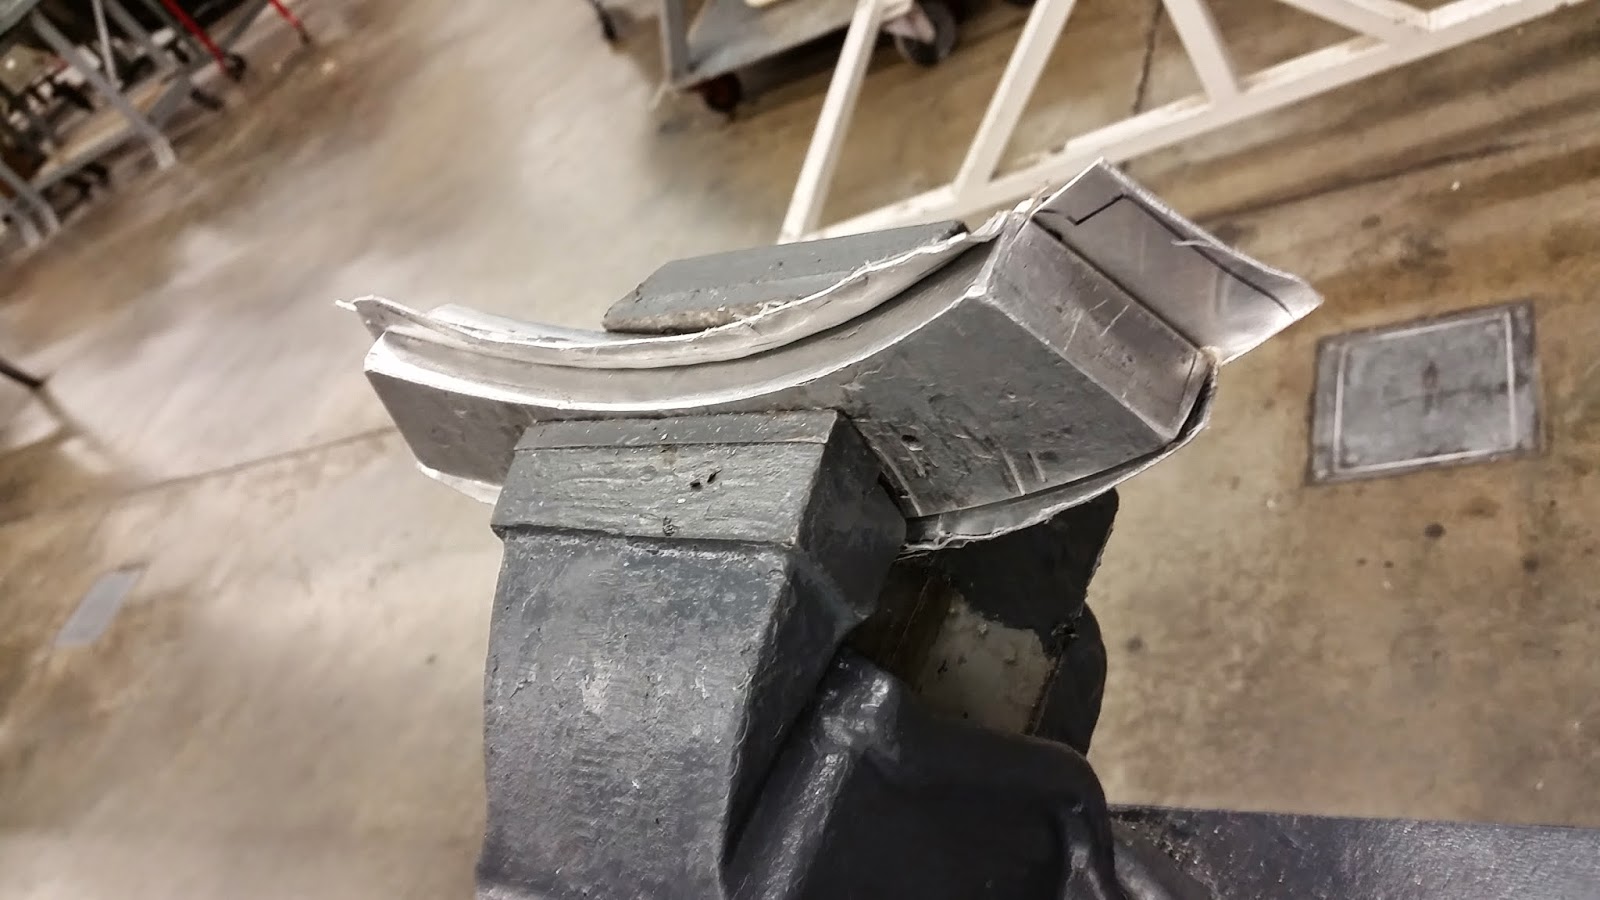
Same part, different angle.
Below, is a video of using a form block.  The video doesn't use a wood block like I did.  I also didn't use the "fluting" process they talk about at the end of the video.  I was taught to cut the material long, and by the right use of "body english & profanity" the wrinkles could be pushed into the scrap section, and trimmed away.

To see the video, click here. 


After the part was formed, I had a lot of excess material.  I cleaned this up using a belt sander, finishing it with a hand file to get the edges as clean as possible.

Granted, the edges weren't perfect.  But it was my first time, and I definitely learned what to do better the next time!


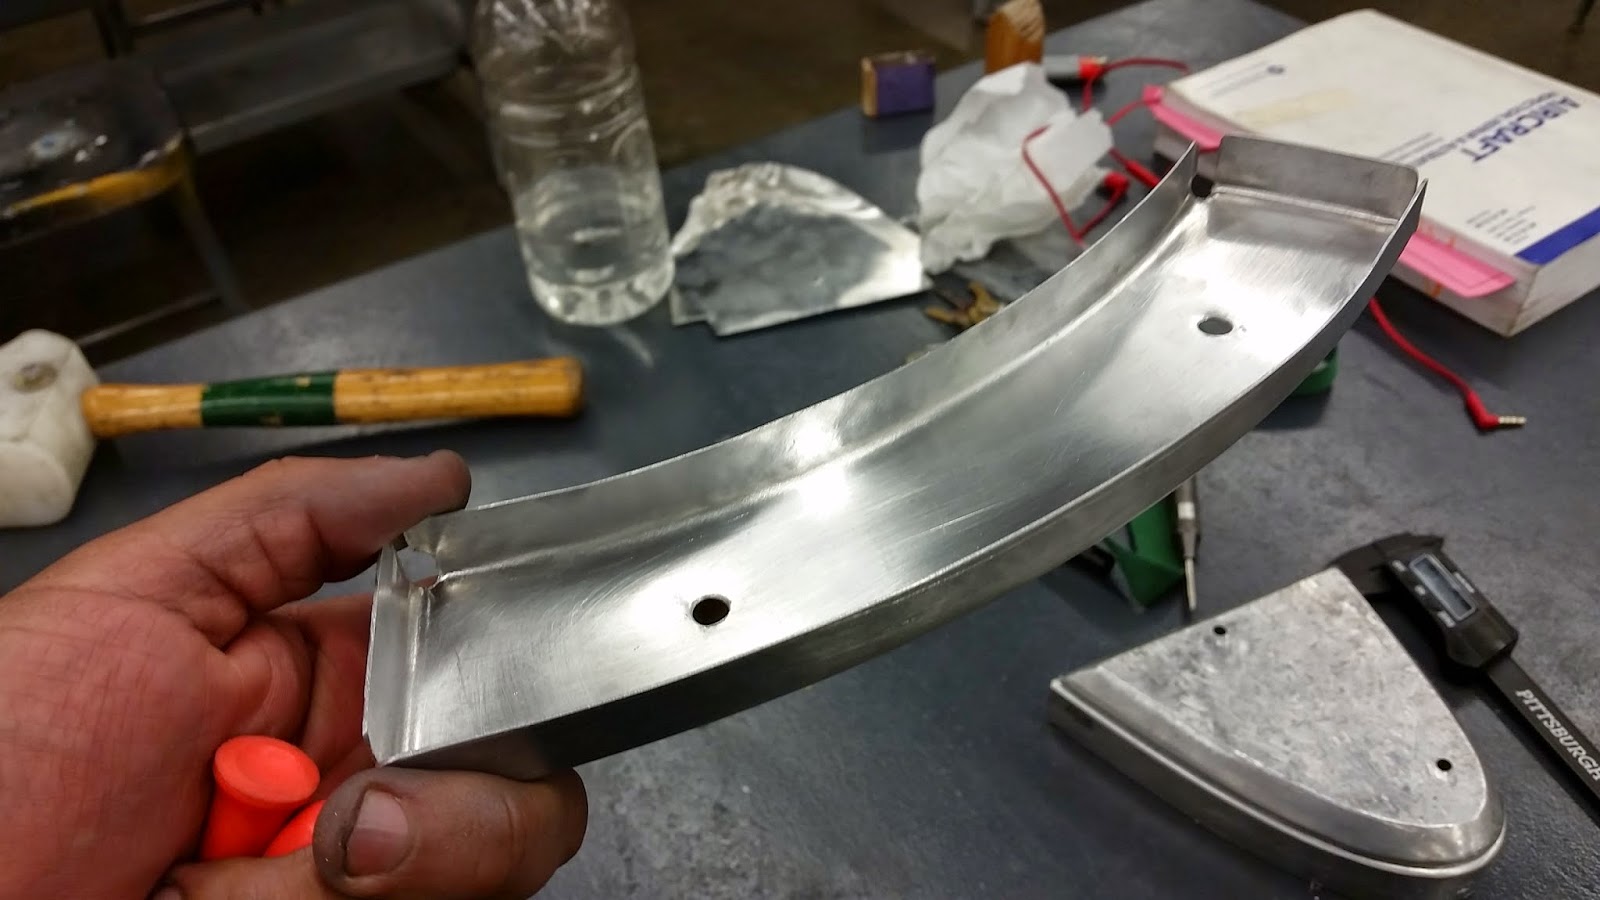
The part finished and trimmed.
Notice the soft hammer in the background,
along with the book o' standards AC43.13


Ultimately, the part would be heat treated to a T-3 temper, ensuring that it would take the loads that it it would see in a real aviation application.  Since I was just a simple student, we didn't go through this step.

The lessons I learned doing this were immensely valuable.  I just can't dismiss them.

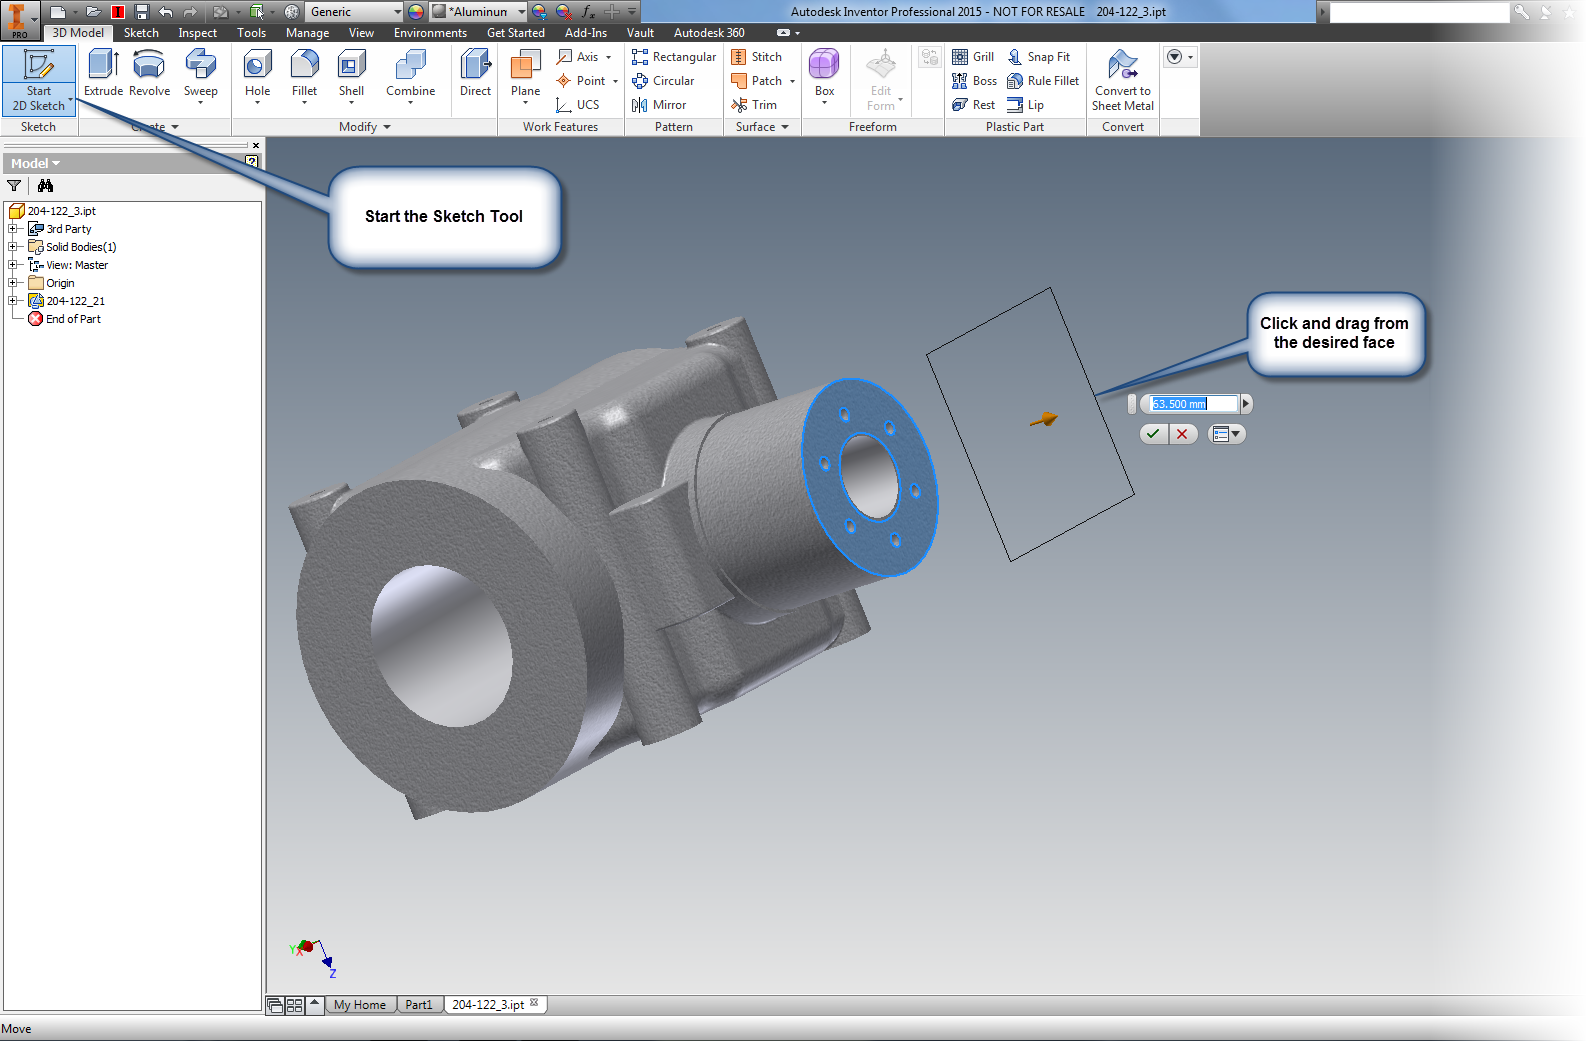
The first thing I did was contrast it with my 3D CAD experience.  I have tools at my disposal that could have designed the part in 3D, and created the documentation, and so on.

So why in the name of the "Wide Wide World of Sports" would I not use them?

Why use snips, a form block, hammer, and a bucket full of patience to build the part?

The answer, in the end, was affirming, at least to me.

The right tool for the right job.  Just because you can use a power sander, that doesn't mean that you'll never hand sand again.  Sometimes there is such a thing as "too much power".

Granted, my part was just a sample, a training session doing something that represents a typical process.  But I've seen the "real mechanics" creating parts to repair a 60 year old airplane.

In those days, there was no "Computer Aided Design" software.  A "cad" was a rather improper or rude man. The mechanics are matching reality without the benefit of a virtual world

Still, why not "whip out some Inventor and generate the flat pattern for that bad boy?   Trust me, that would be awesome.  I would love to do that!

But it would still take time to generate the part, ensure my unfolding rules are accurate, and then go about making the part.

And that would still leave me with having to make a form block, and form the part.

Right tool.  Right job.  And don't forget, right process.

It's just as, if not more, effective to make a form block that fits where the finished part is going to live.  Then form it, trim it, and heat treat it when all is done.

Thought provoking, isn't it?

What's the moral of the story?  Maybe there isn't one.  Maybe I'm just rambling.

But what I learned is that no matter what I'm doing, it pays to know all the tools and process I have at my disposal, and find the best tool for the job.

Sometimes, that means dispensing with fancy technology, reaching back in time, and going back to the old ways.


Monday, September 15, 2014

Five Quick Tips for Autodesk Inventor Part modeling


“He's been a part of the whole run.”
 Gary McNamara

My last post, I talked about 5 tips that could be used in Autodesk Inventor Sketching.  Now, I've decided to go ahead and share a few tips in Autodesk Inventor part modeling that everyone may be aware of.

They're quick, they're simple, and they work for me.  I hope that the 'Verse out there can find a use for them too!

Just like before, the order doesn't imply a preference, just the order the popped into my head.

1. Create an offset workplane at the same time a sketch is created.  

It's a pretty common practice to create an offset workplane, then to follow that up with a sketch.  An example would be creating a boss that's being attached to a cylinder.

But did you know that you can create both the plane, and the sketch at the same time?  Here's how!

Start the sketch tool in which ever way you prefer.  Then much like you would create the offset workplane, drag the sketch.  The workplane and sketch will be created at the same time!


Dragging the sketch and workplane at the same time. 

The one sketch, one offset plane, one motion! 

2. Select Other

I don't think this tool gets the credit it deserves.

In brief, if there are selectable objects stacked on top of each other, the select other tool will help you pick through the part, and select additional entities, even if they're not visible.  For example. the Select Other tool will let you pick the back face of a part.

One way of accessing the tool is to hover for 2 seconds over the desired selections.  The other is to right click over the desired selections and choose the tool from the right click menu.

The Select Other tool in action
PRO TIP!  The default "hover time" for the select other tool can be changed by going to Tools>Application Options.  The setting is located on the General Tab.

Changing the time it takes for the select other tool to appear


3. Sweep along an edge.

This function has been around for a few releases.  And that's the ability to use the Sweep tool along an edge. Once upon a time in Inventor, a second sketch was required to generate a swept path. Many may still be using it the way "it used to work" still do that.  However, it is possible to just use an existing edge instead of creating a whole new sketch.

Sweeping using an edge.  The edge is highlighted, but not selected yet. 


4. Create a four hole pattern using a sketch

Inventor has been able to create holes using sketches since I started in Release 4.  As a matter a fact, at one point it was the only way to do it.  And while it could be considered an older tool, it's still a very useful tool.

One place it can be used very effectively is to create a four hole pattern, such as mounting holes in a lid.

I like using this, instead of a pattern for one big reason.  I don't like doing math with the four hole pattern.  Call me lazy.  Using the offset tool allows the sketch to be offset with one dimension, and the offset will be maintained should the overall dimensions change.

In order to do this, create a sketch and offset it's perimeter using the offset tool.  Next, just finish the sketch, and start the hole tool.  All that's left to do is place a hole on each corner of the offset rectangle using the From Sketch option.  Choose the hole type and go!

Using an offset sketch to create a four hole pattern
5. Slice Graphics and Project Geometry.

This is two tips combined in one, but they often work in conjunction.  That's why I'm combining them.

These tools are most often used when a feature needs to be created on the interior of a part, such as an O-ring groove inside a part.  Slice Graphics will virtually "cut" the part, while project geometry will project the edges cut by Slice Graphics so they can be used in the sketch.

To use Slice Graphics, start the sketch on the plane intersecting the part, and choose Slice Graphics (or hit the hotkey F7).

Once Slice Graphics is enabled, the model will be sliced at the sketch plane.  This is a virtual slice, like an XRay or MRI.  No material has actually been removed.

Next, click the Project Cut Geometry tool (it's on the flyout under Project Geometry), and select the model.  The edges of the virtual cut will be projected onto the sketch. Now that sketch can be used to create the geometry used to create the feature.

Slice graphics and project geometry already selected.  The icons are highlighted. 


So there are a few tips you can use when creating parts in Autodesk Inventor parts.  I hope that they're something you can start using right away.

******************Edit 23-September-2014 Added Video (Finally!)************************

At long last the promised video!  Take a look to see these tips in a video format!