Find us on Google+ 2016 ~ Inventor Tales

Monday, December 19, 2016

Aircraft Maintenance Class - Done for Now!

InventorTales has been a little quiet for the last few weeks, and that's because I've been head down in Aircraft Maintenance classes again.

It's fascinating, and, at times, frustrating.  It meant an additional 25 hours per week in class on top of the 40 hours a week I put into my day job.


The lab at Mount San Antonio College where I learn how airplanes tick.

It's fascinating, and, at times, frustrating.

It was 12 long weeks of studying sheet metal, metal alloys, wood and fabric construction, and composites.  

Those classes gave me lessons that will go far beyond the classroom.


There is more to laying out rivets than meets the eye...

But I don't want to turn this into bragging about what I did in class.  What now for InventorTales?

I'll have the next few weeks off of class, and in that time, I'm planning on getting reacquainted with Fusion 360, and sharing a bit of what I learn.

So stay posted, and enjoy this holiday season!


Sunday, November 27, 2016

Three Things Safety Wire Taught Me About "How Hard Can it Be?"

My aircraft maintenance classes at Mt. San Antonio College, and yes, that does reduce my blogging time still!  

But it keeps me learning, and in this short post, I'm sharing a bit of my experience with a cocky phrase I think all of us have encountered at one point. 

How hard can that really be? 

For me, safety wire was one of those cases.  Deceivingly simple, there's a lot more that goes into it that what first meets the eye. 

An example of safety wire on a fuel totalizer.
It looks like twists of wire, but there's much more to that. 

So what is safety wire?

Also referred to as "lock wire", safety wire is what is called a positive locking device.  It serves the purpose of preventing a fastener from loosening or falling out, and also serves as a witness that the fastener has been properly torqued. 

That covers the "whys", but what about the "hows"?   It's the "hows" where the hidden challenges in the process begin to reveal themselves. 

From the Federal Aviation Administration's book AC43.13, here are the requirements for proper safety wire installation on an aircraft. 

  • Safety wire must be installed in such a way that the fastener cannot loosen. 
  • Safety wire must have 6-8 twists per inch.
  • Never overstress safety wire. It will break under vibration. 
  • Wire must not be nicked or kinked, that includes backing off twisted wire if you've twisted it too many times.
On top of that, there are diagrams upon diagrams of examples displaying the proper procedure for various types of applications.  

An example of some safe wire combinations
From AC43.13
For me, that meant making a lot of mistakes.  I've gotten the wire too loose, I've kinked the wire, I've even gotten the direction backward, loosing the fastener instead of tightening it. 

And all of that means grumbling in frustration, cutting it off, and doing it again. 

So what does that mean for those of you out there?  Many of you will never touch safety wire, and that's alright.  It may not be your thing.  

But one lesson from a few twists of wire can be summed in a few simple phrases.  

Just because it looks easy, doesn't mean it is.  And if someone makes it look simple, it may be that they've been honing that skill for years. 

And that can be true of an task, be it safety wire, welding, running a CAD program, or installing a data management system.  

So see the world with an eye for learning from those experts! 


Acknowledgements:


Sunday, November 06, 2016

How the Cloud Saved my Butt - And my Homework Grade

I'm still taking my aircraft maintenance classes at Mt. San Antonio College.  And while it's rewarding, it's enormously time consuming.

Between work and class, it means days starting at 5:30 AM and ending at 11PM.  It makes me grateful for a supportive family, but something does have to give, and in this case, it's the blog that suffers.   

One of the instructional airframes, the Cessna 337 Skymaster.
But life is still teaching me lessons, and this is one where data in the cloud helped save my grade.

I store my homework in Google Drive.  Why?  I can access it anywhere, and it's always backed up.  It's always nice to be able to open the latest version on my phone, laptop, or work computer, without having to worry about uploading or emailing documents. 

And as a final bonus, I have semesters of homework available for my reference.


The infamous textbook.  My dinner companion many nights.

Perfect cloud application, right?  Of course!

But last week, I had an interesting experience that thankfully, the Cloud saved me from. 

In a rush at work, I hurriedly printed and stapled my homework to turn into class.  Once turned in, I went merrily on  my way, satisfied with a job I thought well done. 

But the next day, I got a surprise that made my stomach sink. 

The instructor returns my homework with a 43% on it.  I'm shocked!  How?

He tells me, "You're missing half your homework."  

Gobsmacked, I flip through the pages.  Sure enough, two of the four pages are blank.  

I kick myself for not checking.  It's a stupid mistake. 

The teacher breaks me out of my trance.  "I don't know how to rectify this with you.  The quality of work implies you did the homework, but if you can't get it to me tonight.... "  

My brain races, and suddenly a solution.  "Can I email it to you?"  

"I'll take that."  The instructor tells me, giving me a ray of hope.

I fumble with my mobile phone for a few minutes, and manage to send a *.docx file to the instructor.  Mercifully, my grade goes from a 43% to an 83%. (I made some bonehead mistakes technology can't solve). 

So that's my story, but what are the lessons?  

1) Technology is awesome!  But don't rely on it too much. - I didn't spend 10 seconds flipping through the pages of my homework to make sure it was all there.  I assumed it was, and that nearly cost me. 

2) When used properly, technology is  invaluable. - As contradictory as it seams, technology also saved me from... technology.  If I hadn't been using a cloud account, and instead had my homework stored on a document on a machine, I may have been stuck eating a failing grade.  By having the ability to send the instructor a word document, I salvaged a bad situation. 

3) Make Technology Work for You! - I think this is the biggest lesson of all.  We all have different needs, and technology has many ways of helping us out, not just one.  Just because I use it one way doesn't mean you have to use it in exactly that way.  Take my ideas, combine them with so many others, and come up with something that makes you're life easier! 

So take my lessons, make them your own.  From now on, I'll be double checking that homework with my good ol' "Mark 1 Eyeball.". 

Sunday, October 09, 2016

I'm Back in Class - Why You Haven't Heard from Me

I know it's been quiet the last couple of weeks.

But it's that time again, I'm back in Aircraft Maintenance Class trying to gain some new skills.

A "Special Fasteners" plate. I learned that safety wire
is both an exercise in patience, and p

The back of the plate shows just *some* of the fasteners
found it a typical aircraft. 

That means working a full week, plus running to class to put in an extra 25 hours per week.

Needless to say, I don't have much time to sit down and blog!

But I'm learning new skills and finding new ways to apply the skills I have.  It's a great experience!


Learning to hold a part with Clecos (the copper pegs), before setting solid rivets.
And I'm already dreaming of a few new posts! 

You haven't gotten rid of me that easily.


Friday, September 23, 2016

A Little Glitch in the (A360) Matrix

Sometimes, the internet hiccups. And I found that happened with my Autodesk A360 account earlier this week.


This is *not* a glitch in the matrix.
I have three black cats.
Friday, I was going to log into my A360 account, and all I saw was the login screen.

Seeing how this is a normal thing to see, I logged in, and waited for A360 to do some technical things.

This before login is normal.


I wait excitedly to be greeted by the wealth of my accumulated information, and what do I see instead?

Seeing this after login is NOT normal!


That's right!  I loop back to the login screen!  It's about 10:30PM.  So I give up and go to bed.  Maybe the next day will fix it.

I try it again on the following day, and I still get the same thing.  It's time to ask Google!

And Google yielded some results from the Autodesk Community itself.  

You can read the thread at the link here, and I encourage you to do so!  

But here is the summary from that page.

The solution!
I tried it, and that solved it!

I was running Google Chrome, to clear your browser history in that program, hit CNTL+H, and choose the Clear Browsing Data button.


Then shut down your browser, and restart it.  Try logging in again, and the problem should be solved.

So if you're running into this issue, give this solution a try!

Tuesday, September 20, 2016

A Fusion 360 - Quick Tip on Showing Modeled Threads

It's sizing up to be a hectic week, but here's a really quick tip I discovered while creating some aircraft fluid fittings in Fusion 360.

A typical 37 degree flared fitting.

Did you know that while creating, or editing threads, you can change whether the thread representation is shown as a graphical representation, or as a modeled thread?

And you can toggle it off at will!

Showing the modeled thread location.  Right click (1), and check (2)!

Check it out, and give it a try!  When rendering models, this can make the difference between an average rendering, or a great one!

When you rendering without the threads displayed....

Not a bad rendering, but something is wrong.....
But now if you check that one simple box....

Now that's a big difference! 

Keep it in mind for a time that you need it!

Tuesday, September 13, 2016

Two New Members, and Maintenance on "Websites Jon Likes"

A few years ago, I added a tab to InventorTales I named "Websites Jon Likes".

It contained resources I found helpful, or just a little interesting, and I just wanted to share them.

That page was long overdue for some maintenance, and so I finally cleaned it up.

I removed a few links that have gone dead.  The sites have now become the ghost of webpages past.

But two more sites were added, and for all the value I think they bring, I wish them a long and prosperous existence.

Here they are!

AIRCORPS Library   


An example of what you can find on AIRCORPS Library

The owners of this site have diligently collected and scanned prints and technical documents for aircraft form the 1930s, 1940s, and a few in the 1950s.  I grant you, they're a pay site, but in my opinion, they have earned every cent they earned, plus more.

Most of us live life in the cloud, and this has got to be one of the greatest uses for it I have seen.

If you like old airplanes or vintage technical documents, then this page is for you!

Lazze Metal Shaping

This is a great YouTube channel with a video after video of detailed sheet metal work.   Most of the work uses manual tools like English Wheels, shrinkers, stretchers, and brakes.

Definitely old school, and definitely worth your time!

Here's a video I liked, but this is just a small sample!  Check out the site on Youtube!


So take look a these sites!  I think you can find something worth while!

Sunday, September 11, 2016

Constraining Content Center Components in Autodesk Inventor - An Alternate Way

Recently, I've been doing a lot of work with content center lately.  I've been building content, publishing content, and fixing content.

It can be tedious, but it can also be a lot of fun.

But there's one trick I've picked up in my travels.  It's how to constrain content, in particular custom content, a little more quickly than by using the standard method.

Now before I get started, one disclaimer.  I'm using standard content to demo my blog, I didn't have customer content center fasteners I could share with you, so I had to borrow the standard.

Since I'm using standard content, I also I know I could use Autodrop, but the point was to show an alternative.  All I ask is you bear with me on the standard content part.

So with that said, it's time to get started.

Of course you'll need to place your content from the browser.

Selecting content to place

2) When the fastener previews, right click and choose the size you want to place.

Choosing the size of your content center fastener

3) Next left click to place your fastener, but here's the trick.  Without you even knowing it, the insert constrain is active.  Before you left click to place the next fastener, left click under the head of the fastener you wan to place.

Selecting under the head of the fastener
4) Now select the mating hole, the insert constraint will be created!

Completing the constraint with a second click on the mating hole
5) All that's left is to repeat the steps if you have multiple fasteners!  You don't have to exit the command!

Repeating the step for multiple fasteners. 
So give it a try if you have content you're using, particularly custom content.  I've found it helps me out, I hope it does the same for you!


Monday, September 05, 2016

Thin Walled Inserts - Threads Screwed into Threads

This post is a bit more "manufacturing focused" than CAD focused.  It was brought on by my most recent experience in design.

I wasn't exposed them as much as I would have liked in college, so I like to share that newly acquired knowledge of mine with the world out there.

So what have I learned about most recently?

Threaded inserts.  I've been spending a lot of time working with them in the last year or so.

A Fusion 360 rendering of a thin wall insert. 
Most of us have probably used helical coil inserts, which most of us know by their trade name, Helicoil.

Helicoil plus.jpg
By The original uploader was Boellhoff at German Wikipedia - Transferred from de.wikipedia to Commons by MichaelFrey using CommonsHelper., Attribution, https://commons.wikimedia.org/w/index.php?curid=7363606


But recently, I had to use "thin wall" inserts, designed to meet the MIL-I-45932/1 standard.  If you like, you can download that standard here.


A real image of thin wall inserts. Image from Acme Industrial.
They're a new experience for me.  I hadn't worked with them before.  I had only installed the  aforementioned helical coil insert.

We use them to reinforce holes in aluminum castings.  Stainless steel inserts provide a more durable interface for the hardware to fit into, and makes it easier to assemble and disassemble without wearing the threads as quickly.

The thin wall inserts have the extra advantages of using standard threads, so they don't require any thread making tools.

They also work when there isn't a lot of edge distance to play with, such as a flange.  Where using too big of an insert risks weakening the interior all.

The downside is that, at least from what I'm told, these are tougher to put in.  You can't twist them in like a Helicoil.  They have to be threaded in, then the collar has to be expanded with a special tool, and a bit of skill is required to keep from damaging the surface, or the insert itself.

For the steps to install a thin wall insert, he's a nice "shop video" from Acme Industrial.


There are so many things to learn, and such little time.  I hope this little blurb is something you find helpful!

As always, here's the embeded Fusion 360 model that I always have so much fun including!

Friday, September 02, 2016

Old Technology Flashback - The Boeing P-26 "Peashooter"

This Friday's post is just a video of old technology.  It's just a fun way to look back on how things were, "once upon a time".

Planes of Fame Air Museum in Chino, Ca. USA, has a restored, 1930s vintage, Boeing P-26A Peashooter

The P-26 outside its hanger at Planes of Fame  

It still starts in the same way it did in the 1930s when it was a front line fighter.

With an inertial starter.  You can find a brief blip on the technology at this Wikipedia link!

That means spinning up a flywheel, and using the flywheel to turn the engine and get that precious first spark!

But a mere description doesn't do the old technology justice.

Check out the video below!  Those guys had to be in incredible shape!

Sunday, August 28, 2016

Modifying an Non-Fusion 360 part in Fusion 360

Just a tick over a year ago, I tried an experiment to build a 3D model of the aileron horn Spanish BF-109.  Then I printed it in 3D to prove the concept.

The original part, and the 3D printed part, side by side


The model of the horn. 

And the concept was proven.

But in that experiment, I found that there was another challenge.

I had to measure the part by hand.  Naturally, that creates the opportunity for error.  And of course, I made an error.  I mis-measured one dimension, and the part was too tall.


Now, at home, I primarily use Fusion 360, simply because it's what I have access to on my personal laptop.

But that raised an interesting scenario to me.

What if you don't have access to the technology that created the software, but still need to make modifications to increase the manufacturability of the product, or perhaps there's feed back that needs to get back to the designers.

Well, here I found myself, wanting to make a few modifications to the aileron horn, but my Inventor installation is 20 miles away on my work computer.

It's time to see what Fusion 360 will do for me.  I can modify the solid, and I don't need access to the feature tree to do it.

I've brought the model into Fusion 360, but let's look at the mis-measured dimension I mentioned earlier.

I'm going to shorten the top flange, and rotate it a few degrees for good measure.

Let's start by right clicking and choosing the Move command.

Let's get moving!
Now comes the selection part.  For this operation, I'm going to choose the faces option.  I'll also choose my center of rotation as the tube supporting the flange.  Notice that you can also translate or rotate the triad, or snap it to existing geometry.

Now comes the selection of geometry to rotate.  That translates into selecting the faces you want to rotate. I'll choose the holes, and all the faces I wan to rotate.

Choosing the faces to rotate. 
And don't forget any back faces too!  Missing one can fail the operation!

Don't forget any back faces! 
Now comes the time to rotate and translate the part.  This can be done by selecting the appropriate translation arrow, or rotation radius for the operation, and dragging or typing in a value.

An example of rotating the flange
Now by dragging the grips, or typing a value, the flange position can be changed to exactly what is needed.

The part after accepting the change.
So here's how Fusion 360 helped me out.  I was able to make the modifications I wanted when I didn't have access to the authoring program, in this case Autodesk Inventor.

The part before, and the part after.  

But the file could have just as easily been from one of several types.  So there are certainly more options to explore!


Wednesday, August 17, 2016

10 Years! Unbelievable!

I can't believe it !  On this very day, in 2006, I created my first blog post for InventorTales.

It was under a different name then, it was actually about 8 years ago, that InventorTales took form.

The very first image posted to my blog. 

An Autodesk Fusion 360 rendering I created last night.
This product wasn't even a dream when I created my first post. 


But still, I'm stunned.  Has it really been that long?

10 years ago, I was;

  • I was younger! 
  • I had hair!
  • I was in better shape! 
  • I was single!
  • Inventor was't using years to reflect versions
  • Fusion 360 wan't a glimmer on the horizon yet! 
It's been an amazing 10 years!  The one thing I've learned is that things are always changing!

Thanks for an amazing decade!  I hope to keep things up for another ten years, even as times change!


Tuesday, August 16, 2016

Lessons in Manufacturing from 75 Year Old Airplane.

Have you ever looked at a manufacturing process and thought, "When was that process developed?"

I had that moment looking at a set of ailerons for a Seversky AT-12 Guardsman at Planes of Fame Air Museum, where I volunteer on the weekends.

The Seversky AT-12 Guardsman at Planes of Fame
Stripped of the fabric that normally, covers them, I had a rare opportunity to see the structure beneath.

Typically Structures of the era would be made of wood, or riveted aluminum like the images below.

An example of  riveted aluminum. 

A typical aluminum control surface.
This is in the process of being recovered in fabric. 
Instead, these structures were made of welded stainless steel that had been spot welded together.

A close up of the stainless steel structure.  The spot welds are the dark spots on the ribs.
And speaking of the era, the ailerons still bore their manufacturer's data plates.  Built by Fleetwings, in 1940.


My curiosity piqued, I looked up the company on the internet.

I found that Fleetwings started in the mid 1920s, and pioneered the use of stainless steel in aircraft structures.

It seems that this set of ailerons represents a small milestone in manufacturing of aircraft structures. The use of stainless steel.

It's an interesting note in manufacturing history!  All prompted by looking at a set of old ailerons.


 With so many tools that we have, we can be better, faster, and more efficient.  But don't forget to use those tools to be come something else. 

Become more curious, and always keep learning! 

Monday, August 08, 2016

The Art of Development - Give Your Content a Chance to Mature!


Today is a "5 minute" post.  Just a little idea I had while working in Autodesk Inventor. 

In my current engagement, I've taken on creating custom content in Autodesk Inventor's Content Center.  That means creating tables, upon tables of various hardware.  Mostly NAS and NASM hardware.  

It's not difficult, but it takes time, and it takes patience.  And that means there are times that I have to leave content incomplete, not ready to use, but it's still in the shared content database, exposed to the users. 

So that left me with a conundrum.  How do I make sure the users don't accidentally use the content before it's ready to release?  

I thought of the traditional route, which is to put "Do not use" or something similar in the family description, but then I had an idea I liked a lot better. 

I decided to use an image.  Just how graphical images are used to convey important information quickly

You can see the image I used in the screen capture below. 

Can you guess which one you shouldn't use?  


So enjoy the bit of humor I used to break up a long, tedious day.  And perhaps think of how you can use that in your daily projects, for both practical purposes, and maybe a little bit of humor! 

Tuesday, August 02, 2016

Embedding Designs in Autodesk Fusion 360 - My Practical Case

Wrapping up an aircraft maintenance class is a bittersweet experience for me.

On one hand, I miss sitting in a hangar full of airplanes, doing homework, while chatting with my classmates about.... airplanes.

What gearhead wouldn't want a classroom like this? 
On the other hand.... I suddenly have my weeknights back to relax! 

So how did I spend one of my first evenings free?  I took a fundamental lesson I learned in class, and integrated it into Autodesk Fusion 360.  

What was the lesson?  

It starts with something my aircraft maintenance teachers, both my formal instructors and my colleagues with far more experience have continually reinforced. 

"Know your references to your information!  Book, chapter, page, and paragraph!"  Sometimes they would add, "And because your buddy said so does not count!"

That meant looking through a lot of books, real paper books.  If I was lucky, I had a PDF that I could scan through.  But even that took time.

Manuals in Aircraft Maintenance are big, heavy, and required! 


I quickly learned to write down key class info in a small composition book, naturally, I included the relevant book, chapter, page, and paragraph.

My little composition notebook.
But next came rivet spacing.  It's the standard spacing found in the FAA Advisory Circular AC43.13

The image from AC43.13. 


Sure, I can write it down in my composition, and naturally, I did!   But I also decided that I would build it in Fusion 360, just for a little practice.

The completed rivet pattern in Fusion 360


But as I finished up my little practice exercise,  My teachers words echoed in my mind.

How can I make the most use of this.  How can I make the information available.

Why?  It's available to anyone with the link, and it's a good visual representation of the finished product.  (Note that AC43,13 is referenced in the title block)


It's a link in the chain of information.  Just like I was taught, it's part of knowing where to find the information.

And it's not about knowing the information, it's about knowing where to find it!

So here's another example of embedded information in Fusion 360.  If you'd like to see the full steps, I wrote a post on that subject here.

Take a look!  And see if it can help you! .  

Sunday, July 24, 2016

5 More Things Aircraft Maintenance Taught Me.

I've been busy.  Crazy busy.  It's why I have been really bad about blogging.

The last five weeks, I've been taking an Aircraft Maintenance class.  This class is mostly book work, as a matter of fact, it's all book work!

It means many a night of being the first up in the morning, and the last to bed at night.

My days start at 4:30 AM.  They end at 11 PM at night.

But while it's time consuming, and at times frustrating, it's good to learn new things.

This includes everything from basic math, to FAA rules and documentation, to Calculations of Weight and Balance.

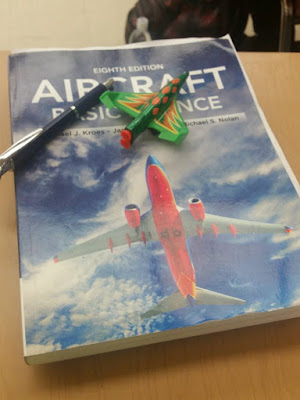
My text book.  I found the toy airplane laying on an airport tarmac.
Being a strange place to find a toy, I took as my "learning'" totem.
It reminds me to find joy in learning new things.

I could bore you with the details  of moments, engineering notation, Form 337, and AC43.13, but that wouldn't be much fun, would it?  Calculating the empty weight center of gravity of an aircraft isn't exactly the pinnacle of excitement!

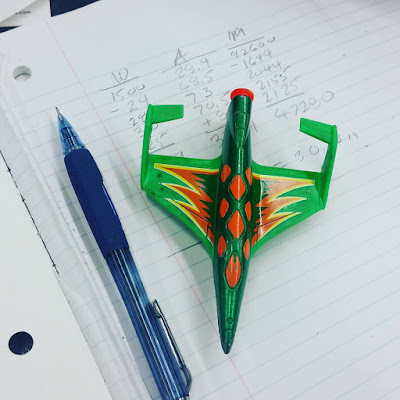
Empty weight CG calcs.  With my learning totem.
I'm sure you can hardly contain your excitement.

And I get more out of these classes than that.  These are lessons beyond the syllabus, things I've observed in those times I look up from my textbook and observe the environment around me.

So what things did I learn?

1) Look for the inspiration of others. 

I look around my classroom and see many a 20 something "kid".  And some of them struggle with the course material.

I suppose I could make some snarky comment about the failure of public education or "those lazy millennials".

But the truth is, I've seen many of these students curse under their breath, then put their nose back into the book and try again.  And again.  And again.

They refuse to give up.  And then they succeed.  They succeeded because they were just to stubborn to give up.

2)  Class May End, but the Learning Doesn't

Being in a constant observation mode has made me better at learning.  And learning everywhere. I go. Sometimes its a document I find doing research for work has applications at school, sometimes its realizing that knowing how to safety wire means I'm better aware what it takes to make a design work.

Sometimes it's knowing when to listen when an old mechanic has something to teach you.

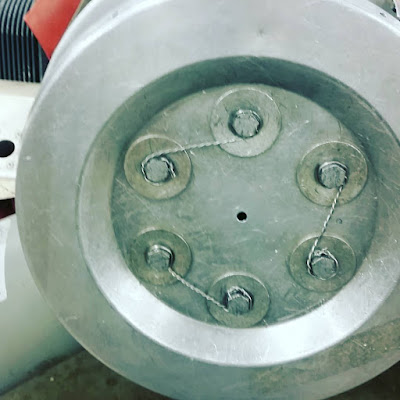
Safety Wire that I tightened.  Not bad, but it could be better.
Next time, it will be better. 


The lessons are many, and they breed other lessons.

3) An Ounce of Patience Can be Worth a Ton of Rework. 

One habit I continually struggle with is the desire to hurry.  Much of my career has been spent in the "hurry up corporate offense".  But many times the plan needs to look like
  • Read the manual
  • Form a plan
  • Reread the manual
  • Adjust the plan
  • Execute the plan
Why?  I've mad the mistake of hurrying.  Then had to redo something because I rushed the job.  The result?  The whole thing took a lot longer than just doing it right the first time. 

Obvious?  It should be, do I always follow that advise?  Not as often as I should.
\
But I follow it a lot more than I used to.

4) Experts Know What They Don't Know.

The best aircraft technicians, and best mentors I've had, have the repair manual close by.  Do they know their job?  Absolutely.  They're some of the best you'll find.  

But they also taught me, "When in doubt, you'd better check that manual!". Why?  They know that they can't memorize every last little detail.  But the manual has everything they need.  

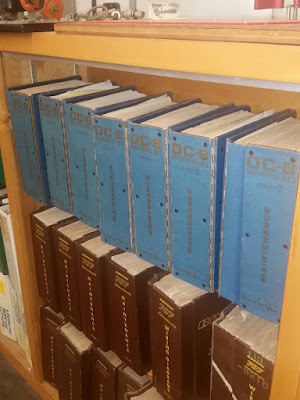
Maintenance Manuals.  The best friend you can have. 


When I first started taking these classes, I figured I would be working on my own, spending a lot of nights studying.  But something quite amazing happened. 

Help came.  It wasn't help I asked for, it was help that came to me. 

People found out I was taking these classes, and they helped me. They shared their knowledge.  Sometimes it was a few helpful tips.  Sometimes they handed me a drill and said "You're going to learn how to drill out a #30 rivet today".  

Sometimes, it was a few kind words of encouragement when the long days seemed to be too much to bear. 

I didn't go seeking these people.  I simply found myself in the right place at the right time.   And when they saw me trying to help myself, they helped me stand taller than I could on my own. 

All it came with was a silent request that I return the favor when someone else needed it.  And I promise them that I will. 

In Conclusion

Here are 5 more things I learned from my Aircraft Maintenance classes.  Do I expect you to take your own maintenance classes?  No.  Of course not. 

But I'd encourage you to find your own "5 things".

Never quit learning, never quit looking for inspiration, and look for it in whatever form it takes.