
“He's been a part of the whole run.”
Gary McNamara
My last post, I talked about 5 tips that could be used in Autodesk Inventor Sketching. Now, I've decided to go ahead and share a few tips in Autodesk Inventor part modeling that everyone may be aware of.
They're quick, they're simple, and they work for me. I hope that the 'Verse out there can find a use for them too!
Just like before, the order doesn't imply a preference, just the order the popped into my head.
1. Create an offset workplane at the same time a sketch is created.
It's a pretty common practice to create an offset workplane, then to follow that up with a sketch. An example would be creating a boss that's being attached to a cylinder.
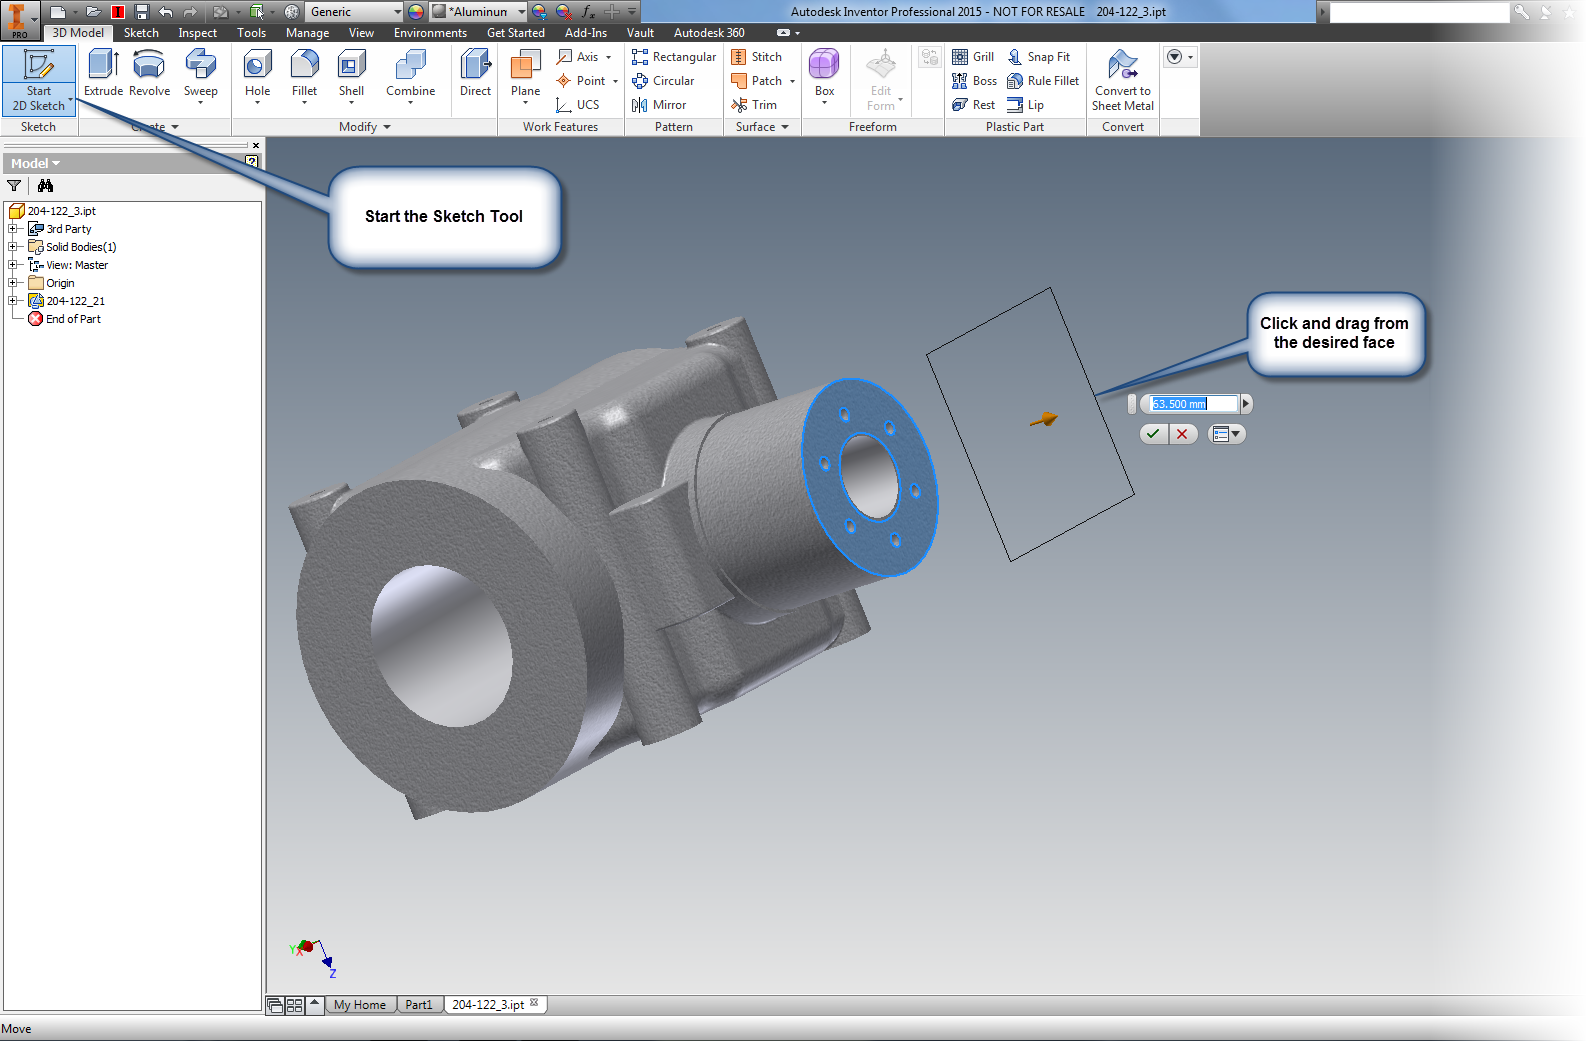
But did you know that you can create both the plane, and the sketch at the same time? Here's how!
Start the sketch tool in which ever way you prefer. Then much like you would create the offset workplane, drag the sketch. The workplane and sketch will be created at the same time!
 |
| Dragging the sketch and workplane at the same time. |
 |
| The one sketch, one offset plane, one motion! |
2. Select Other
I don't think this tool gets the credit it deserves.
In brief, if there are selectable objects stacked on top of each other, the select other tool will help you pick through the part, and select additional entities, even if they're not visible. For example. the Select Other tool will let you pick the back face of a part.
One way of accessing the tool is to hover for 2 seconds over the desired selections. The other is to right click over the desired selections and choose the tool from the right click menu.
 |
| The Select Other tool in action |
 |
| Changing the time it takes for the select other tool to appear |
3. Sweep along an edge.
This function has been around for a few releases. And that's the ability to use the Sweep tool along an edge. Once upon a time in Inventor, a second sketch was required to generate a swept path. Many may still be using it the way "it used to work" still do that. However, it is possible to just use an existing edge instead of creating a whole new sketch.
 |
| Sweeping using an edge. The edge is highlighted, but not selected yet. |
4. Create a four hole pattern using a sketch
Inventor has been able to create holes using sketches since I started in Release 4. As a matter a fact, at one point it was the only way to do it. And while it could be considered an older tool, it's still a very useful tool.
One place it can be used very effectively is to create a four hole pattern, such as mounting holes in a lid.
I like using this, instead of a pattern for one big reason. I don't like doing math with the four hole pattern. Call me lazy. Using the offset tool allows the sketch to be offset with one dimension, and the offset will be maintained should the overall dimensions change.
In order to do this, create a sketch and offset it's perimeter using the offset tool. Next, just finish the sketch, and start the hole tool. All that's left to do is place a hole on each corner of the offset rectangle using the From Sketch option. Choose the hole type and go!
 |
| Using an offset sketch to create a four hole pattern |
This is two tips combined in one, but they often work in conjunction. That's why I'm combining them.
These tools are most often used when a feature needs to be created on the interior of a part, such as an O-ring groove inside a part. Slice Graphics will virtually "cut" the part, while project geometry will project the edges cut by Slice Graphics so they can be used in the sketch.
To use Slice Graphics, start the sketch on the plane intersecting the part, and choose Slice Graphics (or hit the hotkey F7).
Once Slice Graphics is enabled, the model will be sliced at the sketch plane. This is a virtual slice, like an XRay or MRI. No material has actually been removed.
Next, click the Project Cut Geometry tool (it's on the flyout under Project Geometry), and select the model. The edges of the virtual cut will be projected onto the sketch. Now that sketch can be used to create the geometry used to create the feature.
 |
| Slice graphics and project geometry already selected. The icons are highlighted. |
So there are a few tips you can use when creating parts in Autodesk Inventor parts. I hope that they're something you can start using right away.
******************Edit 23-September-2014 Added Video (Finally!)************************
At long last the promised video! Take a look to see these tips in a video format!
No comments:
Post a Comment