Find us on Google+ September 2010 ~ Inventor Tales

Sunday, September 26, 2010

Inventor Customization - Using iLogic to Raise a Yellow Flag

“Time is the cruelest teacher; first she gives the test, then teaches the lesson.”
Proverb

With KETIV's Autodesk Manufacturing Academy getting nearer and nearer, I've been working heavily on my iLogic class.  As a result, this post is about, what else?  iLogic.

As I worked on developing my iLogic exercises, I found one place that would have been helpful in a past job working with electronic enclosures. 

I did a lot of work with Electronic enclosures that had to meet NEMA enclosure ratings.  We regularly used Hoffman boxes.  I downloaded this file from their website HERE.

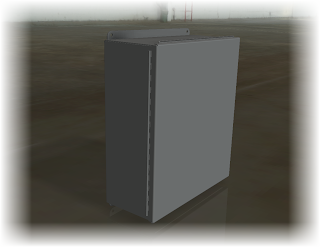
Ahh, The Hoffman enclosure.  I know thee well.


If you want to read about the ratings, feel free to follow the link, it's good information.  For the purposes of this post, let's just deal with indoor, and outdoor applications.

I dealt regular dealt with outdoor (more robust, but expensive) and indoor (less robust, but less expensive) enclosures.  Needless to say, you didn't want to mix them up. 

An outdoor rated enclosure in an indoor application is overkill.  It costs too much, and the gains in exposure resistance aren't beneficial.

On the other hand, you don't want to use an indoor rated enclosure in an outdoor application.  The box isn't designed to meet those requirements, and moisture is likely to get inside the box and damage the components the box is intended to protect.

Back when i was in this line of work, you had to check the box part number and be sure.  while this wasn't difficult, it was sometimes a painstaking step, and there were times that mistakes happened.

Fortunately, one of these mistakes never made it beyond the computer, but it did result in lost time as the wrong box was removed from the model, the correct box (which may not have been the same exact size) was placed in, and the components placed in the box again.

So how does iLogic help?  With one, simple line of code, I can create a warning that will tell me the rating for this enclosure.  So I know right away if this is an outdoor rated enclosure, or an indoor rated enclosure.


Yes it's simple, but it can also be effective.  And sometimes little extra warning is all the help we need.

Sunday, September 19, 2010

It's Automagic! The Drawing Resource Transfer Wizard

“He's got tools. Something to see.”
 Sid Monge

Necessity is often the mother of invention, and last week proved no different.

I was creating a large number of drawings for someone, and we were faced with something that, while easy, can be exceedingly tedious.

We needed to update title blocks in several drawings.  There were only about ten or twelve, but copying and pasting each one can be time consuming.

So instead, I used a tool to help automate the process; the Drawing Resource Transfer Wizard.  It can be found from Windows Start>All Programs>Autodesk>Autodesk Inventor (version)>Tools

The Drawing Resource Transfer Wizard

So how does it work?  Let's roll some footage and take a look!


This tool really helped me transfer the title blocks quickly, without having to do a bunch of copying and pasting from drawing to drawing. 

One thing to watch out for.   While the Drawing Resource Transfer Wizard will try to match up all the properties in the new resources, but it may not be able to do it in every case.  In other words, it pays to double check when everything is done.

In my case, I had to open the drawings to create final prints, so I checked the title blocks along with he dimensions, views, text, etc. that I had to check anyway.

In the end, this tool saved me the trouble of having to do a lot of tedious work, and let me focus on more important (and fun) things.

Happy Inventing!

Sunday, September 12, 2010

Change Model Reference - Making the Switch

 “There are no answers, only cross references”
 Proverb

Every release of Inventor brings many new features.  So many, in fact, that some useful features can get easily overlooked. 

To this end, I've decided to revisit one of those, 'subtle but significant' features; Replace Model Reference. 

Change the Model Reference

This particular feature is actually available from the 'Subscription Advantage Pack' for Inventor 2010.  If you're on subscription, those files are available from the Autodesk Subscription site.  It was made available to everyone with the release of Inventor 2011.

What does this tool do?  It lets you change the model an Inventor drawing is using to generate it's view.

Why would I use it?  If you've ever tried to parts, assemblies, and drawings, in Inventor, you've seen that the drawing you've just copied wants to reference the original part or assembly. 

The old trick was to rename the original files, and force the drawing to ask you for it's reference file.  You'd point it to the new copies, and you'd be off and running (after renaming the originals again, of course).

Effective, but a little inelegant.

But by clicking the Change Model Reference button, you can open up a screen that allows you to select the current reference, and then browse to redirect it.

Choose view, and browse to new reference

Clicking the browse button, you can select a new model.

Choose your new file

Once that's done, the new file will replace the current one.

There it is.  The new reference!

Bear in mind, while Inventor will try to keep the dimensions it can, but it may not.  It all depends on how different the view is.  If it's totally different, all best are off.  But, if you've just created a copy, it's pretty solid.

So there it is.  Give it a whirl.  It's a great help!

Happy Inventing

Monday, September 06, 2010

Obeying the Rules - Enforcing Length using iLogic

“Hopefully my experience can help a little bit. I'm just a small piece of the puzzle.”

 Ed Jovanovski

One simple, but effective case I've see for iLogic is to prevent someone from inadvertently call out a length longer than what can be purchased, or manufactured by the tooling in the shop.  If caught too late, the ramifications of calling out the 'unobtainable' length can cause a lot of rework as the design is corrected.

Fortunately, a few lines of code in iLogic can help with that.

In this video, I describe how iLogic can be used to limit the length of a sample extrusion to 60 inches or less.


There's tons of things that can be done with iLogic.  This is just a small example.  I hope to post more as I go!

P.S. Here is the code that I used to create the rule.  My comments are below each line of code

iLogicVb.UpdateWhenDone = True
'updates part after rule finishes running

If Length > 60 in Then
'The if statement telling iLogic that something is to be done if the parameter 'Length' is longer than 60in

MessageBox.Show("Length cannot be longer than 5ft", "Design Violation")
'Displays a message box stating that the length can't be longer than 5ft

Length = 60 in
'Resets the length back to 60 inches

End If
 'Ends the if statement.