Sharon Begley
It's been a busy week this week! So unfortunately, I haven't had a chance to build videos. But instead of holding the post back, I'd rather share what I have now.
I'm hoping to build the videos a bit later, and add them in! In the meantime, I hope the post below is helpful!
I recently found myself doing indexing AutoCAD block attributes into Autodesk Vault. During this process, I thought to myself: "Self, this is probably something that should be documented".
So I decided to share it here!
First, the "Setup"!
I've created a block with just one attribute in it. FACILITY NAME. What I would like to do, is place this file into Vault, and make the facility name a property that can be searched by within Vault.
The first thing I want to do is take note of the block name in Vault. This can can be accomplished in AutoCAD, and selecting block, and using the command BATTMAN (for batch attribute manager, not the Caped Crusader).
Next take note of the attribute tag that's going to be indexed in Vault.
In this case, the tag is named FACILITY_NAME. This is important for the next step, where Vault is "taught" what information to read from the block.
Now that the tag name is known, it's time to open up the Autodesk Data Management Server Console (ADMS). Once logged in, select Tools>Index Block Attributes.
Selecting this tool will open up the Index Block Attributes dialog. Choosing the New button will bring up a dialog where the block name is entered.
Make sure to type it exactly as it appeared in AutoCAD!
Accept and close the dialog boxes.
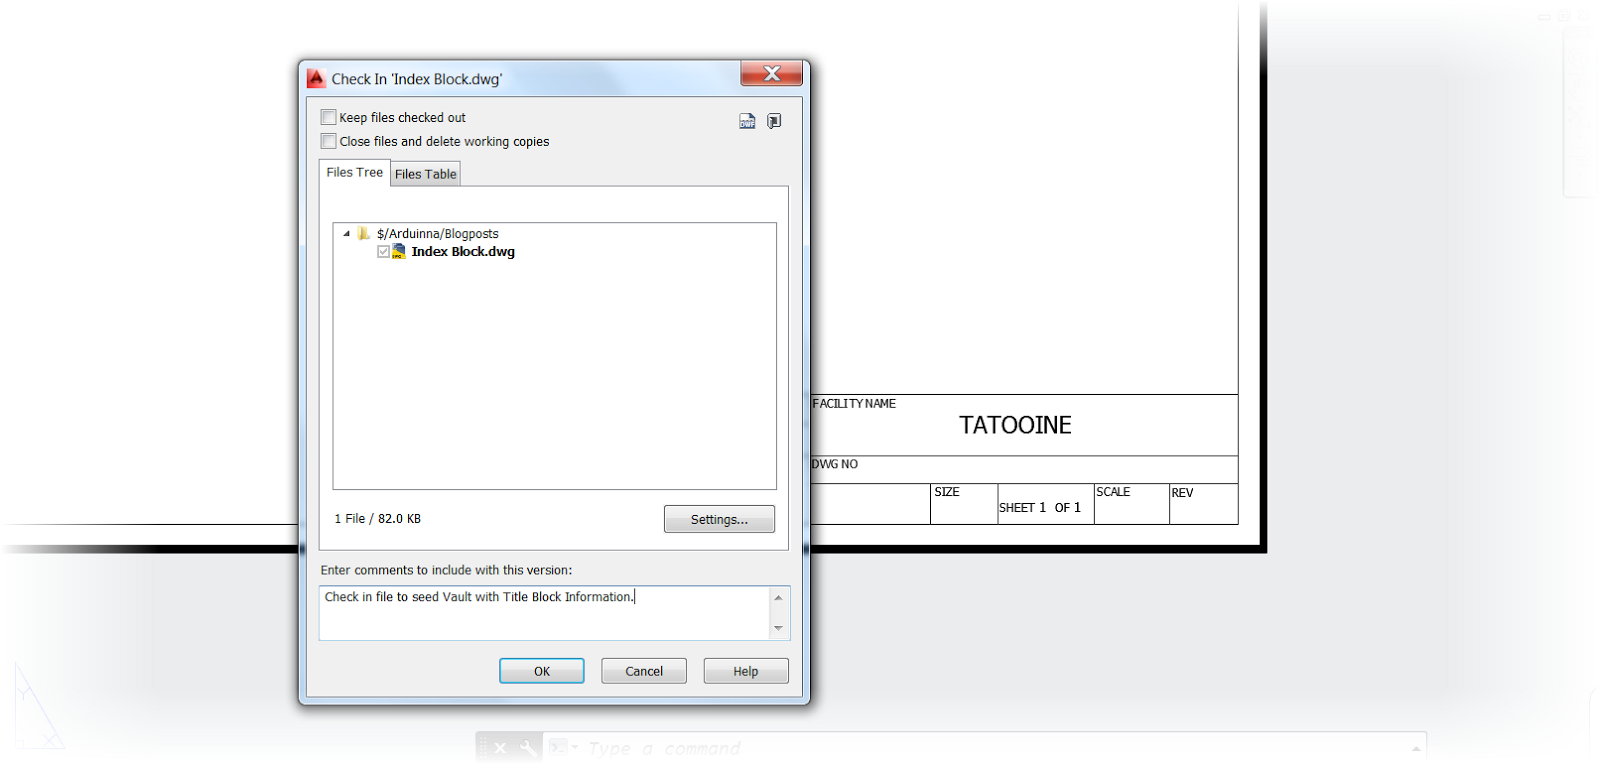
Now, Vault needs to be seeded with a file containing the block to be indexed. The first step in this process, is to check in the file in Vault.
 |
| Checking the file into Vault |
Now with the file checked into Vault, the appropriate property needs to be created and mapped.
First, go to Tools>Vault Settings.
The Vault Settings dialog box will appear. Choose Properties from here.
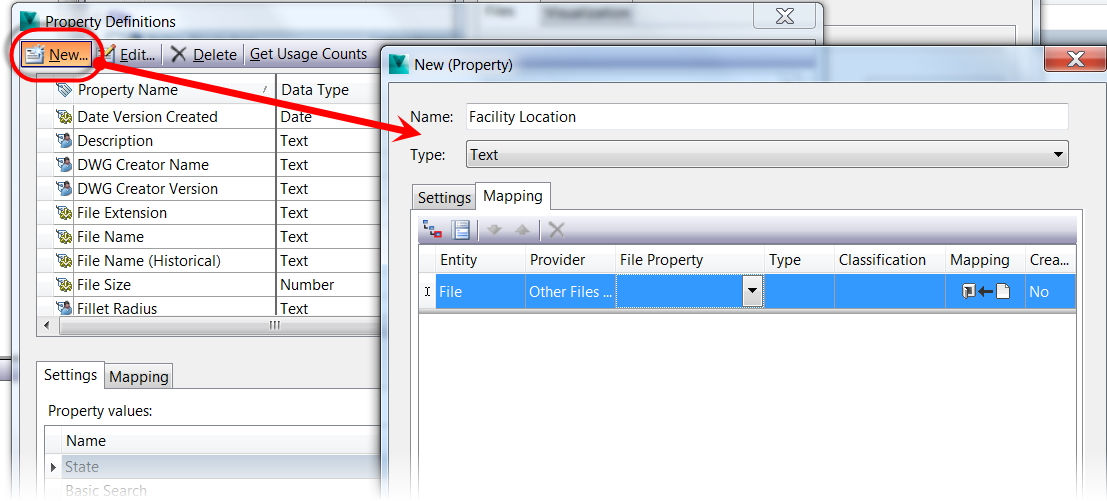
Now, it gets fun! Click the New button to create a new property. I'm going to call it "Facility Location".
 |
| Add caption |
Click in the empty File Property box to bring up the "Import Properties" button, and choose Import from Vault.
.
Now the seed file can be located by browsing in Vault.
The list of properties will appear. Browsing through the list will yield Title Block Enter Facility Name, which is exactly the property that's needed!
Accept this value and close all the dialog boxes. There are a few more steps to go, but not too many.
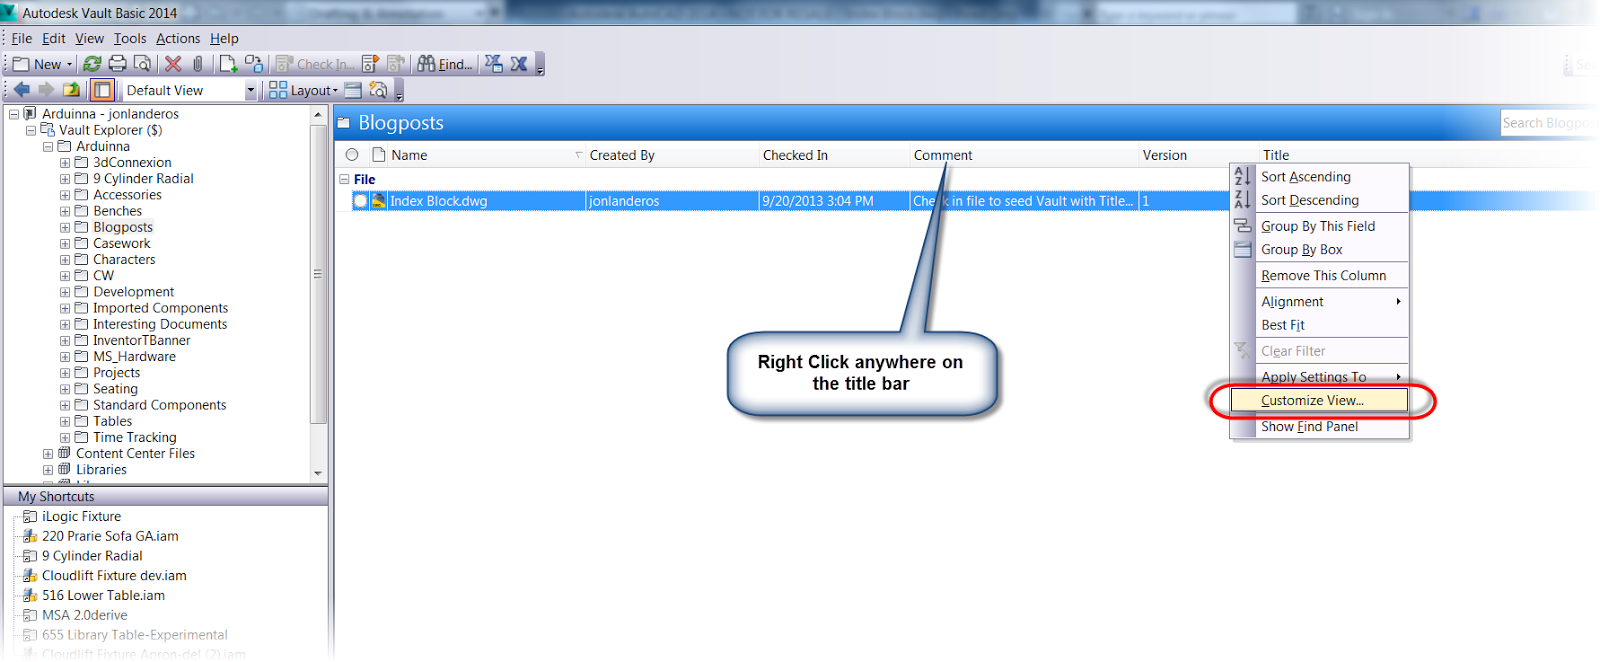
Using Customize View, make the new property in visible in Vault Explorer by right clicking on the title bar in Vault Explorer and choosing Customize View.
 |
| Customizing the view |
Accepting this, the field will appear in Vault Explorer, but there's one issue. It's empty!
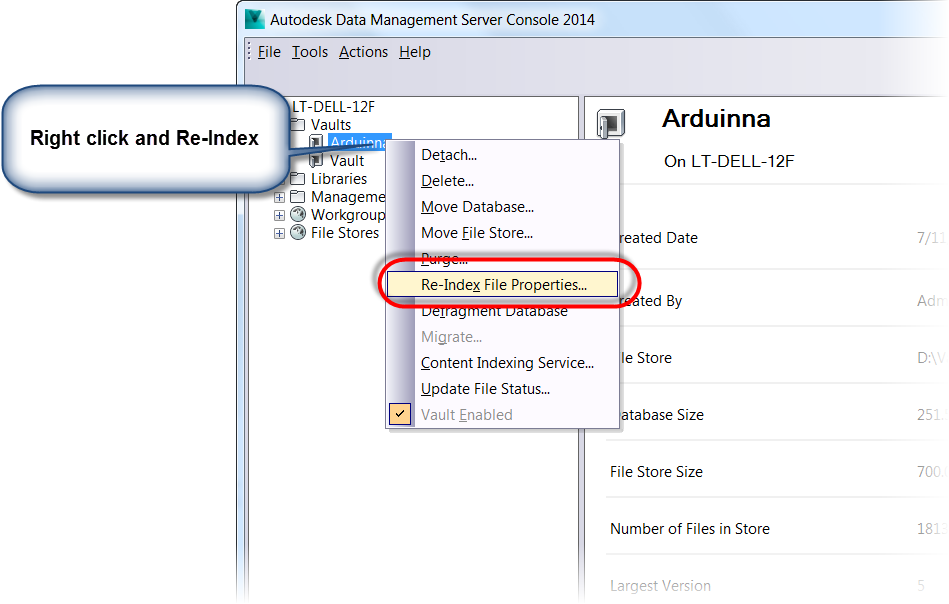
There's one more step left. Return to the ADMS Console, and select the desired Vault, and choose Re-Index Properties. This will reread the properties in Vault, including the one just added.
Note that this process can take a while if there are a lot of files, so give it some time to finish. If there are a lot of files, it could take over an hour.
 |
| Re-Indexing the properties |
Now, after the files have Re-Indexed it's time to return to Vault Explorer and refresh the screen by hitting F5.
 |
| Now the property is visible! |
At long last, the process is finished!
I know this seems like a long winded process, and I wouldn't disagree that there are quite a few steps involved. After all, I just spent hours writing them all out!
But now that it's done, it's done. Any additional AutoCAD files that contain this block will populate the fields from this point forward. So the heavy work is done, now it's time to reap the benefits!
 |
| The properties are done! |
Give it a try! It can make a big difference automating those much needed steps!
****************************Edit 13-October-2013************************************
I've added the videos to accompany this blog post!
*****************************************************************************************
Part 1
Part 2


Very informative article.
ReplyDeleteIf a DWG file contains more than one attributed block with same name, can we mainitain Vault UDPs with multiple values?
Anonymous, in my experience, if there are multiple attributes with the same name the Vault Property will only take one value. So in this case, it wouldn't maintain multiple UDPs.
DeleteI nearly forgot. Check out this post here for help indexing properties into Vault!
Deletehttp://www.inventortales.com/2013/09/linking-autocad-block-properties-into.html