Mila Kunis
Custom Content Center in Autodesk Inventor can be extremely useful. It can help organize custom parts, providing a central place to maintain and manage them.
But it when in use it a production environment, it can be a challenge to work with, simply because users are accessing it at the same time new configurations may need to be added or changes to content may need to be tested.
Fortunately, with a little planning, there's a nice way to take a copy of Custom Content out of production and work on it off line.
But, before I wade too deeply into this particular post, there's one thing I would like to clear up. It's something that I don't always think is clearly explained. It's just sort of assumed.
What exactly is a Content Center Library?
What a Content Center Library is not, is a list of folders upon folders that can be browsed for Inventor parts. Content Center Library is a database with the necessary numbers and mathematics to build Inventor parts.
This Libraries can be configured to be accessed from one of two places. The first, is Desktop Content, where the Content Center Libraries are stored outside of Vault.
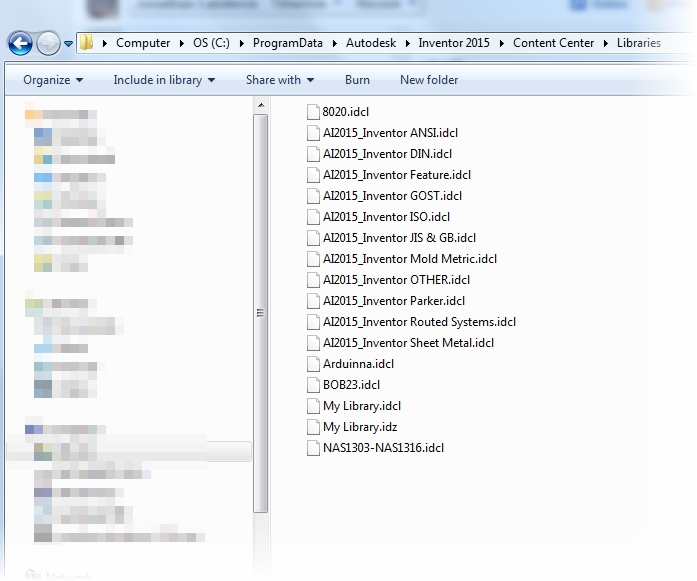 |
| Example of the Desktop Content Libraries |
The other, as Vault Content, where the libraries are stored with the Autodesk Vault databases.
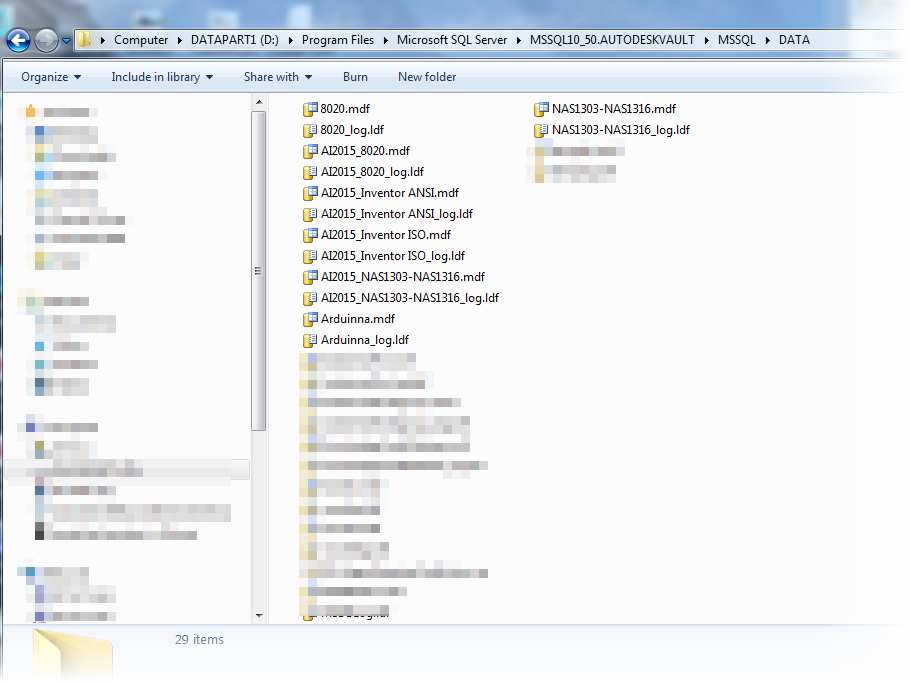 |
| Example of the Autodesk Vault Content Libraries. Note that not all libraries are installed here. |
Regardless of how the Content Center is configured, it essentially functions in the following manner.
- User requests a component from the Content Center, by using Place from Content Center, for example.
- Content Center will then check the folder where it publishes the data to see if the part has been previously created. This location is set by either the Application Options, or by the Project, incidentally.
- If it has, Content Center will place that component in the assembly
- If it has not, Content Center will build that part, and place it in the assembly.
So why would one be chosen over the other?
Vault Content is typically used when Vault is being used to manage data. With the Content Center Libraries stored with Vault, they can be centrally managed with other Vault databases. Also, and very importantly, the Custom Libraries can be backed up with the Vault backups, making sure all that critical is kept safe and sound.
The case for Desktop Content comes primarily when Vault isn't being used. Vault Content requires the installation of the Autodesk Data Management Server (ADMS). Using Desktop Content prevents having to do install ADMS just to run Content Center.
Another possibility is... Why choose one? There are some users who will run Desktop Content event when running Autodesk Vault. Why do this? On its face, it may seem a bit backward.
These users may be mobile users, who check out files from Vault, and leave the office. They check out files, work on them, but don't check them in until they return to the office. Having a copy of desktop content ensures that they can access content, even off site.
Another reason is for users Content Center Administrators. They may need to test content locally before publishing it to Vault Content. Using Desktop Content provides a twofold benefit.
First, they can use Desktop Content as a "sandbox", testing configurations before they push them out to production.
Second, it can provide an additional backup. Should something happen to the Vault Content Library, the Desktop Content can be pushed to Vault without having to restore the entire Vault! That can come in handy, and prevent having to restore an entire Vault to save content.
Imagine the downtime that could save. Just think about that a moment.... This is where I was really going with this post when I started it, way back about six inches up the page.
But with that said, how is it done?
First, where Inventor is accessing it's Content Center Libraries can be selected in Tools>Application Options on the Content Center tab.
This can be done whenever needed, but in this case, I'm going to switch it now. Why? I intend to use the Desktop Content next, because I want to test a new configuration.
This can be done whenever needed, but in this case, I'm going to switch it now. Why? I intend to use the Desktop Content next, because I want to test a new configuration.
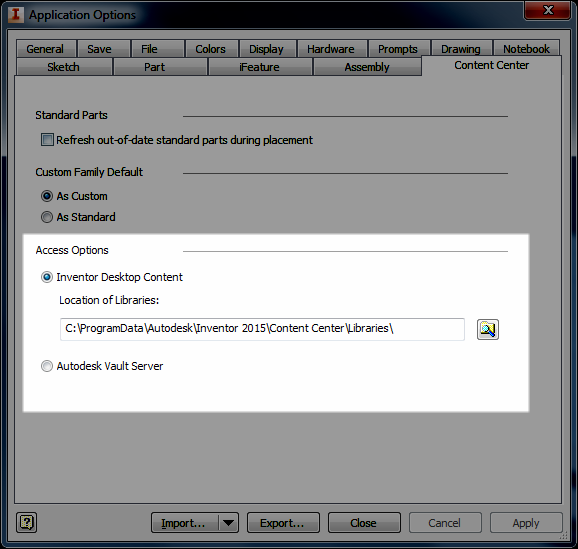 |
| Selecting the location Inventor is pulling Content Center From |
But this only tells Inventor where I'm accessing my libraries from. It doesn't sync the libraries. For that, there's a different step.
Let's say, for the sake of my example, that I want to take a copy of Vault Content and transfer it to Desktop Content so I can test some changes before pushing them to Vault Content. I also have several libraries in my Content Center so in this case, I'm going to work the the library containing NAS standard bolts, it's called NAS1303-NAS1316.
To make the transfer, I go to the Get Started tab, and choose Projects.
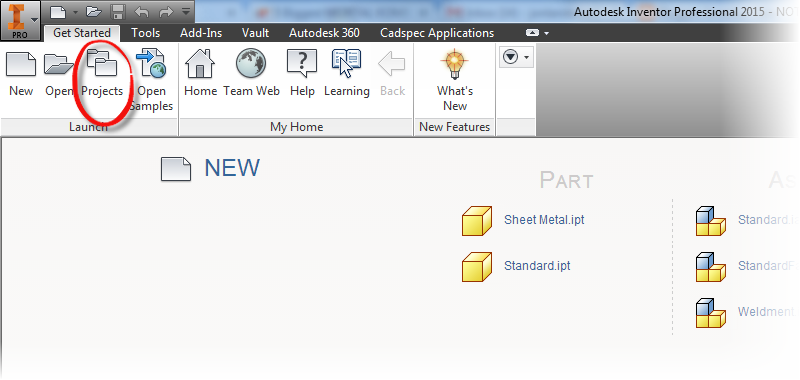 |
| Locating the Project Icon |
Now, once the project screen opens up, I need to choose "Configure Content Center Libraries" for the Content Center I'm working with.
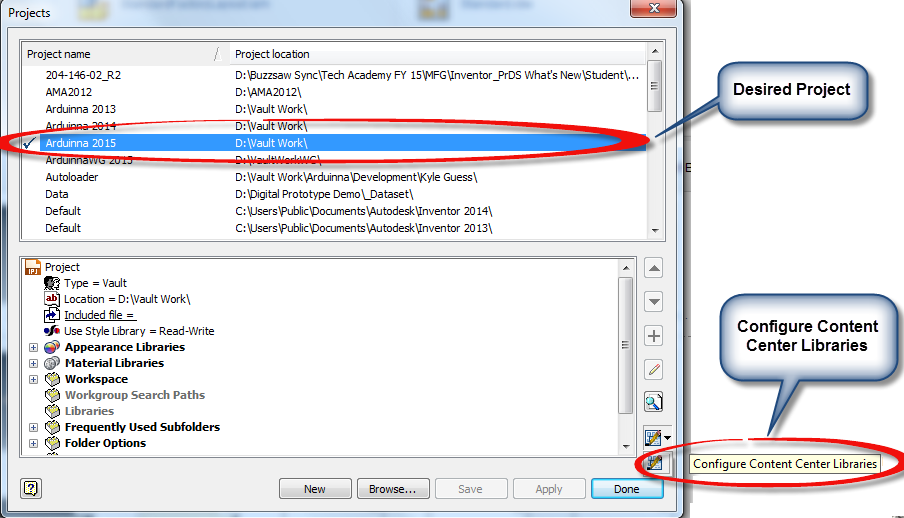 |
| Selecting the Configure Content Center Library option |
I can see where my content is currently being accessed from, and which are being used by this project. And from the bottom, I can choose the Library Transfer Guide, where I can transfer a library from the Vault Content to Desktop Content, or vice versa.
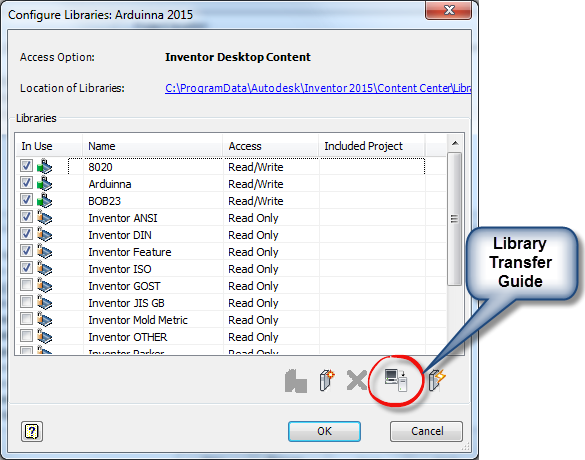 |
| Selecting the LIbrary Transfer Guide |
Selecting the Transfer Guide, I now get to choose which direction I want to transfer the libraries. In this case I want to transfer from Vault Server to Desktop Content.
Why? It's my intention to transfer Vault Content to Desktop Content so I can work on it offline. In the meantime, Vault Content can remain available to my users.
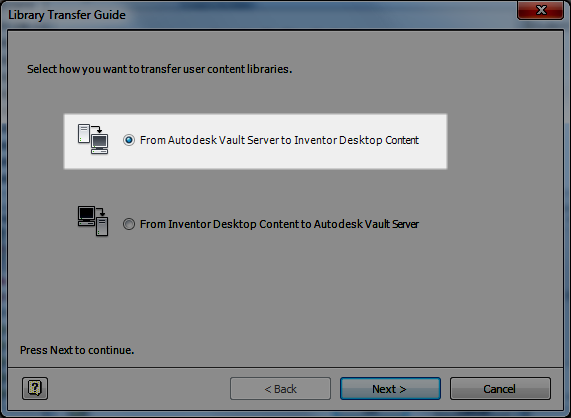 |
| Choosing which direction to transfer the content |
Choosing next, I can step to the next screen, I 'm asked to log into my Vault, which I do.
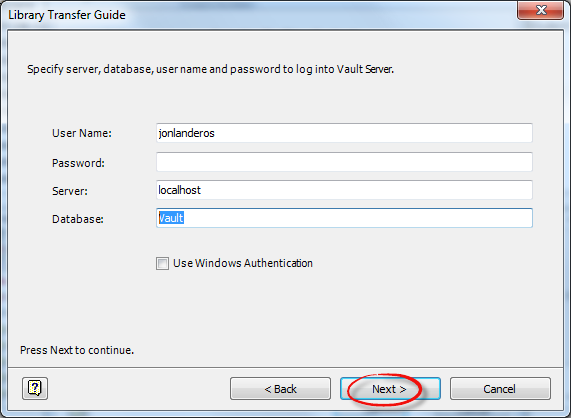 |
| Logging into Vault |
Now getting past this step, I go ahead and choose the library I'm transferring. Also note that the Custom Libraries at the destination are listed too. I chose my NAS1303-NAS1316 library, and click next.
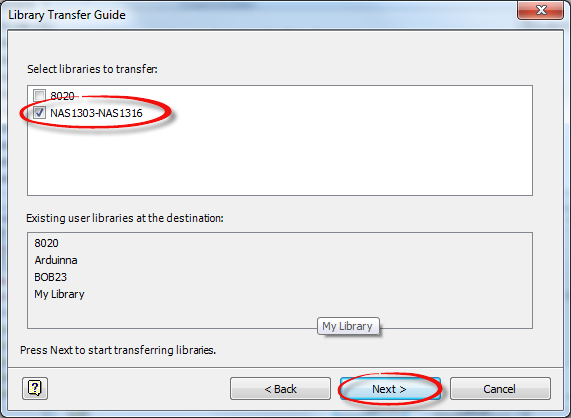 |
| Choosing which library to transfer |
The library will transfer, and after a few moments, depending on the size of the library, the process will complete.
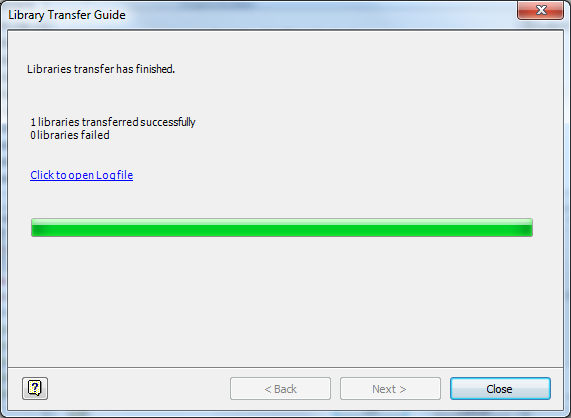 |
| And we're done! |
Now, I hit close. On the next screen, I make sure to check the library I intend to work with. Why? I need to make sure it's available to this project, or else I can't edit it!
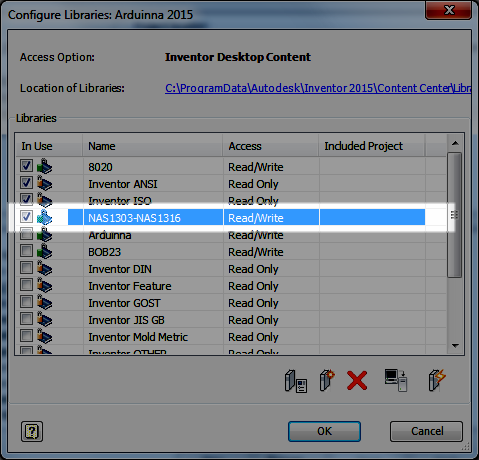 |
| Making sure the library is available to the project |
Now I can close all my screens, and if asked, save the project. Now, I've accomplished two things.
- I've set Inventor to use Desktop Content
- I've transferred Vault Content to Desktop Content.
Now I can make changes to the library in Desktop Content, and test them while the content in my Vault Content is safe.
Once I'm happy with my results, I can transfer my Desktop Content to Vault Content by reversing the steps I've performed above.
But there is one last thing to be aware of! In order to make the transfer, the previous library occupying the space will need to be deleted! Why, the Library Transfer Guide can't overwrite content. It's not difficult, but something that does need to be planned for.
Just make sure that the Vault is properly backed up, and that Custom Content was backed up with it. If it's Desktop Content that needs to be backed up, just copy it to a new location, where it will be safe! And you're all ready to go!
Wow, this was a long post! But one I think was worth the time. Take a look at it, and make good use of it!
And this isn't the only way this could be done. Depending on configuration, and preference, there might be a few ways to approach this! Feel free to share if you have a different way of doing it!
And on a final note, for more information on editing content, check out my posts on that subject here! There's a few, so follow the links!
And if you'd like the NAS libraries I used as an example, I've posted them to GrabCAD here!
***********************************************************************
Edit 13-July-2014 - Added Video to Accompany Text Post
***********************************************************************

No comments:
Post a Comment