
And I'm going to choose the automatic thickness detection in sheet metal.
In short, when converting a model to sheet metal, Inventor 2016 automatically detects the material thickness, versus the "measure and copy" method of previous Inventor versions.
The process starts out with a part in the Inventor part modeling environment. In my test, I used a base solid, as you might see in an imported file. It's currently a "standard" Inventor part, and hasn't been turned into a sheet metal component.
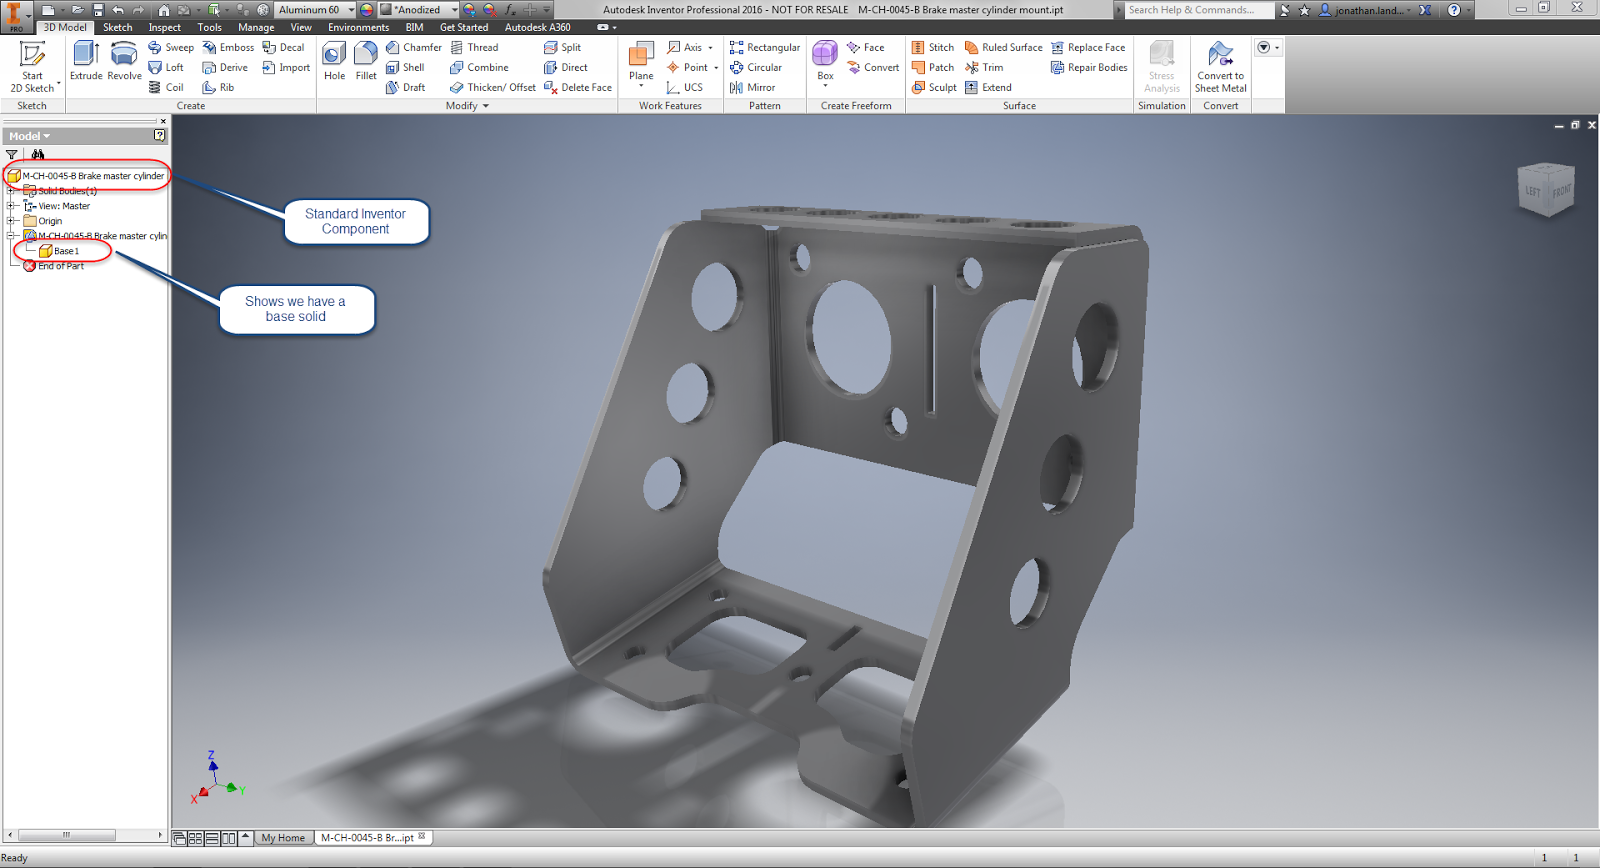 |
| Starting with a model that needs to be converted to sheet metal |
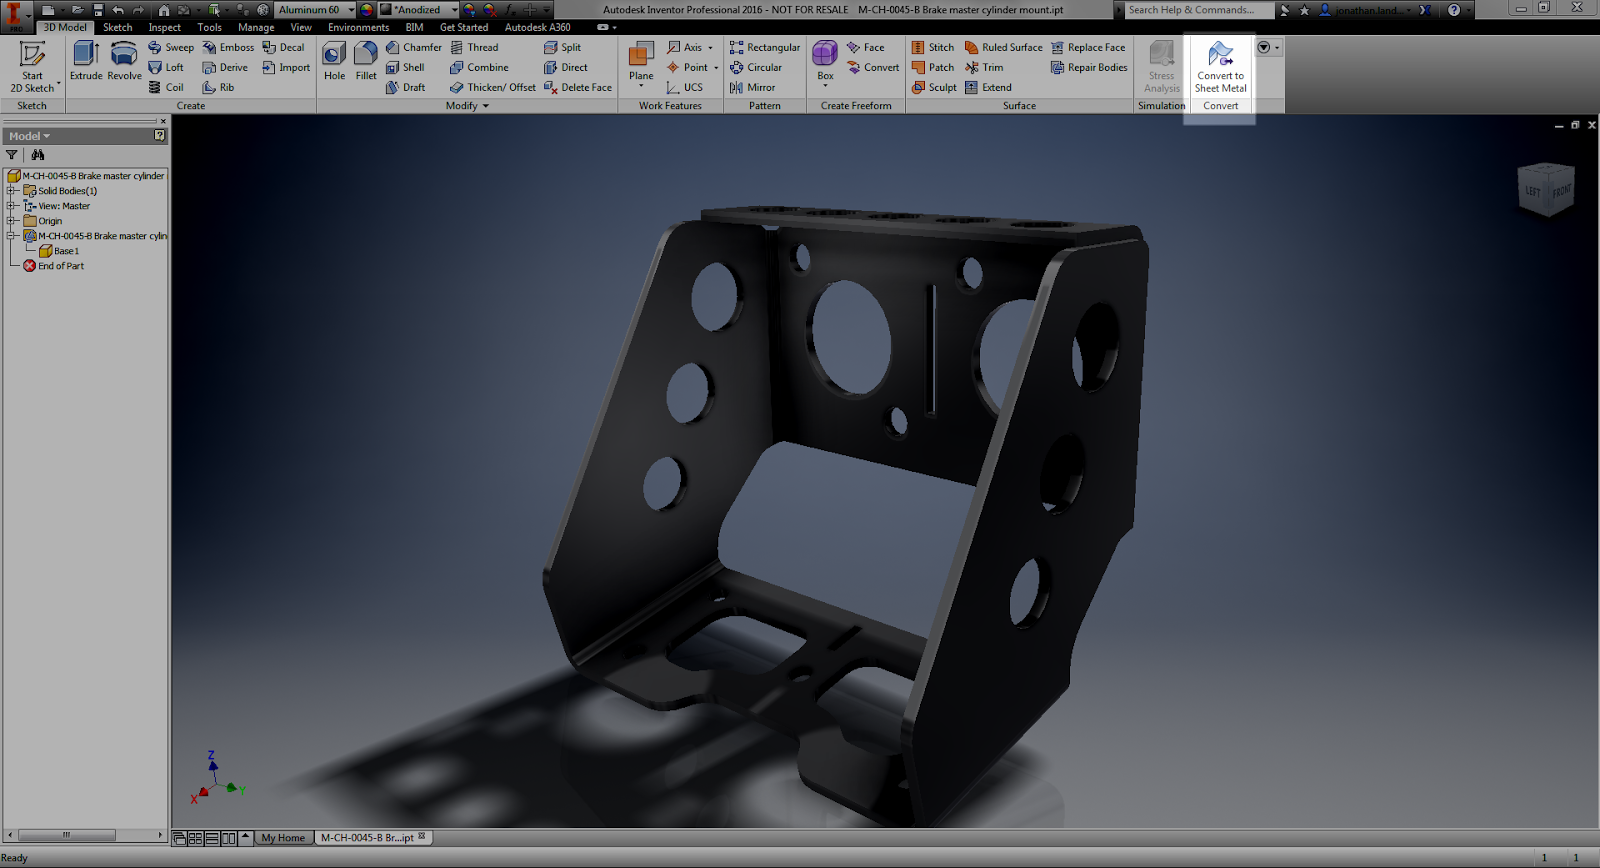 |
| Now, convert to sheet metal. |
 |
| Select the base face for unfolding |
Once you select the base face, Inventor will open the Sheet Metal Defaults dialog box, and display the thickness as measured in the Thickness field.
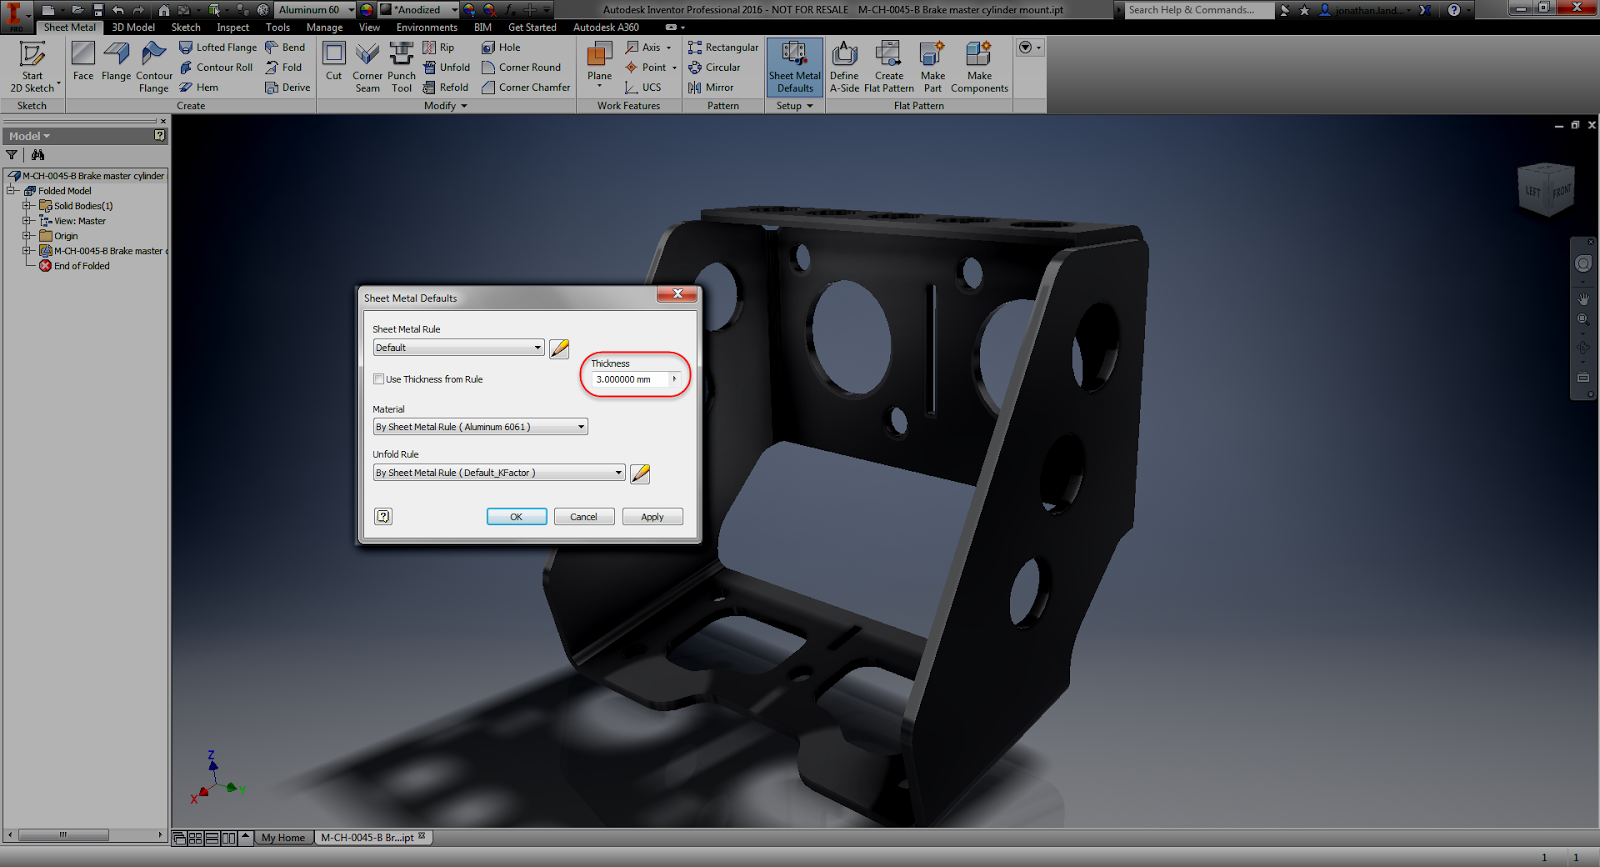 |
| The Sheet Metal Defaults screen confirming the sheet metal thickness |
 |
| Time to start modeling! |
Give it a try! It's worked pretty well for me so far. I've downloaded two models from GrabCAD, and both worked just fine!
And if you see this post in video form, here it is below!
thanks for share this info with us
ReplyDelete