
I'm running Autodesk Factory Design Suite 2015, with Autodesk Vault Professional 2016.
Because of that configuration, I'm going to start with upgrading my server to Vault Professional 2016.
Why? Vault Professional 2016 can run my 2015 and 2014 based products. So my new Vault server can support my 2014 and 2015 base products. So if I can't upgrade Factory Design Suite right away, I can still access my Vault files.
You might think the next step is to click on that pretty, shiny, setup.exe file, but I would suggest considering a few things first.
- Check the server's system requirements. Do you need up upgrade SQL? Is there enough hard drive space? Is the server's hostname "Wheezy", because that's an accurate description of it's current condition?
- Do you have your Vault backed up? And just because it was running fine the last time you checked, before going to the company Christmas party doesn't mean it still is. Check again!
- Consider running a test upgrade off line, if you have the capabilty. And just because you've got a new server you've named NCC-1701 (you clever geek, you!), you might give Wheezy one last shot at glory before consigning to the Great Beyond. Use it to test your migration off line!
- Finally, if you have any network licensed products, like Vault Professional, for example, get those licenses ahead of time! You're going to need them!
I know preparation steps aren't fun, and they seem like a lot of extra work. I rarely see a Vault migration go wrong, but the Titanic was making great time when it hit the iceberg. You never want to be remembered as "the CAD manager who shut down engineering".
So now, the preparation steps are done. The backups are checked, verified. Finally, it's time to run that backup.
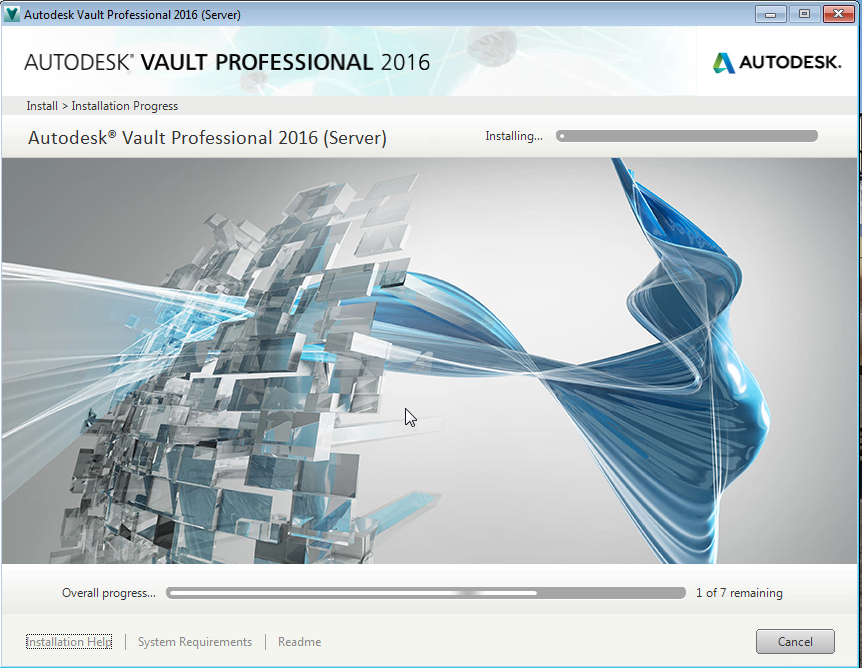
Now, click on the Setup.exe file that you've been getting excited about.
 |
| Launching the Setup.exe |
Once the setup initializes, run the precheck. This is going to identify if there are any issues that need to be resolved before proceeding.
 |
| If you're used to 2015, the precheck has it's own button now |
In my case, I did have an AutodeskDM directory already existing. But if you get any error, click on the link.
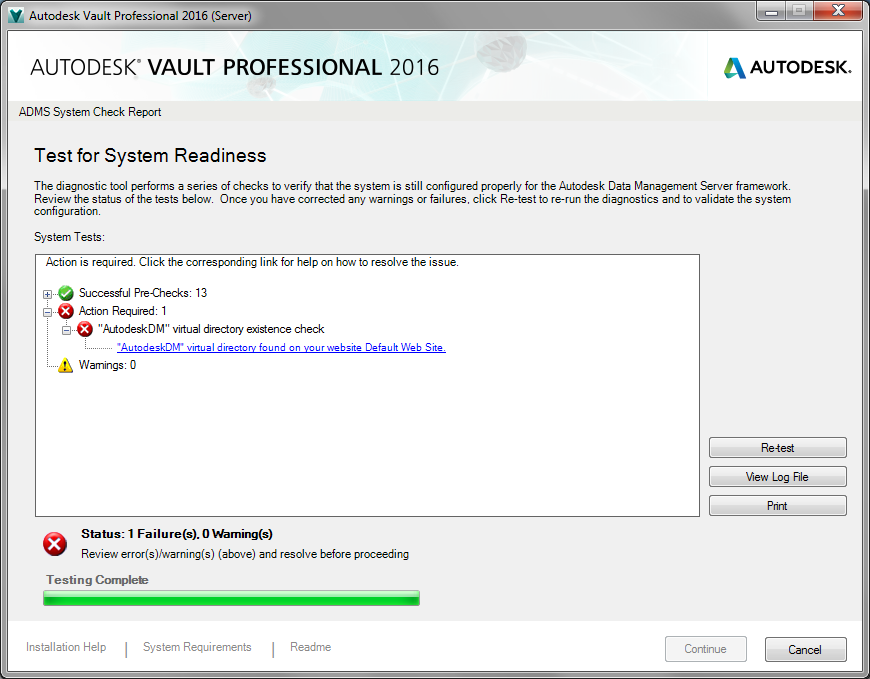 |
| Looks like we have a little fixing to do! |
 |
| Deleting the AutodeskDM directory per the solution fixed my issue. |
Run the precheck again to make sure that all issues are resolved. Once the precheck is clean, click Install.
 |
| Now, we install! |
Next up is the End User License Agreement, or EULA. Accept it and move on. That's pretty much all there is here!
 |
| Read this carefully (I know you do!), accept and continue! |
After accepting the EULA, it's time to enter your serial number, product key, and if you're using Vault Workgroup, or Vault Professional, your license server.
 |
| Entering the information you need,. |
Clicking the next button will now ask you if you want to install with a new configuration, or with the previous configuration from your existing Vault.
In my case, I'm using my previous configuration, so I choose that.
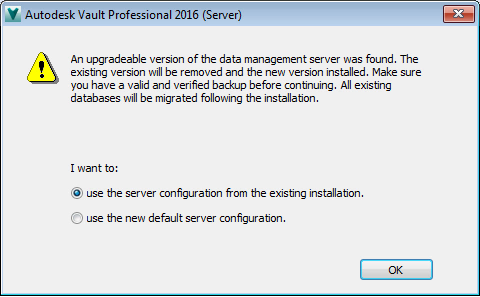 |
| Do you want to use the new configuration or default? |
Now, Vault will ask you which components to install, as well as what location your going to install to. In my case, I'm using my D drive, so I change the install location.
Now we get to hit the button we've been waiting for, Install. (Cue music to 2001)
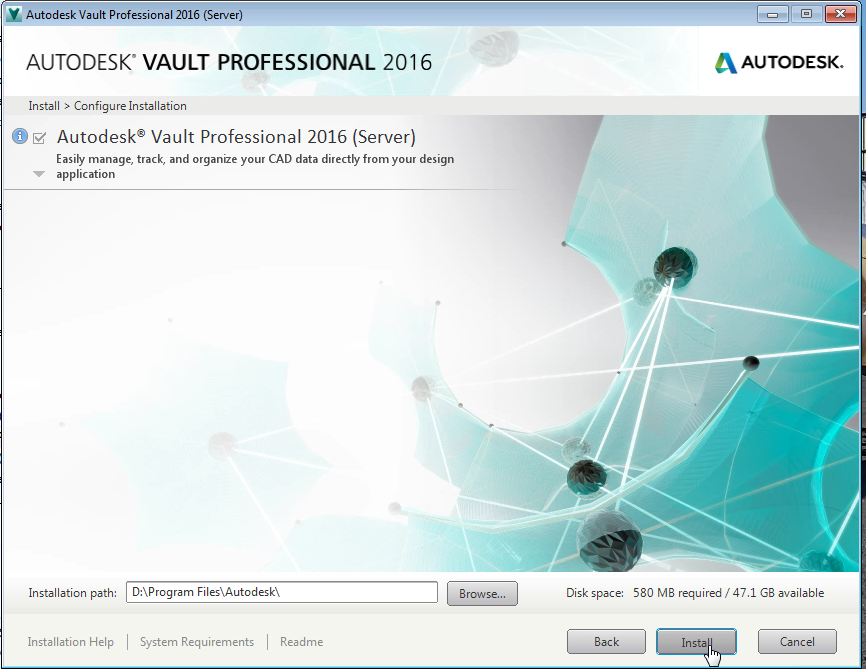 |
| All I need to do is change my location here. |
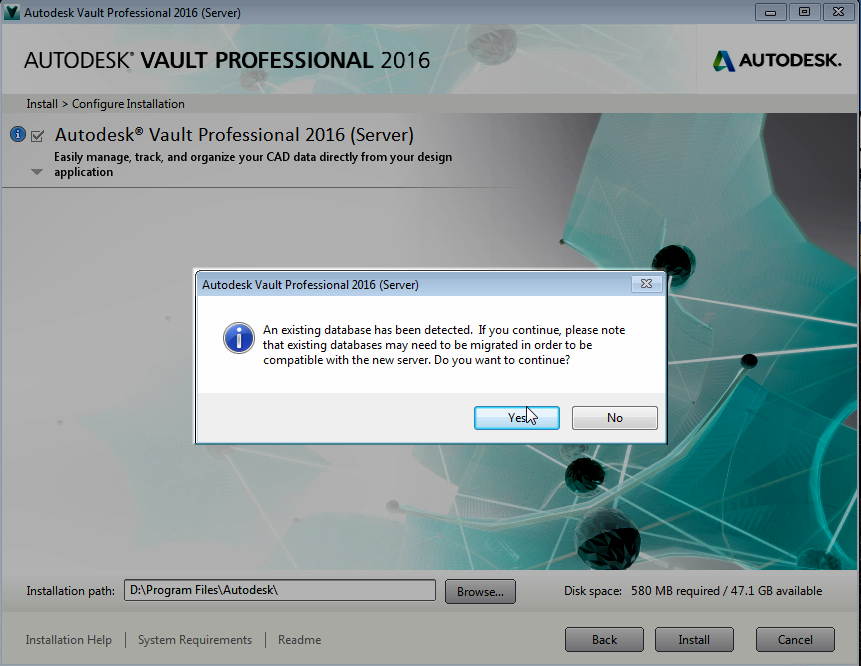 |
| This is just advising you that you'll need to\ igrate your existing database to make it useable. |
In this case, the point is to migrate it, so we'll say yes.
The install goes for a few minutes, depending on your machine. The installer will run prechecks again, removed the old Autodesk Data Management Console, and install the 2016 version.
The install goes for a few minutes, depending on your machine. The installer will run prechecks again, removed the old Autodesk Data Management Console, and install the 2016 version.
 |
| Now we wait for the install. |
Once the installer completes, you'll see your "Success" screen. Take a second and pat yourself on the back!
If you're migrating an existing Vault, as I am here, You'll see another message to open your ADMS Console to migrate your databases. It's a good idea to do that now.
If you're migrating an existing Vault, as I am here, You'll see another message to open your ADMS Console to migrate your databases. It's a good idea to do that now.
 |
| Starting the console to star the database migration. |
The Autodesk Data Management Console will open and ask you to log in, and begin migrating the necessary databases.
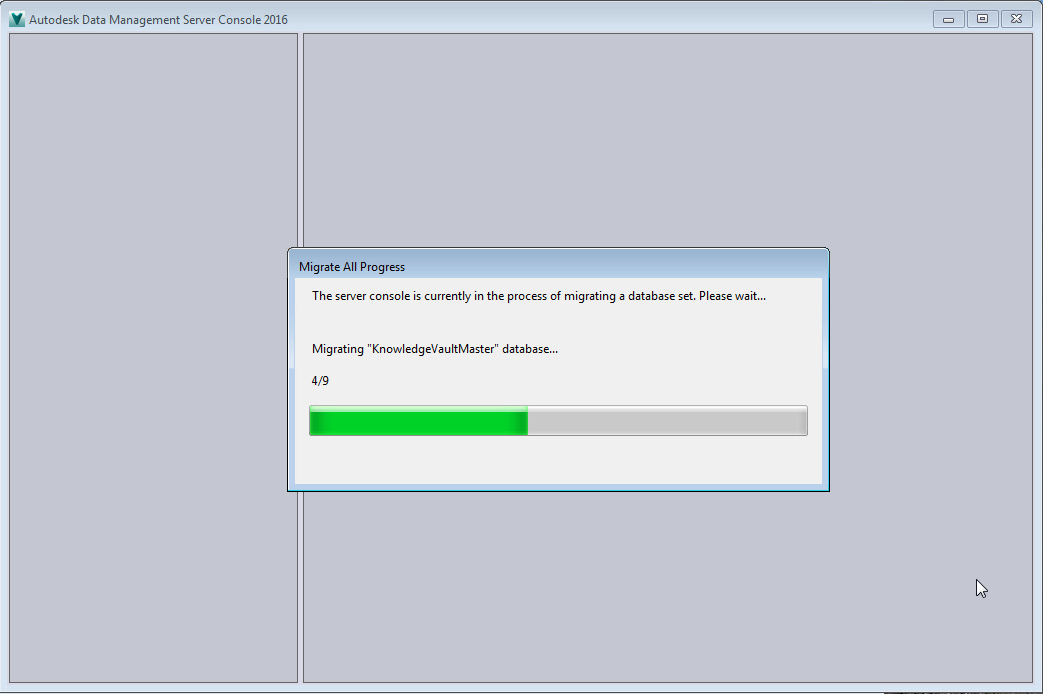 |
| This is the process of migrating. This can sometimes take a while for large datasets. |
One more message is going to come through. Vault is going to ask if I want to migrate my Vaults and custom libraries. Which in this example, is what I want do to, so I'll answer yes.
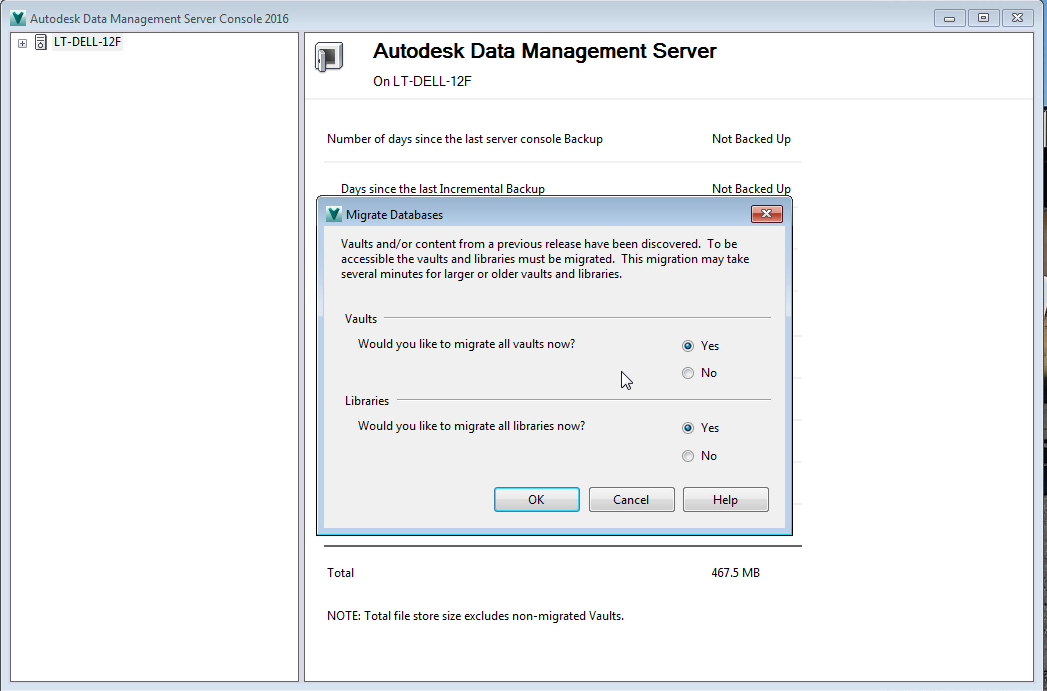 |
| Choosing which databases to migrate. |
One more question comes up, and it's one worth noting. Vault is going to ask which versions of Inventor you want to have your custom Content Center Libraries available for. In my case, I work with Inventor 2014, 2015, and 2016, so I'll keep all three.
This is a good time to get rid of any unused libraries, it will make backups run a little quicker, and will save a little hard drive space.
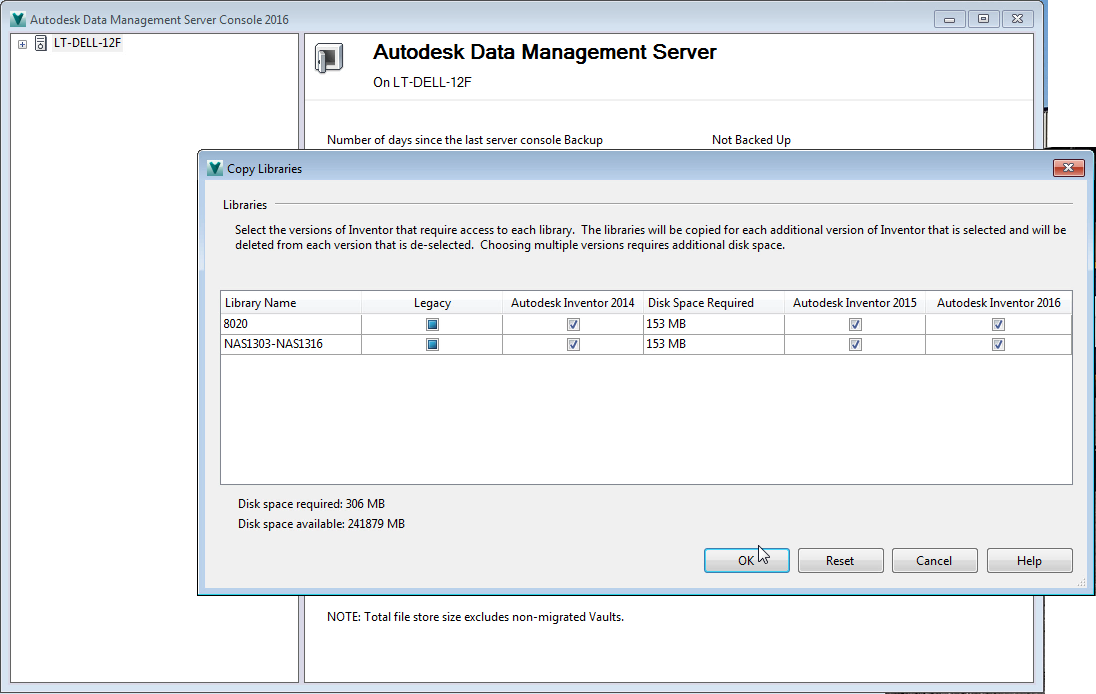 |
| Which versions of Inventor do you want your custom libraries available for? |
In my case, installing my 2016 based client software!
Stay tuned!
P.S. I'm hoping to build a video for this as well, but videos take a while to create, particularly this one!
Look for it to be added in a future date!
Don't forget to run the installer again so that you can deploy the Thin Client. Why this was moved to a seperate installer is beyond me :(
ReplyDeleteThanks, Ryan. I didn't install the thin client this go around. So I didn't even think of it!
Delete