Naturally, the most direct way is to open the file in AutoCAD, and save back as a 2000 version. But there's a handful of files, so it's going to take a little bit of time to save the files one a time.
 |
| Converting files one at a time. This is a common look for the person stuck with that task. |
It's called DWG Convert, and lets you batch convert AutoCAD files to an older version of your choosing.
To get to the tool, go to the Application Icon (the big "A" as I like to call it) and choose Save As.
On the flyout, look for the DWG Convert icon.
 |
| The DWG Convvert Icon. |
 |
| The different areas of the DWG Convert dialog |
The sections listed by the blue icons are:
1) The list of files to convert (these haven't been added yet).
2) Icons to add files to be converted. From left to right, they are:
Add files to convert
- Add files to convert
- Create list of files to convert
- Open a list of files you've previously created
- Append files to an existing list
- Save to list
3) This section provides a list of selection setups to choose from
4) Finally, the Conversion Setup icon allows you to modify an existing setup, or create one of your
own. This is the one we're going with right now.
Clicking on the Configuration Setup button shows a new dialog box.
 |
| The Conversion Setups dialog box. |
In my case, I chose to create a new setup. Since I'm converting to 2010, I used Convert to 2000 (in place) and selected new. This creates a new setup based on the existing one I chose.
 |
| Changing different options for the conversion. |
Now modifications can be made to the setup. These include, how the files are handled (such as a zip file, or folder of files) which format to convert to, as well as several actions to perform on the files, such as purging and error correcting.
It's listed quite nicely in the Autodesk Help System here, so I won't try to recreate that particular wheel in this post.
Accepting the settings, I'll return to the previous dialog box, and add the files I want to convert.
 |
| Adding files to convert. |
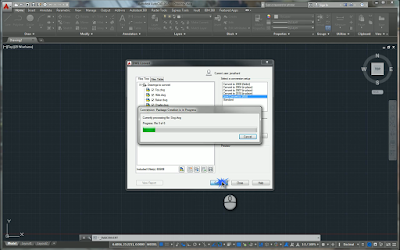
Once the files are added to the list, all that's left to do is click Convert, and let DWG Convert do its thing.
 |
| The conversion in progress. The list can be seen in the background. |
 |
| All done! |
So when you need to batch convert a bunch of files, here's a tool to keep in mind!
Photo Credits:
photo credit: 2 a.m. Tedium via photopin (license)

And don't forget, DWG Convert is available in the free DWG TrueView as well, so no need for an AutoCAD license.
ReplyDeleteI believe it works exactly the same as described here.
Excellent point, David! That's true! Anyone with TrueView can also convert if they need to. That's a great way for non-AutoCAD using consumers of the data can get the right dwg format.
Delete