 It's been a busy week working with a little Fusion 360, as well as doing a little studying for my Aircraft Maintenance classes.
 Because of that, this post will be a little on the simpler side, but I still hope the material is something that you all find valuable.
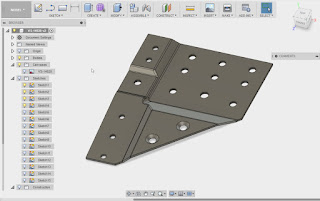
In my work with Fusion, I've had to create a few sheet metal countersinks already. Admittedly, some of these parts will never unfold. In fact, the part on the right wasn't even made using sheet metal tools!
But the part has sheet metal countersinks, and that's where this blog starts. The countersinks are made by dimpling the metal, since cutting a countersink would leave too little material and compromise the material strength.
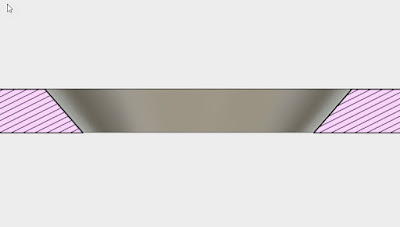 |
| The sharp corners at the bottom of this countersink are, to put it mildly, bad. |
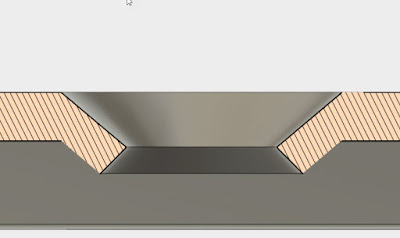 |
| A better countersink for thinner material |
That being briefly discussed, the dimpled countersink is created by using the revolve tool. That's easy enough, but when creating the dimension for the hole diameter, Fusion only gives you an option for a radius.
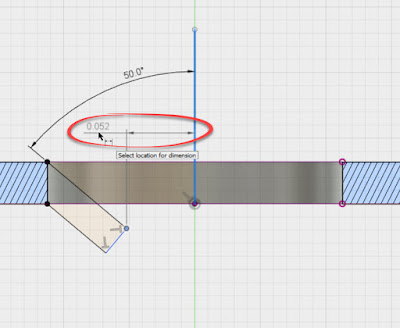 |
| But this dimension is a radius!?! |
But what if there was a way to get a diameter?
If I took time out of my Sunday afternoon to write the post, you can likely guess there is. Here's how you do it.
Pick a point on the diameter, for example, for my countersink, I chose a vertex where two lines representing my countersink geometry intersect.
Even if you could choose a line, take the extra time to pick the point. I think it's worth it.
Next, pick your axis of rotation, just like normal. At this point, you may say; "Jon, I still see a radius. Thanks for nothing jerkface!"
But if you do, I'm going to give you a smirk and say; "Try right clicking!"
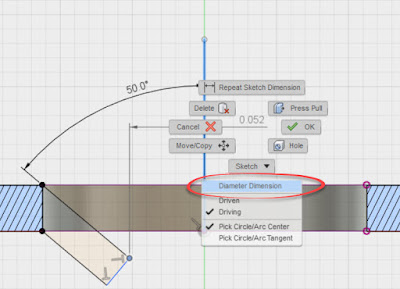 |
| Selecting the diameter dimension |
You may also be wondering why I made such a big deal about picking a point for the edge of the diameter. I've found that by picking a point, Fusion picks the correct diameter every time.
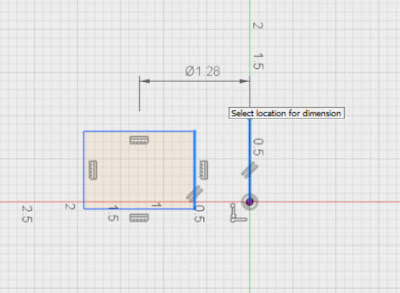 |
| I hate it when this happens |
If I try picking a line, I sometimes get the geometry backward if I pick the geometry in the wrong order. The trick if you prefer this method, is to make sure you pick the axis of rotation first.
So give it a try! And good luck!


No comments:
Post a Comment