Find us on Google+ Inventor Tales

Friday, October 18, 2013

Lesson from the Real World - That's not Supposed to Look Like That!

“Those who do not read are no better off than those who cannot.”
Proverb

As part of my engine maintenance class at Mount San Antonio College, we had to disassemble and measure and reassemble a Lycoming O-320 4 cylinder engine.


The assembled engine


 It was an interesting, and educational exercise.  Taking the engine apart, labeling components to make sure that they all could be easily returned to their locations when reassembling.  

The ultimate experience for a geeky engineer type.  Taking mechanical things apart!

The engine disassembled

The fascinating and frustrating portion was the inspection.  We checked parts with micrometers and feeler gauges, compared tolerances, and recorded everything.

One of the most interesting things we found was one of the pushrods. 

We removed it, and the conversation between myself and my lab mates went something like this.

Me (Holding up pushrod): What the......!

Lab Partner #1: Dude!  That's getting replaced.

Lab Partner #2 (standing about 5 feet away):  I can see that from here!  If you throw it, it'll come back to you!

The pushrod, which should be arrow straight, was visibly bent.  It was so badly bent, that it was rubbing on the inside of it's shroud, and had polished itself in places!


The pushrod laying on top of a cubical wall. The daylight can be seen underneath!
jj
Polish marks on the pushrod
How did it happen?  I'm not exactly sure.  Perhaps the push rod was too long.  Maybe the valve stuck, and the push rod had nowhere else to go but to bend. 

But what was my lesson?  The care that had to go into our checks.  The labeling of part, the measurements. It was painstaking, it was meticulous. 

It was necessary!

There was table upon tables of values listing the acceptable limits that our parts had to be within.  Anything outside of that should be replaced.

Example from the overhaul manual.  The "Table of Limits"


There were gaps measured in ten thousandths of an inch.  That's right. .0015 inches was a gap I had to look for!

I did realize that sometimes, in the sanctity of my 3D modeler, I sometimes don't think about things beyond "net fit".  It can be easy to forget about manufacturing tolerances, what happens to a part when it's heated to operating temperature. 

These are all factors that have to be considered. 

One miscalculation, or even a little bad luck, can result in a bent, or broken part. 


Sunday, October 13, 2013

Migration Errors Moving from Autodesk Vault 2012 to 2013 - Scary! But an Easy Fix!

“It was tough. We have some experience on our side, which is nice.”
Paul Testa

One thing about my job, is I learn something new every day.

Friday, I was upgrading a server from Autodesk Vault 2012 SP2 to Autodesk Vault 2013. 

This should be easy.  I've done it a dozens times. 

But this time, it's different.  Instead of the usual upgrade magic, I get this error.


What?!?  What does this mean?!?

Database not supported?!?!? 


How can a 2013 not be able to migrate a 2012 database?!?!?

It's Friday, 2PM.  I am not looking forward to fighting a database into the wee hours of the night. 

I call a couple of colleagues.  We puzzle over it a bit. 

Then.. The solution comes from an experienced Vault user.

"Bring Vault 2013 up to the latest service pack." 

I do it, and it works. 

I breath a sigh of relief.  As a matter of fact, I breath a couple of more sighs, just to be sure.

Finally, I ask "What happened?  I've never seen that before".

My colleague explains that he's run into cases where an older version of Vault (in this case 2012) gets a service pack that's issued after a new release (2013 in this case).

Since 2012 install I was working on had Service Pack 2 installed, and that service pack came out after Vault 2013's release.  The Vault 2013 Service Pack 0 install didn't know what to do. 

Service Pack 1 for Vault 2013 had the updates to the migration process that were required.

I'm grateful for the experience of that colleague.  Without that, I probably would have tried to rebuild the 2012 installation.  This would have worked, but it would have taken hours instead of minutes.

I would have never thought to try the service pack.  

Now I know, should I ever run into this again!

And for the rest of you out in the 'Verse, I hope this tip helps you, should you ever run into the same thing!

Sunday, October 06, 2013

Lessons from the Real World - Using Non Destructive Testing!

“It is our imagination that transforms itself into reality, through our physical strength and endeavours.”
Helen Araromi

This week, I didn't get a chance to come up with a good CAD related topic to blog about.  My schedule just stole my mind share.

But what I did get, was a solid exposure to how the real world works, thanks to my aircraft powerplant classes at Mount San Antonio College.

In the course, I had to perform some "non-destructive testing".

Of course I've seen how the computers do it.  I've heard how computer software simulation can "accurately predict how many cycles a component can take before it reaches it's fatigue life".

I've seen heads move up and down knowingly, about how the computer can help make more accurate predictions. 

But I also read a real world "Air Worthiness Directive".  This document is issued by the FAA when there's an incident that warrants a notification that could affect other operators.

In this case, the directive resulted from an incident, where an aircraft had a propeller "separate from the aircraft" due to crack propagating in the crankshaft! 

I don't think that the pilot of that aircraft was thinking "the simulations didn't predict a failure at this time" when he was watching the propeller leave without him!

The result of this?  Someone has to perform a real world test. 

In class, we performed a "Zyglo" test on non-ferrous parts.  In this test, a dye suspended in a penetrating oil is used.  It penetrates cracks, and when illuminated with a black light, it glows, revealing the cracks.

Below is a video describing Zyglo.


We tested for pistons, and found cracks in the skirts of three of the four pistons, probably where they had been dropped.


An example a piston in Zyglo.  It's a blurry picture, but there's a crack near the bottom

Example of parts undergoing Zyglo test.  Courtesy "Safari Helicopter Construction"
 Could a computer simulation predict that the pistons would be dropped, and crack long before their service life had been reached? 

For our ferrous components we conducted a "Magnaflux" test.  In this test, a ferrous component is magnetized and an oil with fine iron filings is sprayed on the part.  In this case, we had better luck.  no cracks in the parts we tested.

Connecting rods getting magnetized for a Magnaflux test


Image of a crack revealed in Magneflux.  Courtesy J&M Machine Co
 And check out the video below describing Magnaflux in detail.


But there's a lesson here.  How much can a simulation predict?  Can it predict that a part might get dropped and receive invisible damage?  Can it know how many parts might be improperly manufactured?  Can it predict that it's own inputs didn't reflect the forces the component would exist in the real world? 

No.  It can't.  That doesn't mean simulation isn't a valuable tool, it's an incredibly valuable tool.  But in the end.  It's just that.  One tool among many.

And it shouldn't be used to the exclusion of other tools.

That's the lesson I learned!

Tuesday, October 01, 2013

Cutting the Wire - Introducing the Space Mouse Wireless

“Many a live wire would be a dead one except for his connections”
Wilson Mizner

I've been a fan of 3DConnexion Devices since I first used one in Autodesk R10.

That's right, not 2010, Release 10.  That puts that around 2005 or so. 

A while, in other words.

I've gone through a SpaceTraveler, which they don't even make anymore, and I now alternate between a SpacePilot Pro and a SpaceMouse Pro.

And now, a new member joins the 3DConnexion family.  The SpaceMouse Wireless.

Courtesy of the 3DConnexion website


I've been told a few times "Why don't they make a wireless one?" 

Apparently I 3DConnexion was listening.  And now it's here! 

Check it out on the 3DConnexion Website here! 

I'm excited!


Sunday, September 29, 2013

Using the Mirror Component Command in Autodesk Inventor

“Only in quiet waters do things mirror themselves undistorted. Only in a quiet mind is adequate perception of the world.”
Hans Margolius 

In this weeks post, I chose to visit a tool that's been around a while, but I think doesn't always get it's due. 

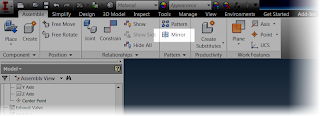
That tool, is the Mirror Component command in the assembly file. 


Locating the mirror component command


This tool will create opposite handed components, using another component for reference. 

I could go on talking about theory, but instead, I think I'll use an example of where I used this function.

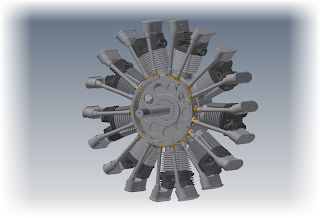
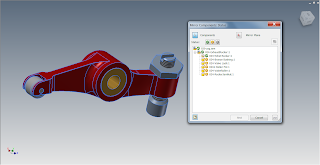
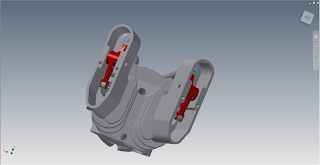
Over time, I've been slowly rebuilding a 9 cylinder radial engine I found on GrabCAD.    Most recently, I was working on the rocker arms in the engines valve train.

The 9 cylinder radial in it's current stage of completion


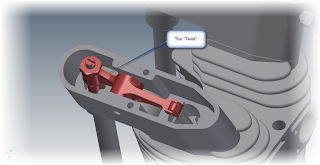
I first created the rocker arm for the exhaust side, which was a bit of a challenge.  The arm has an interesting twist in it that's required to make it work.

The Rocker Arm in Position


Needless to say I wasn't excited about repeating the same for the intake side.  That is, until I realized the intake rocker arm is just a mirror image of the exhaust side.

That makes it a whole lot easier!


First, in order to make things easy, I isolated the rocker assembly.  Notice that I'm still working in the assembly the rocker is placed in.  That's indicated in the browser below.


So instead of rebuilding the entire intake side from scratch, I just selected the Mirror Component, selected my rocker assembly and got started! 

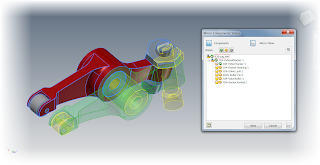
The first thing to note are the status icons.  The green icon indicates the subcomponent will be mirrored, creating a new subcomponent in the process.  The yellow icon will reuse the existing subcomponent, and won't create a new subcomponent.  The gray icon indicates that the subcomponent will be ignored, and not used at all.


By default, Inventor wants to mirror everything.  While every situation varies, in this case I only need to change the rocker arm, so I can reuse every other subcomponent.

Selecting each component in the dialog box allows the status of each subcomponent to be changed.


The components selected for change.
Now, I just have to select a plane to mirror about.  This can be a workplane, or a flat plane on the part.  In this case, I just chose the side of the bushing. 

I can always reposition with assembly constraints later!  Also, notice how the mirrored subcomponents are colored green in the preview, and the reused subcomponents are colored yellow.  That's good feedback!


Previewing the mirror

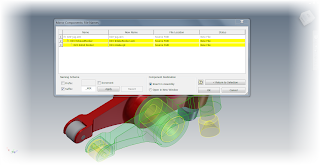
I'm almost there now.  With everything the way I want it, I can click next in the dialog box.   I'll have the ability to rename the new files here (which I've done).  I can also choose if I want Inventor to open these files in a new assembly, or place them in this one.

In this case, I've already renamed the files, and selected the option to place them in the existing assembly.


Renaming the components
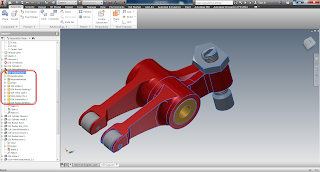
 Now with all my options set, I can click okay to create the new component.


The new rocker highlighted, and show in the browser.

Now the new rocker is placed in my assembly, now I can turn the visibility of the other components back on, and position the rocker in the assembly. 


The rockers in position.
So there it is!  An example where the mirror component tool really helped me out. 

So take a look at it and see where it might be able to help you! 

Acknowledgements:


This file was not created by me.  It was originally created by Dave Goetsch on and shared on GrabCAD here.

I'm only recreated what he's shared in Inventor.  The major credit goes to Dave!

Other notes:

You may realize that I'm not creating videos as often as I used to.  That's because I'm in the process of taking classes in the evenings, and I quite simply, don't have the time I used to.

I'm hoping to revisit these blog posts with videos later!  But rather than hold up the show, I decided to place them in text only. 

Enjoy!

Wednesday, September 25, 2013

From the News Desk - Using Hand Gestures to Drive CAD?!?

“Drawing is like making an expressive gesture with the advantage of permanence.”
Henri Matisse

There have been times that I've wondered if in a few years, we'll all be looking at the mouse and keyboard and think "Hard to believe that's how we used to design!" 

But in the same breath I've also thought; What will replace it? 

Virtual Reality?  Holograms?  A data port implanted in the side of the designers head?  That question still floats out there.

Maybe that input hasn't been fully developed yet   I still can't see giving up my  3D Connexion SpacePilot Pro yet.... 

I suddenly feel like grasping my SpacePilot to my chest and yelling, "From my cold, dead, hand!".

But perhaps the folks at SpaceX may have given us a glimpse into the future. 

What if the CAD model could be controlled using hand gestures.

Not THAT gesture.  Stay with me, people!  

Check out the video below.  Have we seen a glimpse of a world yet to come?

Sunday, September 22, 2013

Linking AutoCAD Block Properties into Autodesk Vault

“The mind's cross-indexing puts the best librarian to shame.”
Sharon Begley

It's been a busy week this week!  So unfortunately, I haven't had a chance to build videos.  But instead of holding the post back, I'd rather share what I have now.

I'm hoping to build the videos a bit later, and add them in!  In the meantime,  I hope the post below is helpful!  

I recently found myself doing indexing AutoCAD block attributes into Autodesk Vault.  During this process, I thought to myself: "Self, this is probably something that should be documented". 

So I decided to share it here!

First, the "Setup"!

I've created a block with just one attribute in it.  FACILITY NAME.  What I would like to do, is place this file into Vault, and make the facility name a property that can be searched by within Vault.


The first thing I want to do is take note of the block name in Vault. This can can be accomplished in AutoCAD, and selecting block, and using the command BATTMAN (for batch attribute manager, not the Caped Crusader).


Next take note of the attribute tag that's going to be indexed in Vault.

In this case, the tag is named FACILITY_NAME.  This is important for the next step, where Vault is "taught" what information to read from the block.


Now that the tag name is known, it's time to open up the Autodesk Data Management Server Console (ADMS).  Once logged in, select Tools>Index Block Attributes.


Selecting this tool will open up the Index Block Attributes dialog.   Choosing the New button will bring up a dialog where the block name is entered.


Make sure to type it exactly as it appeared in AutoCAD!

Accept and close the dialog boxes.

Now, Vault needs to be seeded with a file containing the block to be indexed.  The first step in this process, is to check in the file in Vault.
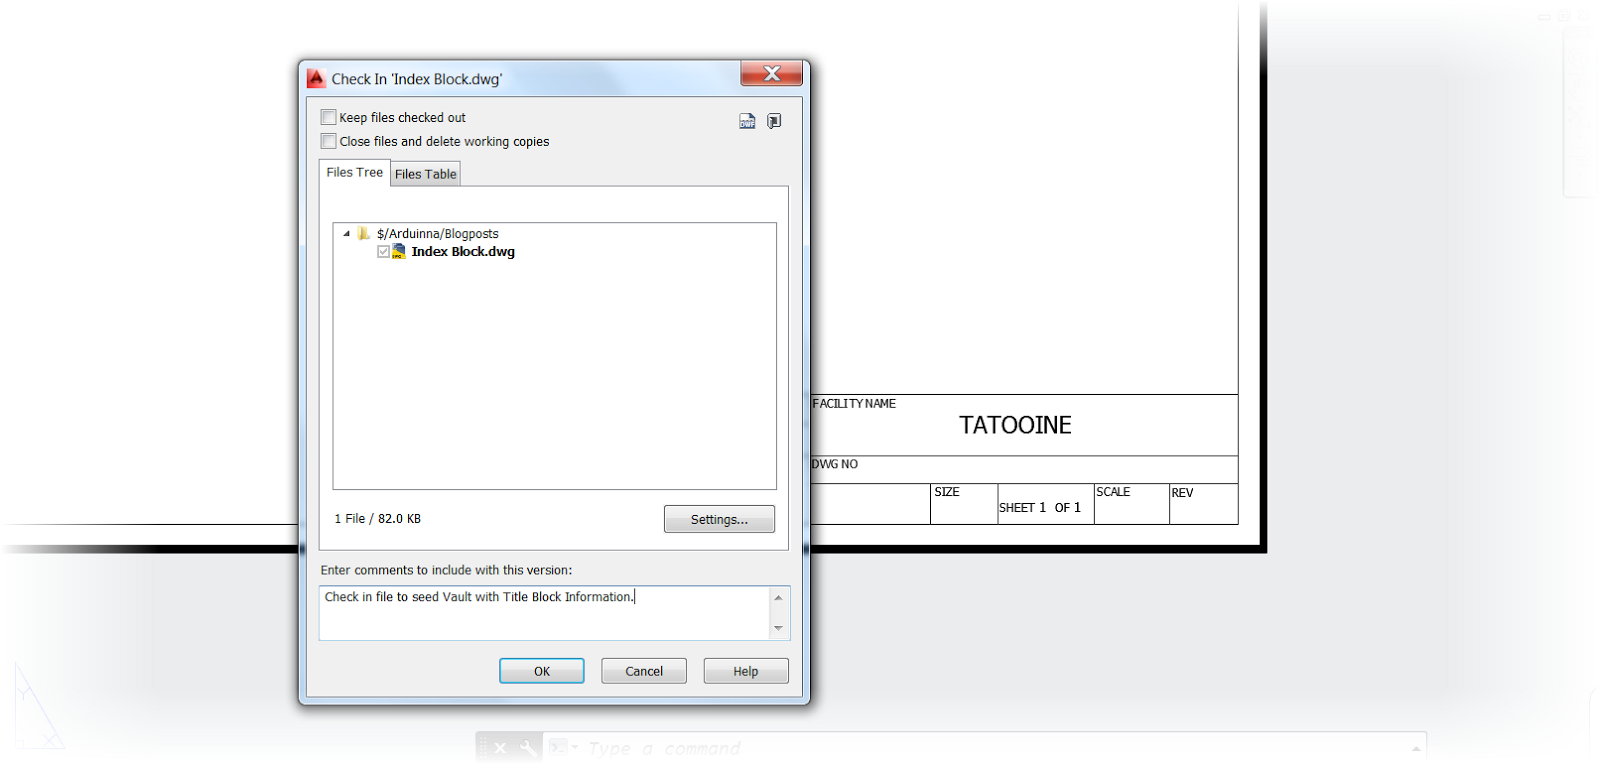
Checking the file into Vault
Now, the "Connection"!

Now with the file checked into Vault, the appropriate property needs to be created and mapped. 

First, go to Tools>Vault Settings.


The Vault Settings dialog box will appear.  Choose Properties from here.


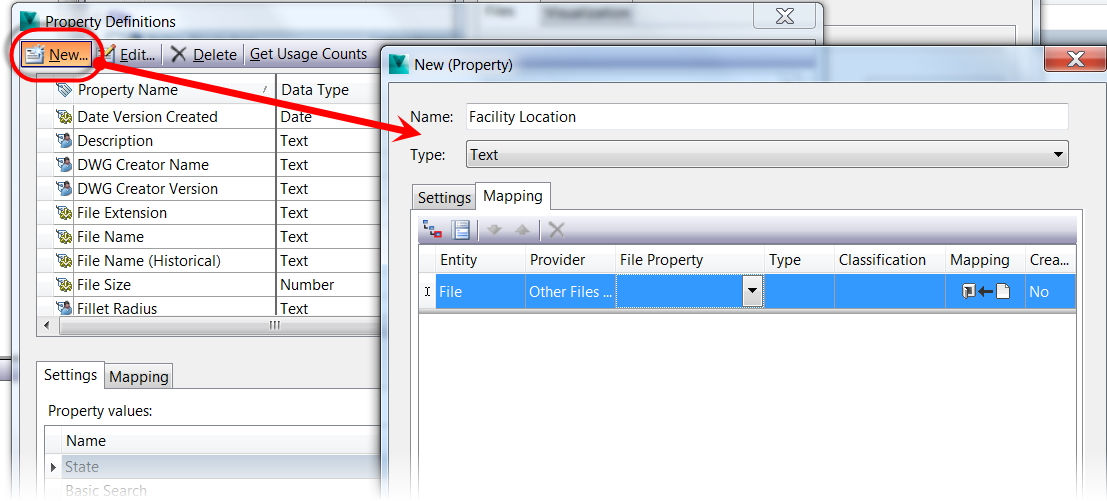
Now, it gets fun!  Click the New button to create a new property.  I'm going to call it "Facility Location".

Add caption
The next part of this step is to map in the actual AutoCAD block property to the Vault Property.  This is where the connection is made.

Click in the empty File Property box to bring up the "Import Properties" button, and choose Import from Vault.  


Now the seed file can be located by browsing in Vault.


The list of properties will appear.  Browsing through the list will yield Title Block Enter Facility Name, which is exactly the property that's needed!


Accept this value and close all the dialog boxes.  There are a few more steps to go, but not too many.

Using Customize View, make the new property in visible in Vault Explorer by right clicking on the title bar in Vault Explorer and choosing Customize View.
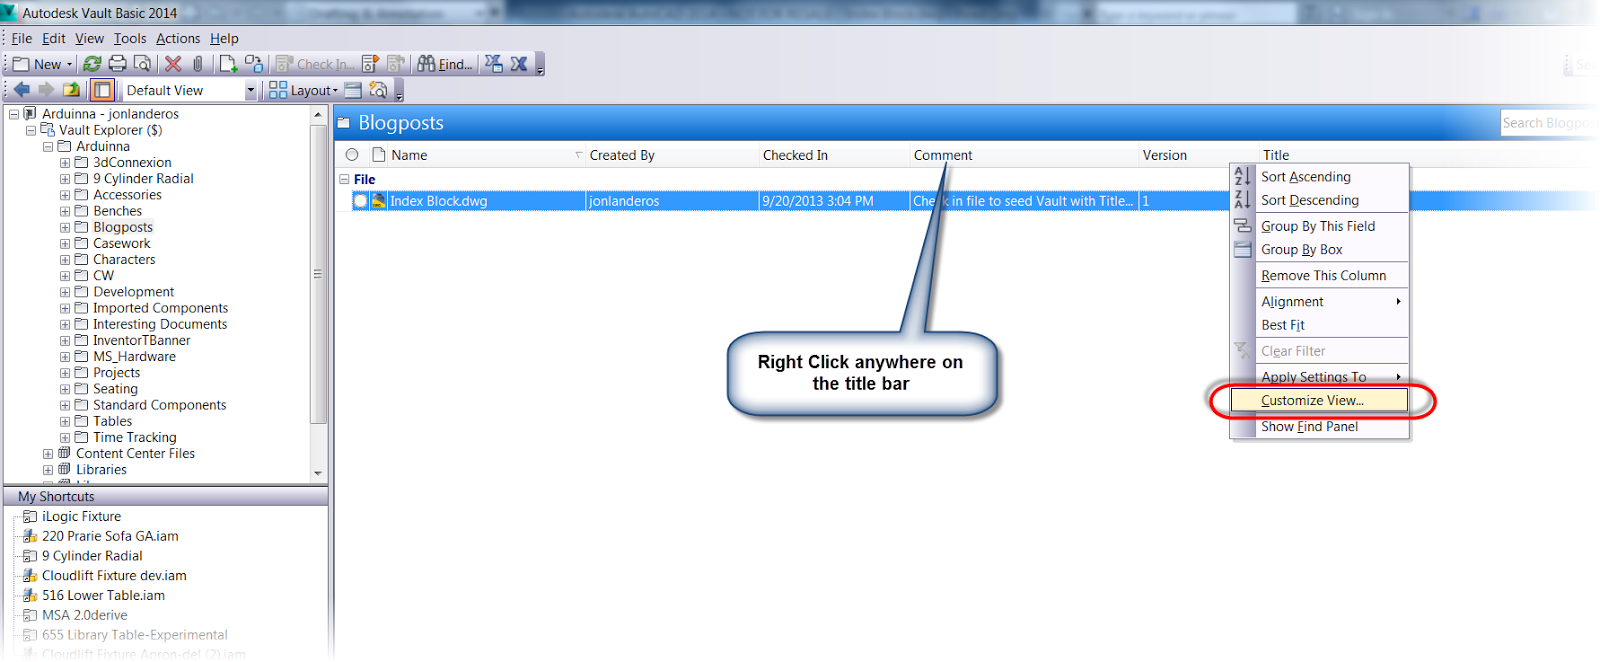
Customizing the view
Now, follow that up by locating the Facility Location property, and moving it to the visible fields panel.  The "Move Up" and "Move Down" buttons can be used to reposition the field if desired.

Accepting this, the field will appear in Vault Explorer, but there's one issue.  It's empty! 

There's one more step left.  Return to the ADMS Console, and select the desired Vault, and choose Re-Index Properties.  This will reread the properties in Vault, including the one just added. 

Note that this process can take a while if there are a lot of files, so give it some time to finish.  If there are a lot of files, it could take over an hour.
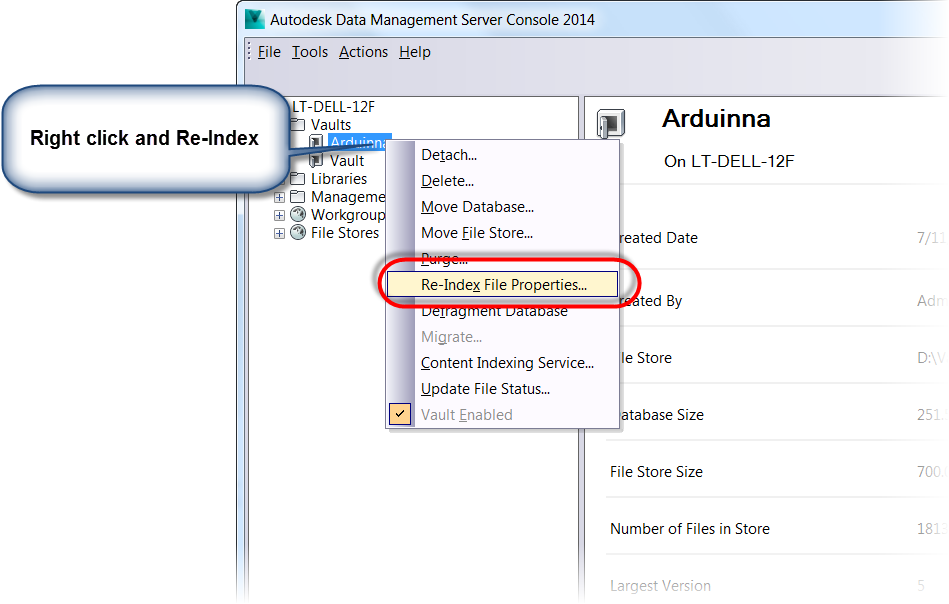
Re-Indexing the properties


Now, after the files have Re-Indexed it's time to return to Vault Explorer and refresh the screen by hitting F5.

Now the property is visible!

At long last, the process is finished!

I know this seems like a long winded process, and I wouldn't disagree that there are quite a few steps involved.  After all, I just spent hours writing them all out! 

But now that it's done, it's done.  Any additional AutoCAD files that contain this block will populate the fields from this point forward.  So the heavy work is done, now it's time to reap the benefits!


The properties are done!

Give it a try!  It can make a big difference automating those much needed steps!

****************************Edit 13-October-2013************************************

I've added the videos to accompany this blog post!

*****************************************************************************************


Part 1


Part 2


Sunday, September 15, 2013

Which Version of the Truth? An App for Checking DWG Versions

“History is the version of past events that people have decided to agree upon.”
Napoleon Bonaparte

The other day I was asked, "Is there a way to check what version a dwg file was created in?"

I had to think a moment.  I don't work in AutoCAD as much as I used to, so it's safe to say I'm a bit rusty.

But I set off on my quest to take a look, and up popped a couple of methods.

The easy one?  Open the file in AutoCAD.  Once the file is open, hit the "F2" key and you'll see a line that says, "Opening an AutoCAD XXXX format file"

Finding AutoCAD dwg version by hitting F2 immediately after opening


But there's also a more elegant way!

In my searches, I found an application on the Autodesk Exchange App site that will display the DWG version in Windows Explorer!

This app is called DWG Columns for Explorer by JTBWorld, and it creates a column in Windows Explorer that displays what version of AutoCAD the DWG was created in.

The App as it appears on the Autodesk Eschange site


So I downloaded it down, tested it, and found out it's a slick little tool.  It's simple, and it's effective.  Just like many good tools. 


How cool is that? 

So give it a try!  I know it's a nice little app that I'll be keeping on my own machine for a long time!

Note that there's also a pay version that shows all AutoCAD properties.  I haven't given that one a try, but it the pricing looks to be pretty reasonable, so maybe down the road, I'll give it a shot!

If you end up trying the premium version out, leave a comment and tell us all what you thought!

And before I wrap up, I'd like to leave a couple of tips on setup below!

1) Once installed, open up a directory containing dwgs in Windows Explorer.

2) Right click on a column.  If you don't see "DWG Version" choose more.


3) Located "DWG Version" and check the box.  Click OK when done.


4) The column will now appear in Windows Explorer!
 

Thanks for reading this post!  Have a great week!

Tuesday, September 10, 2013

Autodesk Introduces 123D Circuits... For Free!

 My method is different. I do not rush into actual work. When I get a new idea, I start at once building it up in my imagination, and make improvements and operate the device in my mind. When I have gone so far as to embody everything in my invention, every possible improvement I can think of, and when I see no fault anywhere, I put into concrete form the final product of my brain.” 

Nikola Tesla

While looking around at some geeky tech news, I ran across this announcement on TechCrunch from Autodesk.

Autodesk Introduces 123D Circuits. 

123D Circuits is a free online app that allows for the creation and testing of virtual electronic circuits?  Premium accounts are also available.

This really interests me!   As a Mechanical Engineer, most of my experience with electricity comes from the "blue spark" and the tingly feeling that comes afterward.  Sot he ability to learn in a virtual environment (away from real electricity) is really appealing!

Have I checked it out yet?  No.  I haven't had an opportunity, but I think I will be looking at this in the future.  It sounds intriguing indeed!


For more info from the Autodesk Sandbox, take a look here!

And to jump in and get your feet wet, check out this link! I know I will

And for an overview video, take a look at the link below!

Introducing 123D Circuits.io from circuits.io on Vimeo.

Sunday, September 08, 2013

Take Your Best (Animated) Shot in Autodesk Showcase

“Cinema is a matter of what's in the frame and what's out”
Martin Scorsese

In my post last week, I talked about creating static camera shots inside of Autodesk Showcase.

But Showcase can also create animated shots too! 

In these shots, different camera animations can be created that make the camera zoom, orbit, or pan across the object in the scene.

By using these effects, a compelling 'eye catching' scene can be created.  One that will really grab the attention of the intended audience.

So how can a cinematic shot be created?

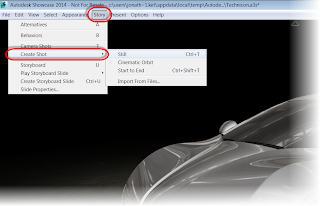
Just like in my previous post, go to Story>Create Shot.  Options to create an Orbit, or "Start to End" Shot are available. 


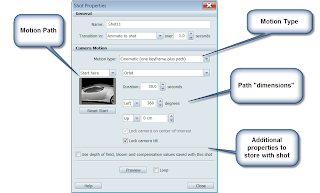
Now, the Properties dialog box shows up, and I can begin tweaking my animation to suit the needs for a shot. 

There's a lot of different things that can be tweaked, so I created the image below.


All of these settings can be adjusted to create different types of animations, all giving a different type of effect.

For example:

Motion Type switches the motion between Still, Cinematic, and Start to End. Depending on the type of motion selected, animations for Orbit, Pan, Zoom In/Out, etc. These have the added bonus of being able to capture a point along the camera path to set the view.

Motion Path
controls the path for the camera, creating the desired camera effect for the animation using a point along the path.

Path Dimensions allow the camera path to be adjusted by typing in the angle, position, and duration of the camera path.

By adjusting these settings, the animation can be changed and just like before, mutliple animations can be created and animated together to create a longer presentation!

Give it a try and experiment!  And check out the video below!


Thursday, September 05, 2013

An Autodesk Showcase Guest Video - Adding Bloom Effects to a Scene

“From the withered tree, a flower blooms”
Zen Proverb

As this week draws to a close, I wanted to share another great video from Marion Landry's YouTube Channel.

This one is on creating bloom effects, or the "glowing" effect that can is sometimes visible. 

It's another effect that can make a scene standout, and it's definitely worth taking a look at! 

Take a look at this video, and the other Autodesk Showcase videos on Marion's YouTube Channel! 

Monday, September 02, 2013

Take Your Best (Still) Shot in Autodesk Showcase

“The camera can photograph thought”
Dirk Bogarde

I've done it many a time before.

I've created a series of images of a scene in Autodesk Showcase, only to realize I don't have an easy way to reproduce one at a later date.  I have to carefully arrange the shot again, making sure I got all the camera angles right and then recreate it.

I like this shot, but how do I recall it later?
This isn't the fault of Showcase, it's a result of me getting anxious, and forgetting to use a tool that can save me a lot of time and trouble.

Camera shots.

Camera shots in Showcase allow camera angles to be saved and recalled, along with some built in camera effects, camera angles, and in Showcase 2014, depth of field settings.

So how are camera shots accessed?

The first place it can be found is in the Story>Camera Shot pulldown. The other is the hotkey "T" which is what I prefer to use.

Accessing the shots

This will bring up the toolbar that shows the existing shots.

The shots panel in the upper left.

Choosing Still from the Camera Shot pulldown, or using the hotkey "Ctrl+T" will take a still shot of the current camera position and camera properties. 


This is how a shot can be saved for later!


A new shot created
But there's more that can be done!  Right clicking on a shot will bring up options that allow the shot to be changed.  But here, I'm just going to choose Properties.


Choose properties
The properties screen will allow for the changing of  different settings for the shot.

These include the transition type between shots (Still, Animate, Cut to Shot), and duration, as well as Animation types, which I'll cover in my next post. 

But feel free to experiment with these, and get an idea how they work! 

And for a video version of this post, take a look below!


Wednesday, August 28, 2013

Time to Get "Schooled"

“If the road you travel has no obstacles - it leads nowhere”
Unknown

Consider this a bit of an announcement for me.

On August 26th, I began taking courses in Aircraft Powerplant Maintenance theory at Mount San Antonio College in Walnut, Ca.

The reasons for why I want to take it are simple.  It interests me, and I think revisiting the nuts and bolts of why things work will make me both a better engineer and 3D CAD operator. 

Plus, it's something I've always wanted to do, and with the encouragement of an old "Phantom Phixer" who told me I could do it, and he'd help me do it, if I decided to go for it.

So I made a decision to try, and perhaps fail miserably.  But I'd rather be 80 years old saying "I tried and failed" then be 80 years old saying "I wish I'd tried".

That's all well and good, but why mention it here?

 Because the classes are very time consuming.  I'll be taking them Monday through Friday, every evening from about 530PM to 1030PM at night.

The first project.  Disassembly & inspection of a Carburetor


As a result, I may not be posting quite as much here as I have in the past, or my postings might just take a turn toward what I'm learning in class.

The carburetor is apart!

ut I'll still try to keep posting!  So even though they may not come as quickly, they'll keep coming!