Find us on Google+ Inventor Tales

Friday, June 13, 2014

A Review - Able to Extract PDF Converter

Converting documents from PDFs to editable formats.

It’s not something I have seen times when it’s been needed for converting data.

It might be a pdf of a drawing, manual, or chart that has been lost or corrupted. How to recover it without just recreating the entire document?

I’ve even seen drawings that have been created in a CAD system that’s been relegated to the virtual boneyard. The only thing left behind are the PDFs, information frozen in time, no longer able to be updated or changed.

That’s why Able2Extract exists. To take PDFs and convert them into a format that can be edited.

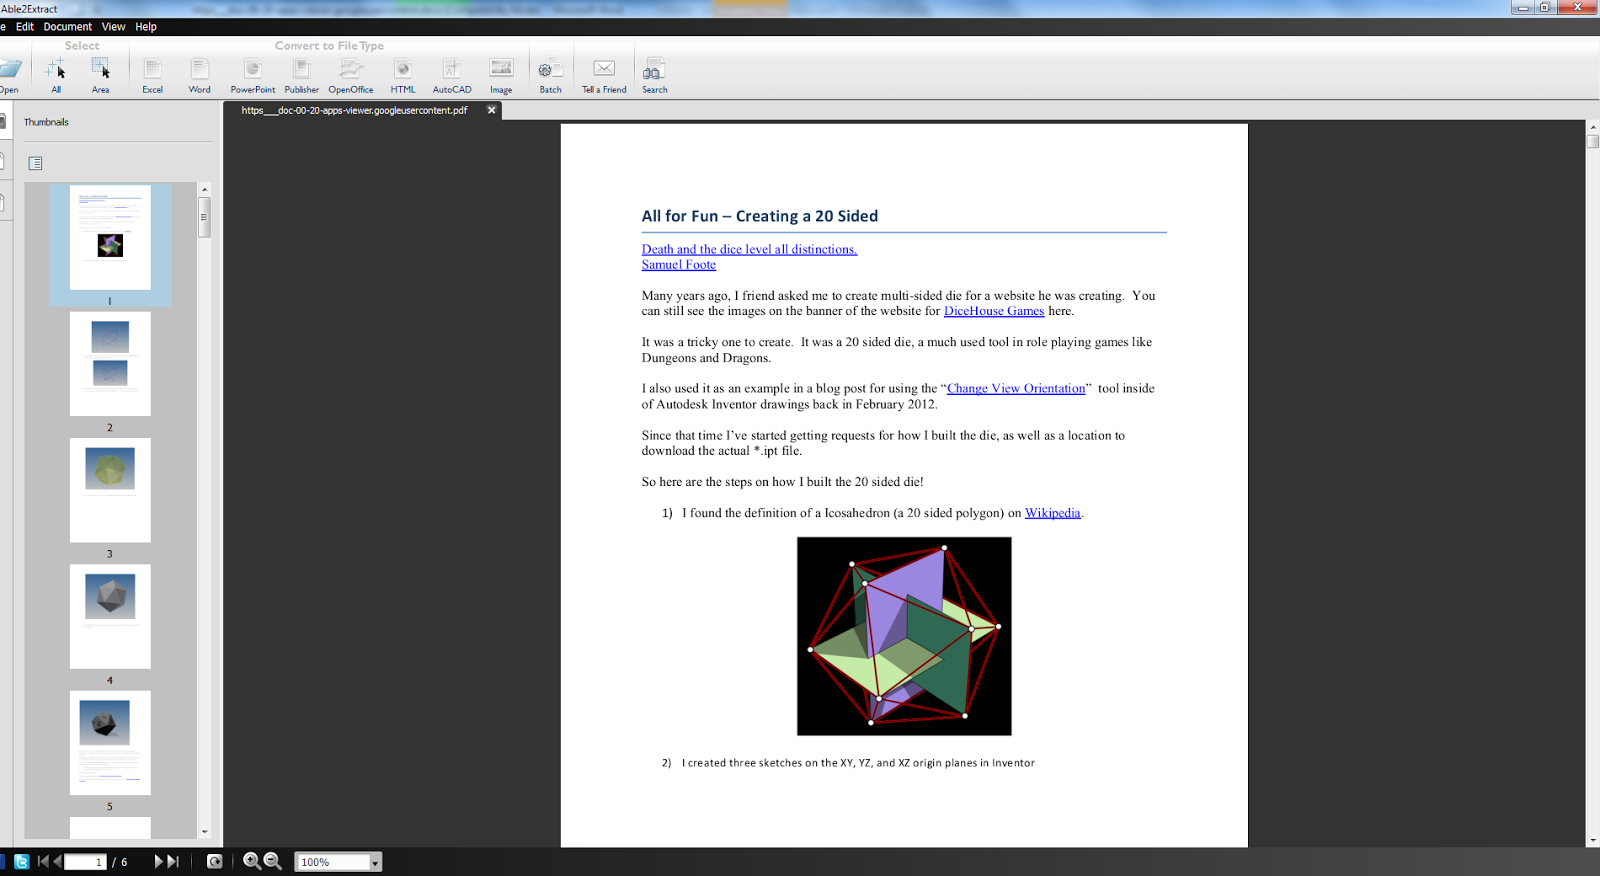
When I was asked to give it a try, the first thing I tried was converting a few pdfs I had created
from Autodesk Inventor.

Converting and PDF into AutoCAD
The PDF Converted into AutoCAD
I was impressed by how easily the conversion was made.

The drawings came across and were quickly turned into an AutoCAD dwg or dxf. Scale is preserved, so measurements can be dimensioned and added.   Dimensions converted to text, but that wasn't something that I would consider "world ending".

Translating documents into Word and Excel were pretty straightforward as well. I took some different documents from various sources, including some I created, and some technical documents I
downloaded, and was able to convert all of them with ease.

A PDF prior to coversion

The Word doc after conversion.  I didn't modify anything
The spacing at the top of the link changed slightly, but still pretty clean.

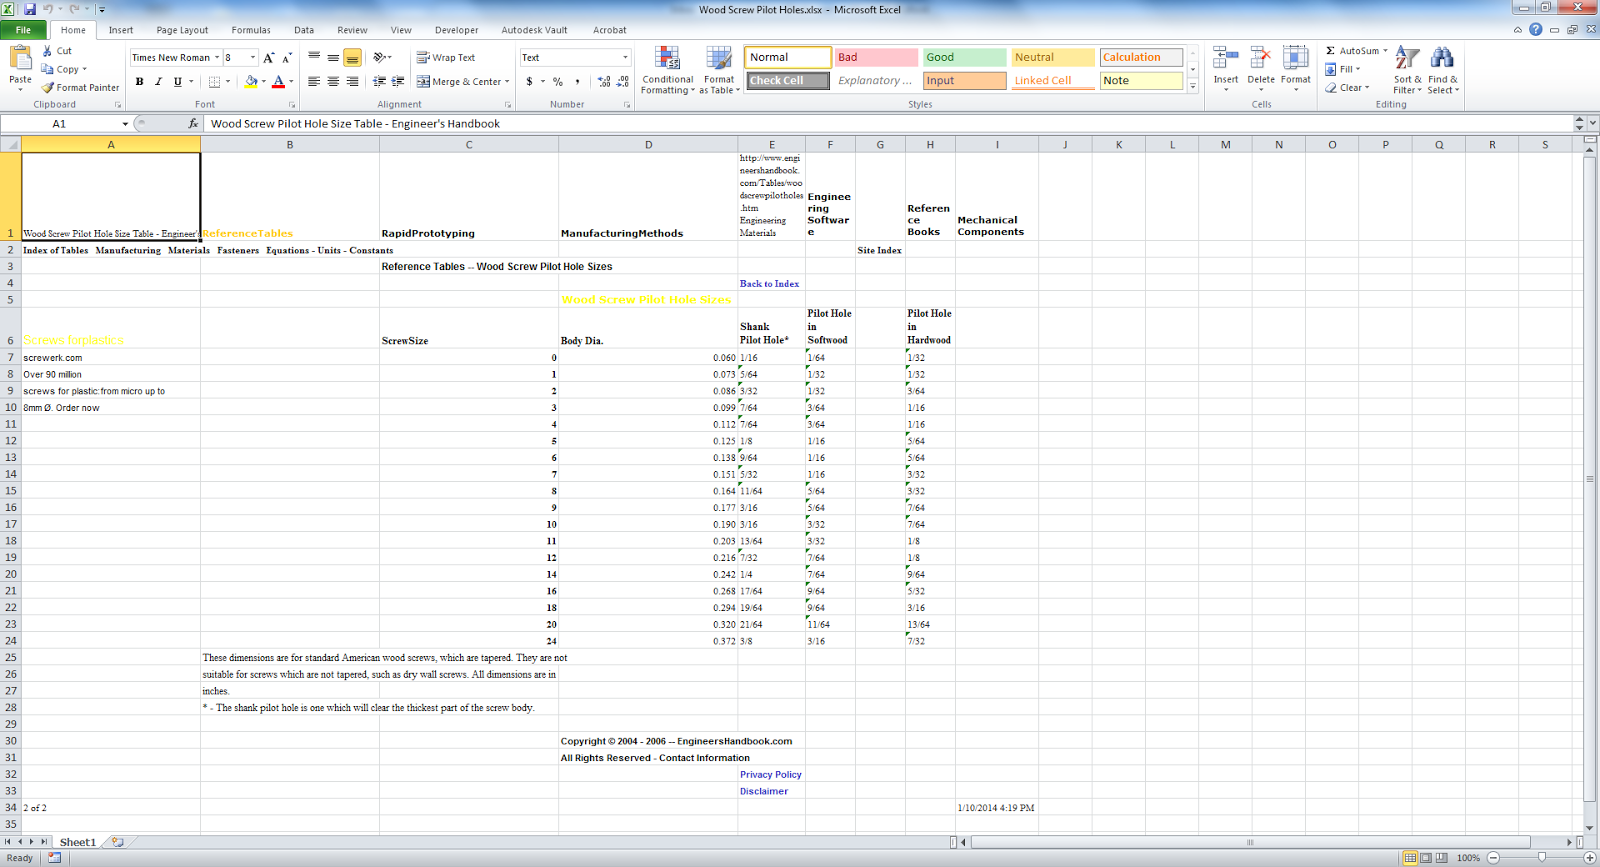
The custom settings for Excel extraction were logical, and it provides a nice preview to help make sure the document will come out the way it’s intended.

Here I have a sample from Excel, which is a pilot hole chart I printed from Engineers Edge.

The PDF during conversoin

The completed conversion

The only things I wasn’t able to convert were pdfs created as raster images, such as a manual on aircraft standards created in 1955. But let's face it!  That’s to be expected.

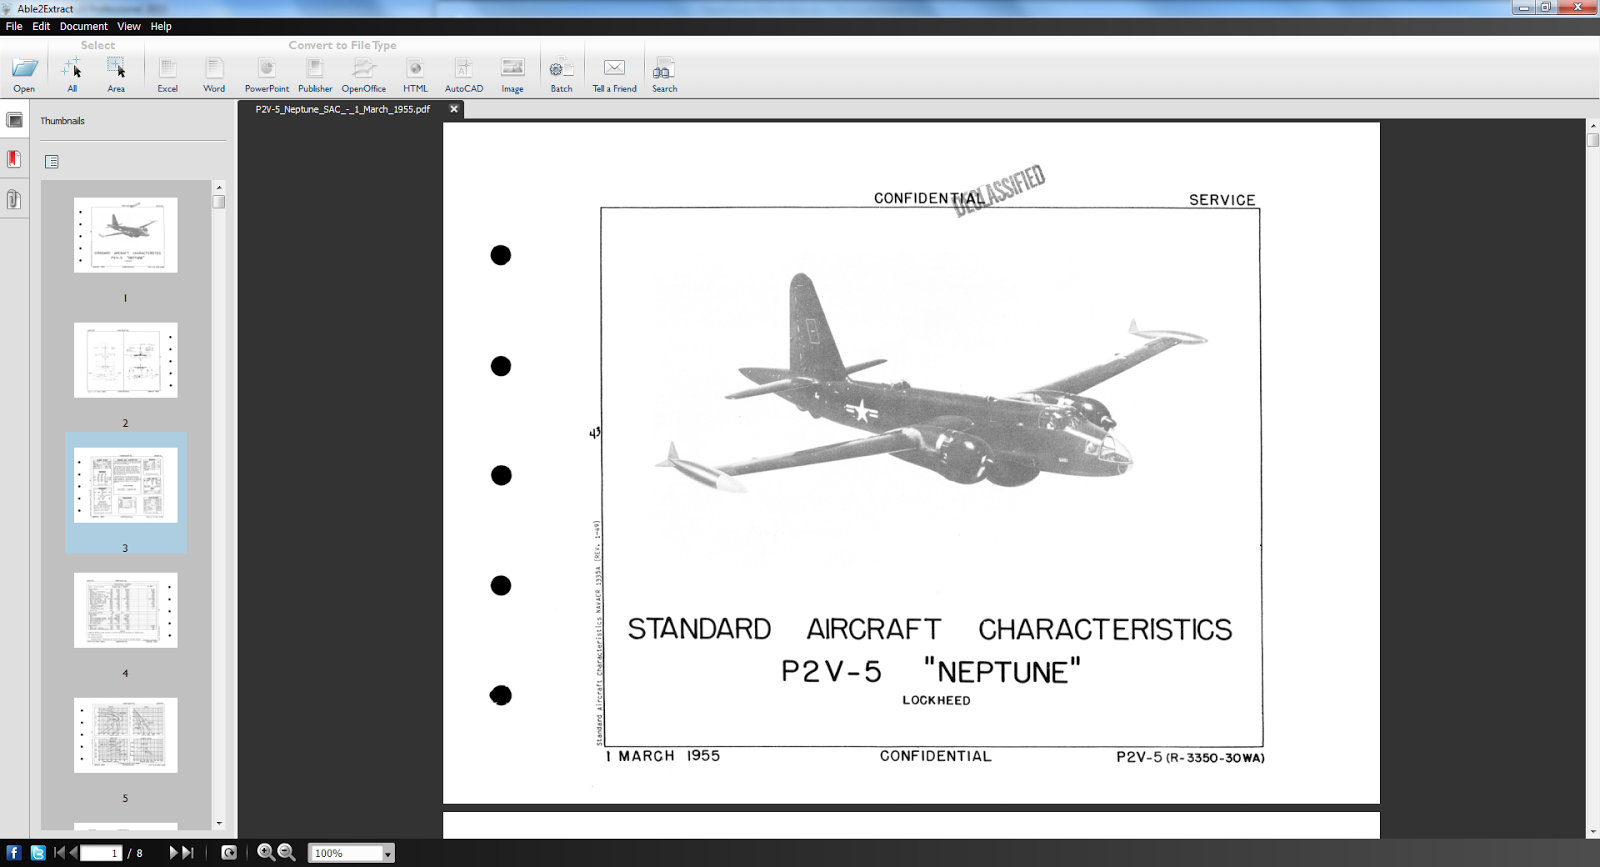
A pdf scanned from good ol' paper.  As a raster, this one won't convert.

Working with Able2Extract, I found the interface very easy to use. A wizard walked me through the steps I needed, and I found the icons to be easy to understand, and laid out in a logical order. The icons follow the workflow from left to right. Open, Select, Convert. Just like that.

So in short, what did I like?

• It’s easy to use, and it just works. It’s not difficult or tricky. I really was converting documents within minutes of installing it.

• The wizard that walked me through the steps of using it was a nice touch. I could have gotten by without it, but it’s nice to know it’s there.

• The icons were laid out very logically, the toolbars work from left to right.

What did I not like as much?

• Very little. It works simply, and works well. I certainly think that it’s capabilities give us an opportunity to look at making sure we keep our data secure.

In summary

I think that this is definitely a program that should be looked into if you’re looking to take data and convert it to a usable format. It’s a wonderful tool for those who have documents in PDF format,that need to have new life brought into them via editing and updating.  It's definitely worthy of your consideration

Finally, the Disclaimer
I was not compensated in any way for this.  I was just given a link to download the product, and then the freedom to try it out.  Beyond being supplied the product, I was free to formulate my own opinions

Friday, May 23, 2014

Sharing the Wealth - A Few Excellent Websites for Sheet Metal Unfolding

“If you're going to build an airplane, first you have to know how to bend sheet metal, and before that you have to know how to render iron from the ground.”
 Eric Henderson

The last couple of weeks have been a non-stop rush, so blogging has definitely been a tough thing to get to lately!

But the lessons never stop!  Learning is a dance that is in constant motion!

While I was sitting in an Autodesk Inventor update course earlier this week, the instructor shared some fantastic sheet metal links and encouraged us to pass them on, so that's exactly what I intend to do!

And why am I sharing these resources?  I mean aside from the fact that the instructor told us to?

The one thing about using sheet metal in Autodesk Inventor, is it's a tool.  And like so many tools, it takes the knowledge of the user to really make it reach it's full potential.

One thing has not changed.  Experience counts.  Pure and simple.

The resources I'm sharing are intended to help obtain that experience.  They let us, as users, assimilate the knowledge we need to make us more knowledgeable, which in turn allows us to use the tools to amplify that knowledge.

So at last, here are the resources past onto us by the instructor.

Bend Calculator from the SheetMetalGuy.com,  Do you need help generating K-Factors and bend tables, here's a place to start.  Here's a direct link here!


The next, is from www.bendallowance.com.  Follow the direct link here to a list of formulas used to calculate sheet metal setbacks!


Third on the list is from Sheetmetal.me and is a resource for designers, operators, and  "anyone else interested in sheet metal manufacturing".  It has great resources for calculating bend allowance on this page.


The last of the four big websites, have a look at this link at Custompart.net to calculate things such as bend allowance, setback, and stamping forces.


Finally, another place to try is the Google Apps store.  There are tons of Sheet Metal Apps that are available.


I haven't tried any, but they com recommended, and if you us sheet metal, and have an Android, it's worth a look.

For you Apple users, I have been told there are apps, but not as many.  But not as many.  I can't speak to this myself, but if you have an Apple App you like, feel free to throw a comment down below!


Friday, May 09, 2014

Getting Ready for Autodesk Inventor 2015 - Migrating Design Data

I have a sweet tooth for reading, so books migrate to my zip code en mass.
Dawn Olivieri

After installing your Autodesk Design Suite, migrating the Vault, and migrating Inventor templates, there's another migration to consider, at least with respect to Inventor

Migrating your Autodesk Inventor Design Data.

First of all, what does the Design Data include?  Design Data includes information such as drawing standards (balloon styles, dimension styles, etc), sheet metal bend tables, thread charts, and so on.

A sampled from my Design Data Directory

If you're running nothing but Inventor's defaults, then no migration is needed.

But seriously, who's doing that?  Nearly everyone has custom settings they need to migrate.

So this is how to go ahead and make that happen!

First, I like to make a backup of my Design Data.  Just in case I make a mistake, or something goes wrong.  This can be as simple as zipping up the design data and storing it in another location.

Make a backup.  You may not need it, but if you do need it, you won't regret it! 
Next, I can go to Windows Start>All Programs>Autodesk>Autodesk Inventor 2015>Tools>Style Library Manager.

Locating the Style Library Manager

Once the Style Library Manager opens, there will be two columns. One is for Style Library 1, the other, Style Library 2.


For Style Library 1 I'm going to browse to my 2014 Design Data (which is backed up, of course).  For Style Library 2, I choose the destination directory where I want to place my migrated 2015 Design Data.  At the moment, this directory is empty.

Notice that once I select the destination directory, the migrate button becomes available.


Now what?  I click the migrate button, and the styles begin their migration!  The Style Library Manager will tell me that the library will be migrated.  It'll also tell me I can't undo this!

But this is alright for two reasons.  One, I'm migrating to a new, empty directory.  The other?

I made a backup.  See?  I keep telling you there's a reason!


I click OK, and I now, I let the migration grind away.  Get coffee, watch YouTube videos.  Do both!

After a few minutes, the migration will complete.


Now, my custom libraries are ready to use!

I hope everyone finds this post helpful!


.


Monday, May 05, 2014

Getting Ready for Autodesk Inventor 2015 - Migrating Custom Templates

“Burglars know there's more than one way to skin a vault.”
James Chiles

In previous posts, I showed how to install your Autodesk Design Suite, as well as migrate a Vault from 2014 to 2015.

However, there are still things that need to be done.  For example, what about custom templates that have been carefully crafted in previous releases?  They aren't usable in Inventor 2015 until they've been migrated.

It goes without saying that this step is important.  So what are the steps to migrate template files?

The simplest, is to just open each template file in Inventor 2015 and save it.  It will work just fine, and it's a completely valid way of doing things.

However, I'm going to describe something that's more automatic then just opening and saving.

Here is my scenario.
  • My custom template files are checked into Vault
  • I want to check them out, migrate them, and check them in all in one fluid process


And while it's possible to perform these tasks manually, I'm going to use a tool called Task Scheduler.

Why?  I like letting the computer do the work where possible, and this is my chance!

The steps required for Task Scheduler are in reality, straightforward.  It's more a matter of knowing where to find the right tools.

Having said all that, what will Task Scheduler do for me?

It's going to check the files out of Vault, migrate them, and check them back in again.  Making sure they're all ready to use in 2015.

First, what are my preparation steps?  Really, there's only one.  But it's a big one!

Make sure everything is configured the way you want it.  For example, I'm still using 2014, so I've kept my 2014 templates safe and sound in a separate directory, so I can still use Inventor 2014.

Remember, once migrated, there's no going back!  So plan accordingly!

The first thing to do, is locate Task Scheduler, which can be found in:
Windows>Start>Autodesk>Inventor 2015>Tools>Task Scheduler


Once the Task Scheduler starts, choose Create Task>Migrate Files


Now, I see a screen to setup my migration.  There are several settings I can choose from.  For your migration, you can change any of the settings here.  For my migration for my vaulted, files, I'm going to make sure to check the following:

  • I'm going to choose my 2015 Inventor project
  • I'm going to check migrate from Vault
  • I'm going to start the migration instantly, instead of scheduling it for later (I'm impatient)


Now, I add the files from Vault.  The icons allow me to add Files, Folders, and an entire project.  I can even create combinations of these if it suits me!

But in my case, I'm just going to choose a single folder in Vault. This is the one with my custom templates.


After choosing the folder,  I'm going to choose my options icon, where I can change settings on what functions to use when checking in.

The first tab, the Local Options, such as rebuilding files, deferring updates, and so on.  The help system describes the steps well. In my case, I'm just going with the default settings.


On the Vault tab, I can add a Vizualization file, and delete the local copy from my workspace.

In my case, I'm not creating a visualization file, only because this is a template, and it's just a blank file.

I'm also not going to delete the local copy.  I need them locally to use them, so they have to stay!


Finally, I'm all ready to go, and I can hit the "OK" button, once to close the options, and once to "pull the trigger".

The migration begins, and all I have to do is give it a little time.


After a short time, it's done!  I have my new templates.


I can even double check by looking at the new versions created in Vault.


Now, my templates are all ready to use!

And for the video of the steps, take a look below!


Thursday, April 24, 2014

Spring is the Time for Migration! Migrating to Autodesk Vault 2015 from 2014


An important step in migrating to a new version of the Autodesk Products is the upgrade of Autodesk Vault.  While this step is important, it's not necessarily difficult, but it does require some planning to make sure things go smoothly. 

Before even looking at your shiny new installation files, there are a few things you should make sure of:

  1. Do you have a valid backup of you Vault filestore and database?  Check.  Then double check.  Then think about the consequences of losing all your data.  Check again.
  2. Make sure you allot for downtime!  The installation takes time, not to mention that databases need to be migrated.  This can take a while, especially if you have a large amount of data.
    1. An additional consideration to this.  You can only skip one version while migrating a Vault.  For example, you can jump from Vault 2012 to Vault 2014, but if you're trying to go from Vault 2011 to Vault 2015, you'll have to jump to Vault 2012 or 2013, then to Vault 2014.  Take this into consideration for your planning.  
  3. Recall that Vault server can run one version back of many of the Autodesk Products.  For example, Vault Server 2015 can run 2014 based applications, and 2014 Server can run 2013 based applications.  Take this under consideration.  It might be wise to update the server, while saving the clients for later.  
    1. EDIT 18-June-2014 See comments below!  David pointed out that the 2015 version of Vault server can run 2014 AND 2013 versions of the clients!  I mistakenly thought it was only the 2014 version!  Make sure take note, and thanks David for the correction! Check out the Readme Here for all the details.
      Also note that the Vaults have to be common (Professional to Professional, Workgroup to Workgroup, etc. 
  4. Consider a test migration on a separate server!  While most migrations go off without a hitch, that doesn't help if you're the one exception to that rule.  It's not paranoia if something is really out to get you.
  5. Did you check that backup?  Make good and sure.  The test migration in step 4 can be a way to verify your backup.   It's worth considering if you have the resources. 

Once the deployment is planned out, go ahead and install the new Vault server from your installation files. 

The Autodesk Vault Install will help guide you through the rest!

The process begins by starting the install from the Setup.exe file, found on your downloaded files, or USB media.


The first screen that appears will have three options, to install the Autodesk Vault Server, choose the Install Tools & Utilities Option.


Next, the End User License Agreement, or EULA appears.  I have to agree to this to proceed, so that's what I'll do!


The Vault installation informs me that it sees an upgradeable version of my Vault.  This is my 2014 version, which I do indeed want to upgrade.  I'll choose that option.


Moving to the next step allows for the selection of which programs I'd like to install.  At this point, I'm interested in installing Autodesk Vault Basic Server 2015.

I've already installed Autodesk Content Service with Factory Design Suite Ultimate, in my previous post.

Content Center is downloaded for Inventor 2015.  Hovering over the "information shows this information.


Also note that the Network License Manager can't be installed.  This is due to the fact I've already got a copy installed.  Hovering over the "No Smoking" symbol will give this information.


Finally, I place my Vault on my D: drive. This is because my C: is a smaller partition, and I want to put programs like the Vault Server on my larger data drive.


Finally! I can click the install button, and get the installation going!

The installation will take some time.  This is part of where that "allotting for downtime" note comes into play!

Add caption
After a little time, the installation will wrap up.  I close the final screen, and this is where I get to take a moment.  The installation is done, but the migration is next.

Now it's time to open the newly installed Vault Data Management Console  The first part of the migration starts.


But there are still a few more steps.  I'll need to log into my Vault, where I'm presented with a message indicating that I need to migrate my Vaults and Libraries, and asking me if I want to do so.

Of course, I'm going to agree! I can't use the Vault until I do.


At last, the end is in sight!

Now, a message asking me if I want copies of my custom Content Center Libraries created for Inventor 2014, Inventor 2015, or both.

You're options might be different here, based on whether or not you have custom Content Center Libraries or not.

In my case, I'm going to make sure I have libraries for Inventor 2014, and 2015, because I am going to be using both.


Now!  Vault is ready to go.  But there are a couple of last things that need to be done!

I'll update any scripts that are maintaining my Vault.  The installation paths have changed!  Backups won't run unless the scripts are updated!

If you're doing your own migration, don't forget this important step!

And if you prefer, I've also created a video of the steps too!  Check it out below!


Tuesday, April 22, 2014

Onward and upward! Installing Your Autodesk 2015 Design Suite!

We think a modern cloud lets you decide when you want to upgrade. We don't decide for you.
Larry Ellison

***********************EDIT April 22, 2014*******************************
Added video to accompany the text description
**********************************************************************


Ah. Software updates.  I'm always excited when the time comes to install my new Autodesk software.  There's new features to try, after all!

But as always, there are options that have to be selected.

So for this post, I'm going show the options that I use for install, as well as explain some of the other choices that might be used.

I can't cover every last detail, but perhaps what I can show can help you plan your own installation.

Before I start cranking, I should point out I'm installing from Factory Design Suite Ultimate 2015.  So if you're installing a different Autodesk software, some of the options may be different.

But even if you're not installing exactly the same product, there should be similarities!

1. To begin the install, click on Setup.exe to being running installer. 

The Setup.exe file.  Pulling the trigger on the installation.

2. This starts the installation.  Soon, the first installation screen appears.

Clicking the option to install to my laptop

For my configuration, I'm going to choose the Install option.  But here's a brief description of the other options.

Create Deployment: This option is used to create network deployments.  This is an install that's configured with a script.  It can be pulled to different users machines and make sure consistent settings are used for different machines.

Install Tools & Utilities: This contains the Network License Manager, CAD Manager Tools, and Vault Basic Server, among other tools

Choosing the Install option, I move onto the next screen.  This is the End User License Agreement (EULA). It's legal stuff.  You have to accept it.  'Nuff said.


The EULA.  Just say "Yes".  

3. After accepting the EULA and hitting next, it's time to choose the license type.

One choice is a Network License installation, where a server holds the license, and the installation "pings" the server for the license.

Since I'm installing on my laptop, I'm going to choose a Stand-Alone license. Also known as a Node Locked license, this will tie the license to the hardware on my laptop.

This screen is also where the serial number and product key are entered.  You'll get your serial number and product key from Autodesk.  (You can't have mine. Get your own!)

Note! Your 2015 Product Keys can be found at this link!

Choosing license type and entering serial numbers


4. Clicking next will now let me choose which programs to install.  I'm going to install the entire Suite.  But you could deselect any options an programs you don't want.  
The only thing I do on this screen is change my installation location, which I change from my C drive to my D drive (which is larger).

Changing my


Additionally, clicking on one of the programs will expand out additional options for the installations, such as downloading service packs (if available), and adding or removing certain components from the installation.

 Each one is different, so check the programs you're installing, and make sure the options you want are selected!


Make sure to click the program name to close up the options!  The install button will be grayed out until you do this!

5. this is all done, you're ready to Click install, and proceed! 


, For a video description, take a look below! 

Monday, April 21, 2014

A Guest VIdeo: Workflows for using Autodesk Inventor and 3dsMax Together!

“I see the computer as just another tool in the creative process, in place of or with paint, pencils or other drawing methods. Working digitally simplifies the workflow process.”
Donna Berger

It's been a busy week, and a busy (but wonderful) holiday weekend too!  I do have some 2015 blog posts and videos in the works, but things have been hectic!  So I'm still working on them!  I hope to have something up soon!

In the meantime, here's a great video from Marion Landry showing some tips and tricks on using Autodesk Inventor and Autodesk 3dsMax!  Take a look!  There are some nice tips in here!

Wednesday, April 16, 2014

It's That Time of the Year Again! What's New in Autodesk Inventor 2015

“When patterns are broken, new worlds emerge.”
Anonymous 

It's an exciting time of year for Autodesk Inventor geeks!  Surfing around the internet, I found my first "What's New" video for Autodesk Inventor 2015!

I'm really looking forward to getting into the free form technology that was just added!  It looks powerful, very powerful indeed!

But, why not talk a look at the video from Autodesk below!  Take it straight from the source and see what you think!

Monday, April 07, 2014

Choosing a Sheet Metal Base Face before Creating a Flat Pattern in Autodesk Inventor

Simon: I'm trying to put this as delicately as I can... How do I know you won't kill me in my sleep?
Mal: You don't know me, son, so let me explain this to you once: If I ever kill you, you'll be awake, you'll be facing me, and you'll be armed.
Simon: Are you always this sentimental?
Mal: I had a good day.

Exchange between Simon Tam and Mal Reynolds in the television series "Firefly"

The trick I share this week is one I've actually known about for a while.  As a matter of fact, it's become part of my "background knowledge".  Something that has become second nature.

I've known it so long, I can't remember when I didn't know it. f

But I'm sure there are those that may not know it, so I choose to share it today.

When unfolding a sheet metal part in Autodesk Inventor, inventor chooses which face is going to be shown to the user via it's own means.

It might be considered common knowledge that the face can be changed in the flat pattern screen by right clicking on the Flat Pattern icon in the browser, and choosing Edit Flat Pattern Definition.


This tool invokes the Flat Pattern Definition dialog box.  This has a button where the flat pattern can be flipped.


But there's another way that it can be done before the flat pattern is created.

Just pick the face you want to see before hitting the flat pattern icon, and that will become the "Base Face"


And if you really want to make sure, change the color of one of the faces to a different color by selecting it and right clicking.  Give it a try!  It works!


And for those who prefer a video format, here you go!

Windows XP - Rest in Peace

“In this business it takes time to be really good - and by that time, you're obsolete.”
 Cher 

As I work on something for my next post, here's a bit of news that is flying all over the web. At this point, this is little more than a reminder that a die that was cast a long time ago, is coming to rest shortly

Tomorrow, April 8th, 2014, is a big day for computer operating systems.

Windows XP is no longer going to be supported by Microsoft.

What does that mean?

No more security patches, tech support, nothing.  Windows XP is set adrift, just another piece of jetsam in the technological world.


Hopefully, everyone has made their moves.  Decommissioned Windows XP boxes from production, or relegated them to old test stations.

But get ready!  Tomorrow is the big day.  After twelve long "computer years", Windows XP is passing into history.