
James Chiles
In previous posts, I showed how to install your Autodesk Design Suite, as well as migrate a Vault from 2014 to 2015.
However, there are still things that need to be done. For example, what about custom templates that have been carefully crafted in previous releases? They aren't usable in Inventor 2015 until they've been migrated.
It goes without saying that this step is important. So what are the steps to migrate template files?
The simplest, is to just open each template file in Inventor 2015 and save it. It will work just fine, and it's a completely valid way of doing things.
However, I'm going to describe something that's more automatic then just opening and saving.
Here is my scenario.
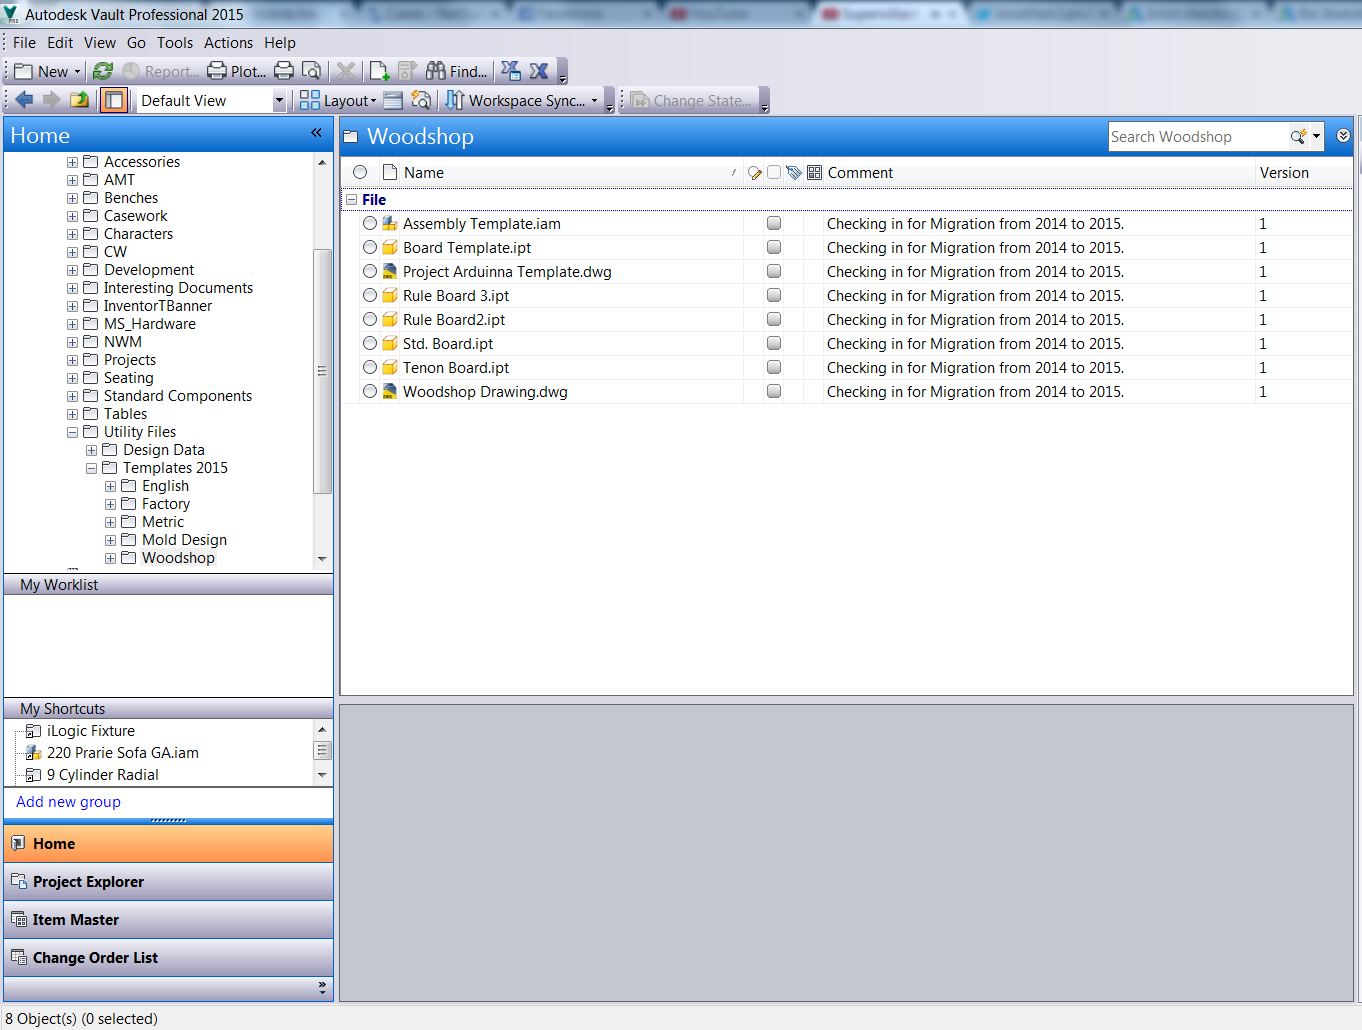
- My custom template files are checked into Vault
- I want to check them out, migrate them, and check them in all in one fluid process
Why? I like letting the computer do the work where possible, and this is my chance!
The steps required for Task Scheduler are in reality, straightforward. It's more a matter of knowing where to find the right tools.
Having said all that, what will Task Scheduler do for me?
It's going to check the files out of Vault, migrate them, and check them back in again. Making sure they're all ready to use in 2015.
First, what are my preparation steps? Really, there's only one. But it's a big one!
Make sure everything is configured the way you want it. For example, I'm still using 2014, so I've kept my 2014 templates safe and sound in a separate directory, so I can still use Inventor 2014.
Remember, once migrated, there's no going back! So plan accordingly!
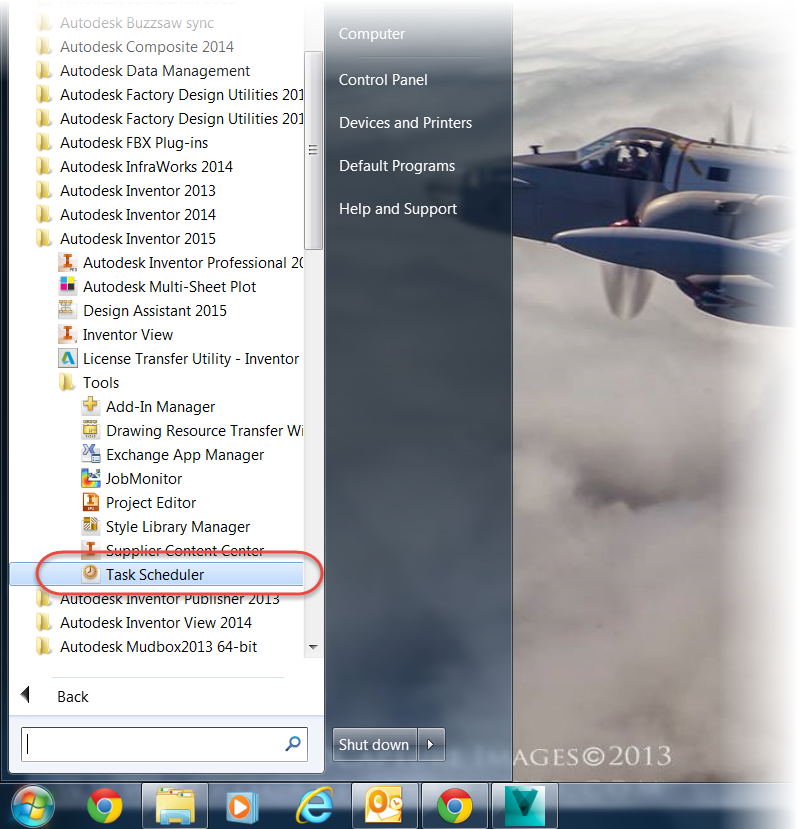
The first thing to do, is locate Task Scheduler, which can be found in:
Windows>Start>Autodesk>Inventor 2015>Tools>Task Scheduler
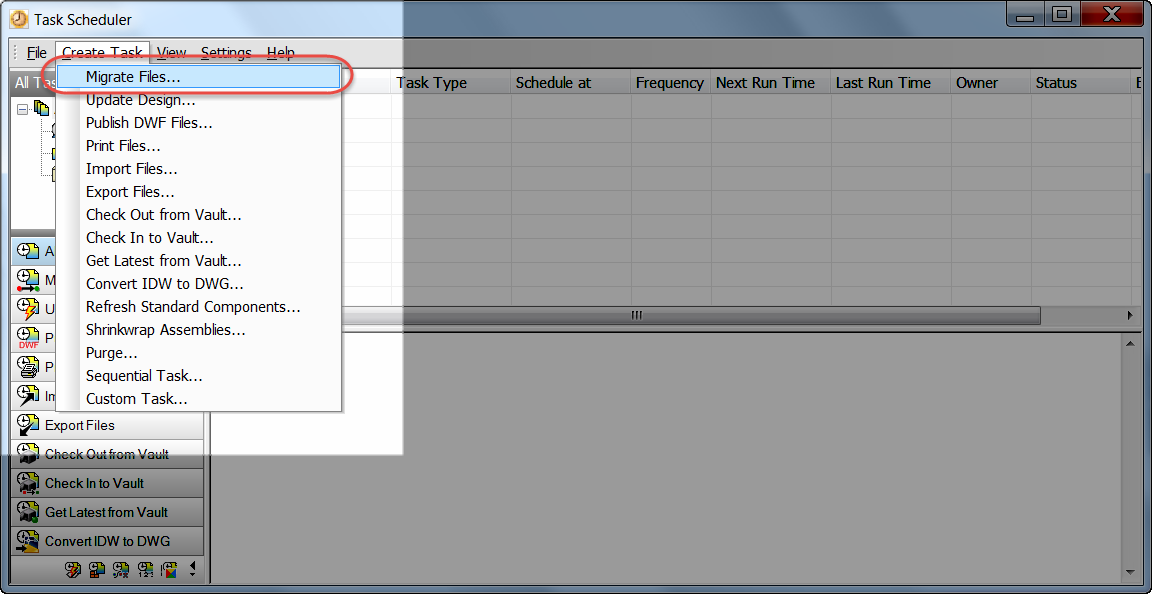
Once the Task Scheduler starts, choose Create Task>Migrate Files
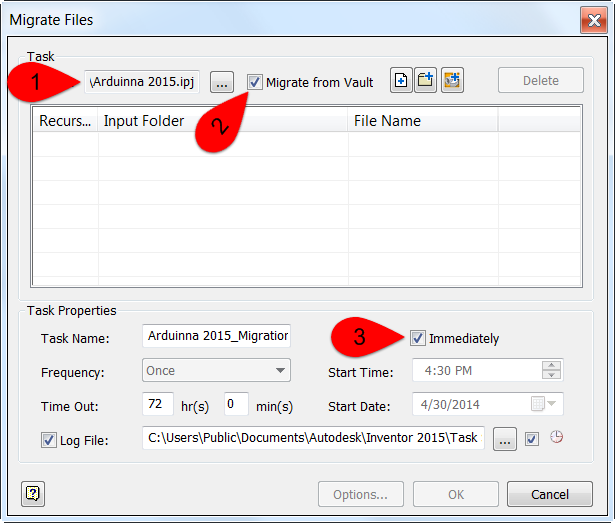
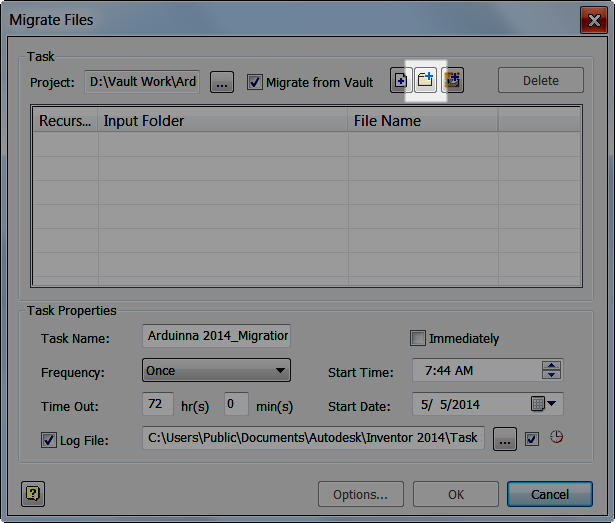
Now, I see a screen to setup my migration. There are several settings I can choose from. For your migration, you can change any of the settings here. For my migration for my vaulted, files, I'm going to make sure to check the following:
- I'm going to choose my 2015 Inventor project
- I'm going to check migrate from Vault
- I'm going to start the migration instantly, instead of scheduling it for later (I'm impatient)
Now, I add the files from Vault. The icons allow me to add Files, Folders, and an entire project. I can even create combinations of these if it suits me!
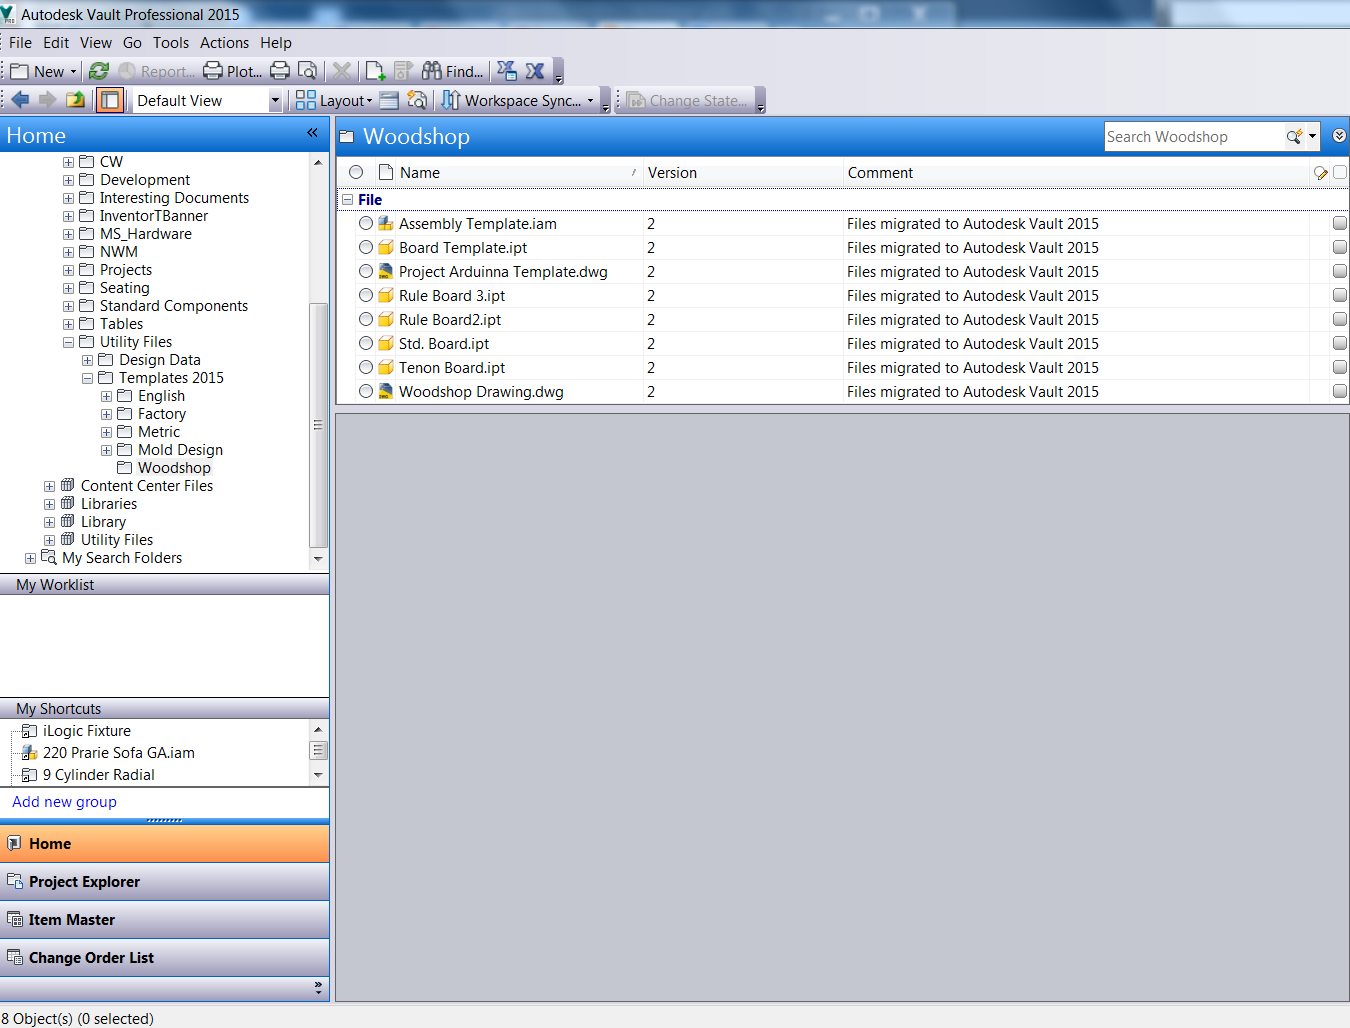
But in my case, I'm just going to choose a single folder in Vault. This is the one with my custom templates.

After choosing the folder, I'm going to choose my options icon, where I can change settings on what functions to use when checking in.
The first tab, the Local Options, such as rebuilding files, deferring updates, and so on. The help system describes the steps well. In my case, I'm just going with the default settings.
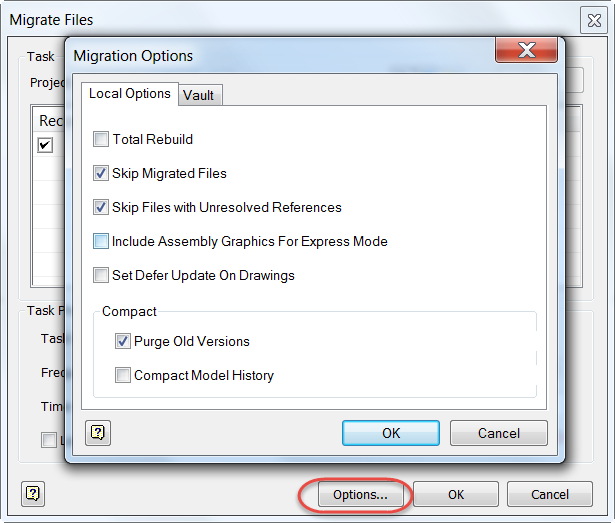
On the Vault tab, I can add a Vizualization file, and delete the local copy from my workspace.
In my case, I'm not creating a visualization file, only because this is a template, and it's just a blank file.
I'm also not going to delete the local copy. I need them locally to use them, so they have to stay!

Finally, I'm all ready to go, and I can hit the "OK" button, once to close the options, and once to "pull the trigger".
The migration begins, and all I have to do is give it a little time.
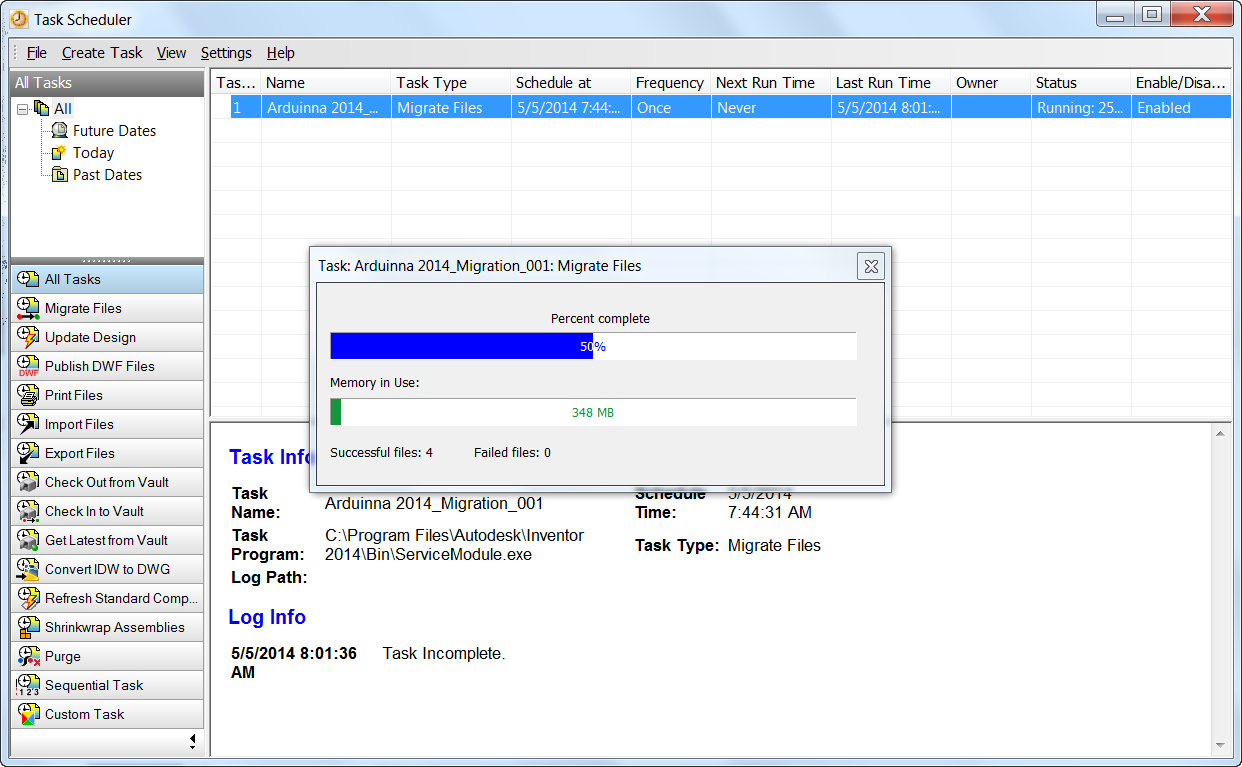
After a short time, it's done! I have my new templates.
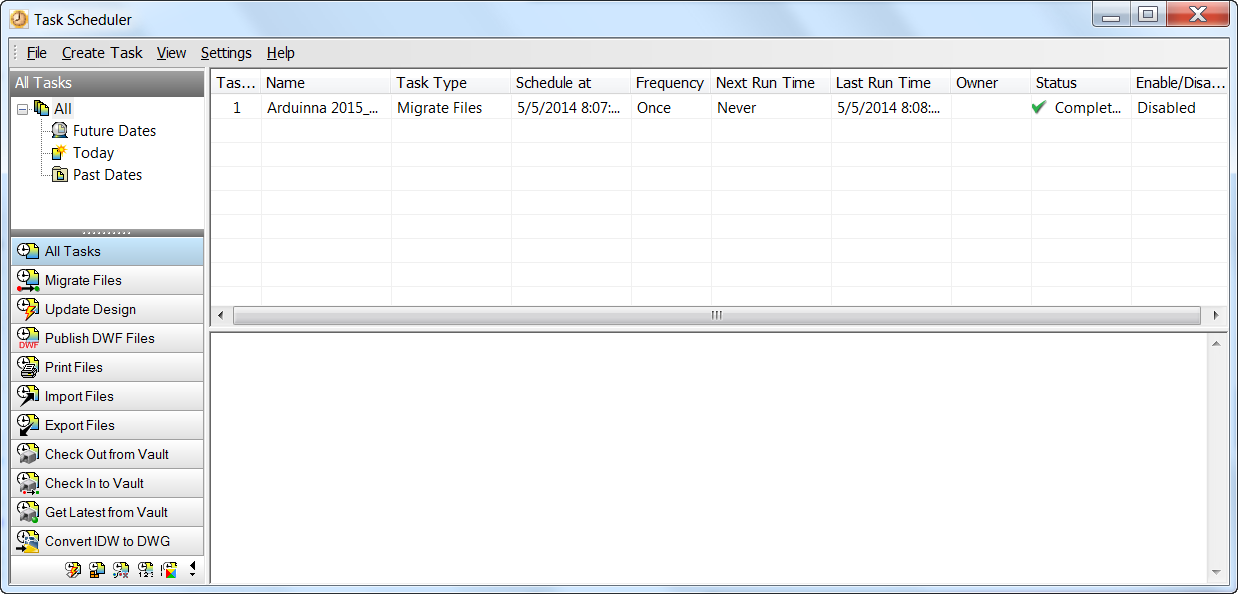
I can even double check by looking at the new versions created in Vault.
Now, my templates are all ready to use!
And for the video of the steps, take a look below!
No comments:
Post a Comment