
Then all the colors will bleed into one
U2 - "I Still Haven't Found What I'm Looking For"
Sometimes, there really is "one magic" setting that can obtain the desired result. In Autodesk Showcase, I've found that one of these is setting the clipping plane.
Sometimes, when a model is imported into a Showcase scene, black triangular streaks will appear across the model.
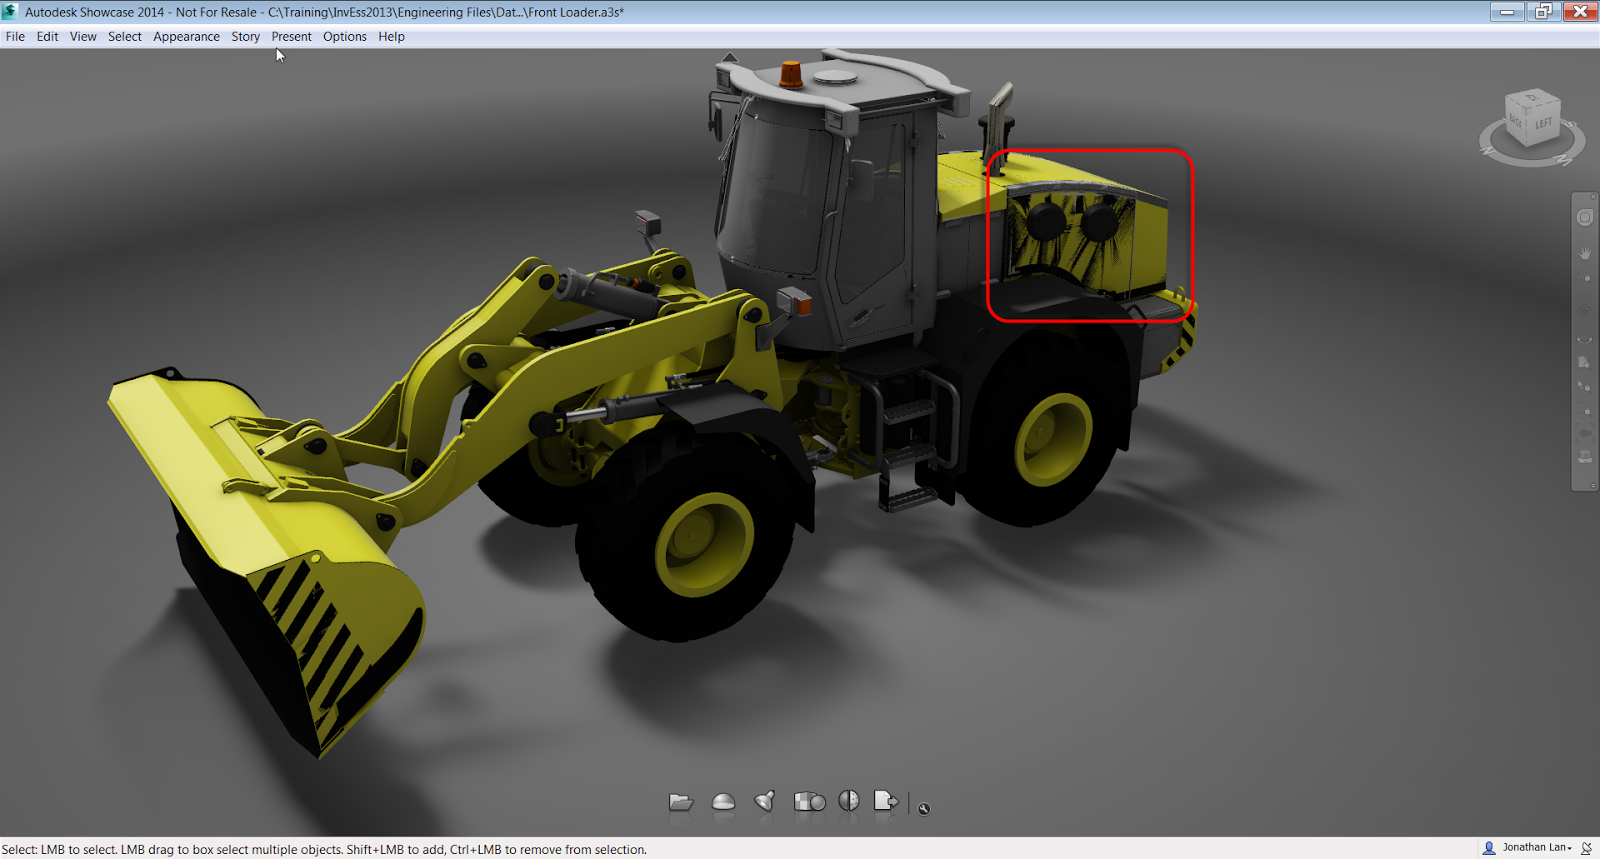 |
| What are those? They're not supposed to be there! |
They shouldn't be there, they're not right, and they're ugly.
They're actually caused by Showcase not being able to sort the faces. The back face is actually bleeding through the face in front of it.
Fortunately, they can be easily cleaned up with just one setting.
The setting is found in File>Settings>Scene Settings
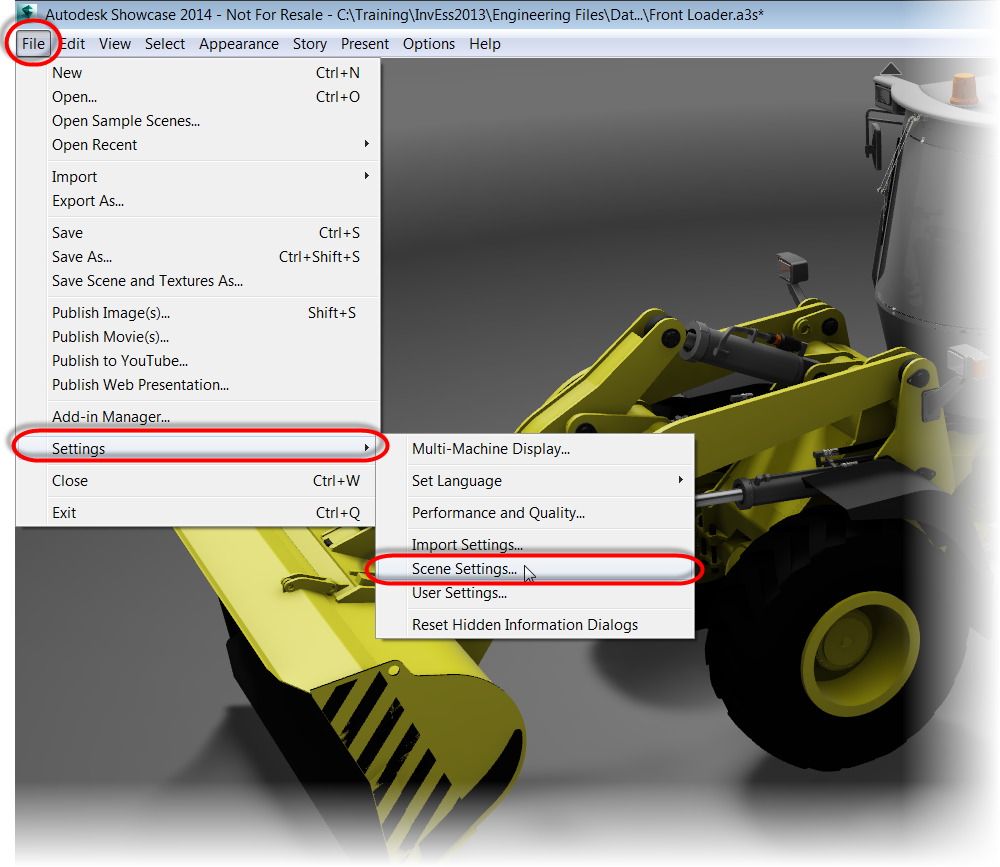 |
| Getting to the setting I need |
Once the dialog box opens, the setting I'm after is: Distance from camera to near clipping plane:
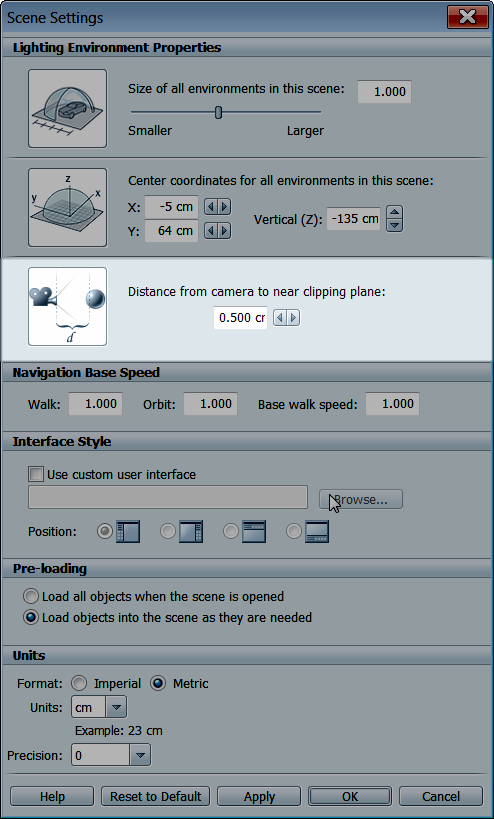 |
| The setting to change is highlighted. |
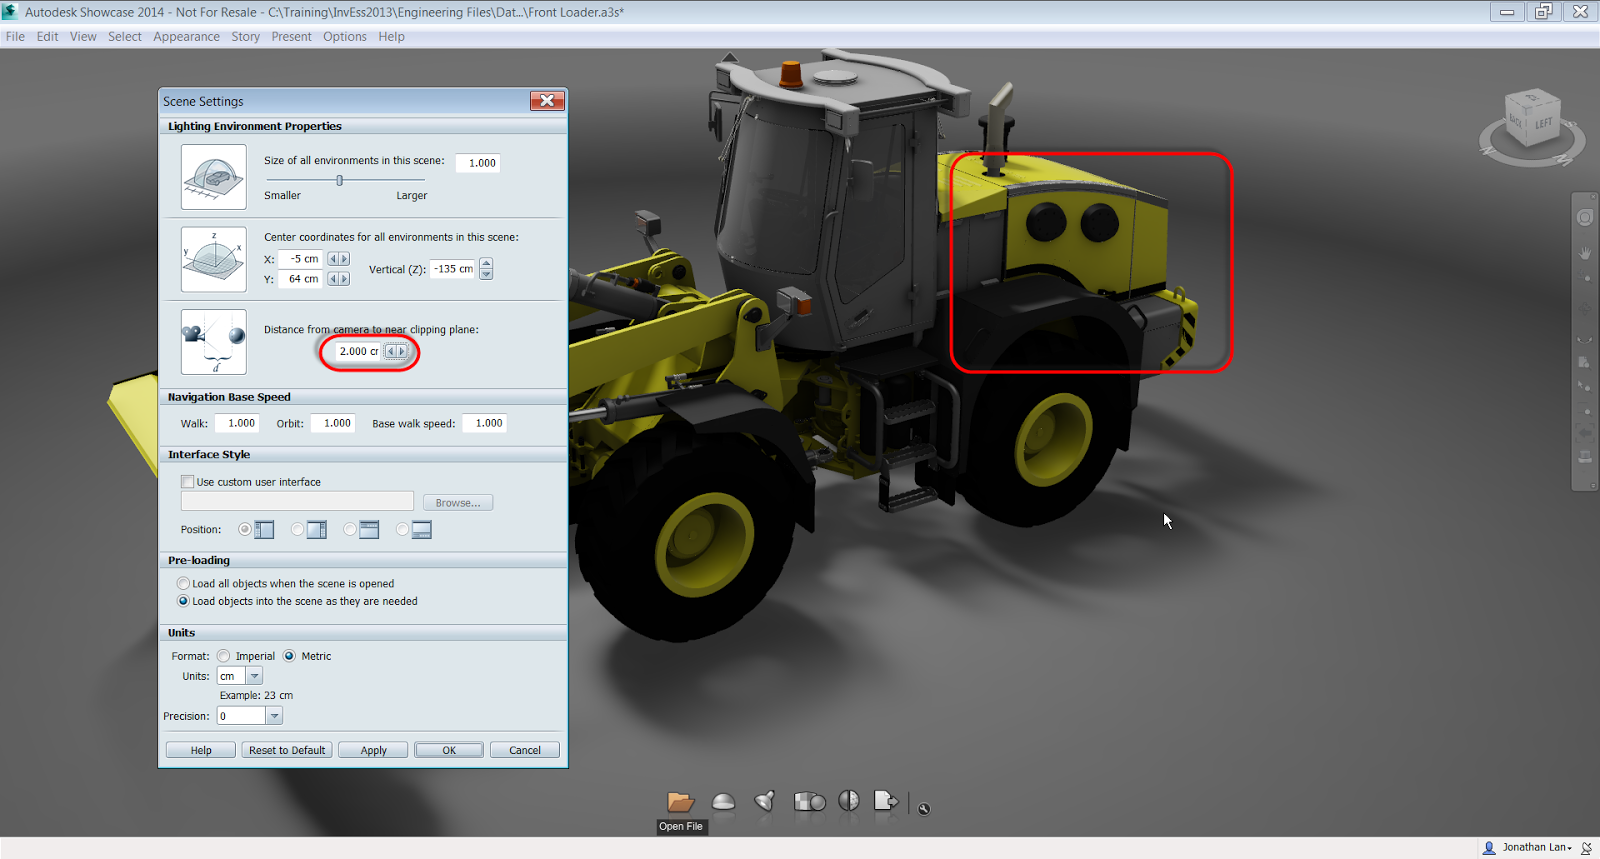 |
| Much better! |
In this case, increasing the setting to 2.000cm makes everything as it should be. Of course different scenes may require different settings, so if you if you're working with your own scenes, you may have to try a couple of different numbers.
But just that setting alone, can make a huge difference in how a Showcase scene appears in the end.
For a fantastic explanation of this, take a look at the video below created by Marion Landry. She's the person who originally taught me this great trick, and she's definitely got the definitive video in my opinion!
No comments:
Post a Comment