Gil Kane
I hope it doesn't become too much of a habit. But travels have again taken me away from my video gear, so I'm not able to provide a video again this week.
But below is a post sans video. Fingers crossed I can add one soon!
The Autodesk Exchange Apps website is an Autodesk Inventor tool that I think doesn't get the press it deserves.
 |
| The Inventor App Site |
Much like the application stores most of us have used for our mobile devices, the Autodesk version has utilities for many Autodesk programs, such as AutoCAD, Autodesk Inventor, and Autodesk Vault.
The reason I've decided to talk about this site is that I found a nice little utility I liked, one that I'll definitely be saving for the future.
It's called "Inventor FeatureMigrator", and it's what it does that makes it interesting.
It can take an assembly level feature, and transfer it down to a the parts that the assembly level feature passes through.
 |
| The Feature Migrator on the screen |
I've been asked if there's a way to do this many times, and the answer has always been "no". Now, with this little free utility, it's not!
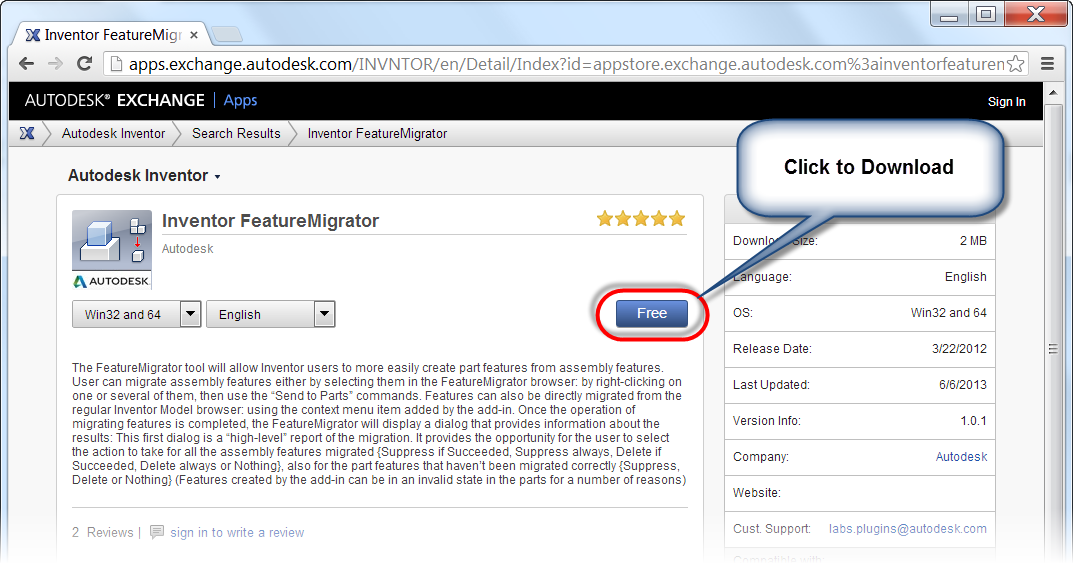
The first thing I did was download it from the site, and install it by clicking on the downloaded file.
 |
| Downloading the app. |
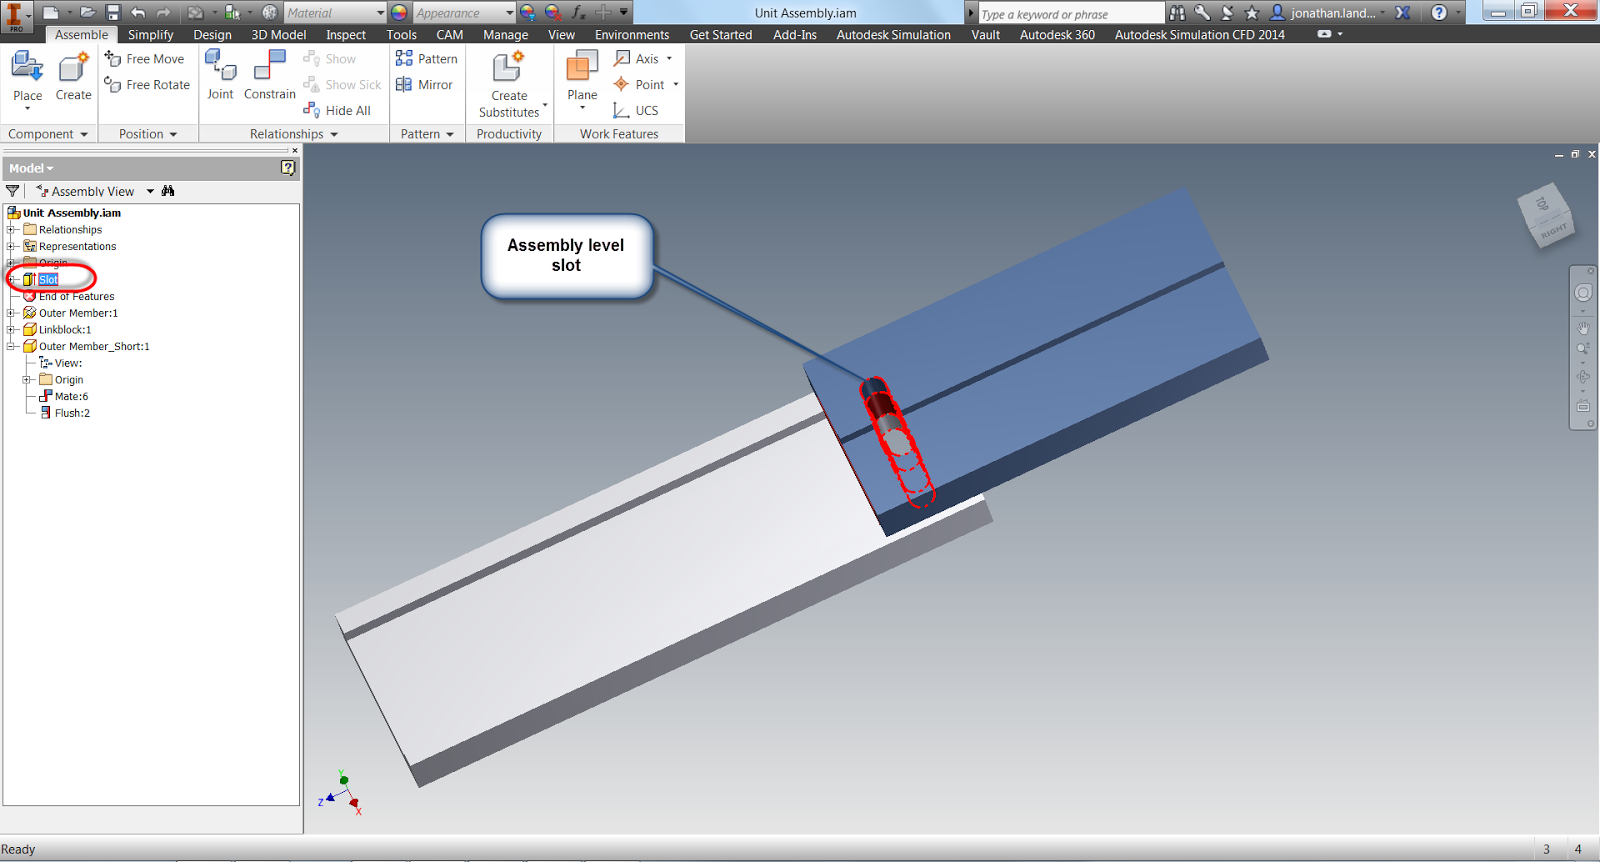
Once the app is installed, I'm ready to use it. Here, I'm using an assembly of three components, with a slot placed through all three of them using an assembly level feature.
 |
| Three components with an assembly level slot punched through them |
At the moment, Inventor looks much like it always has.
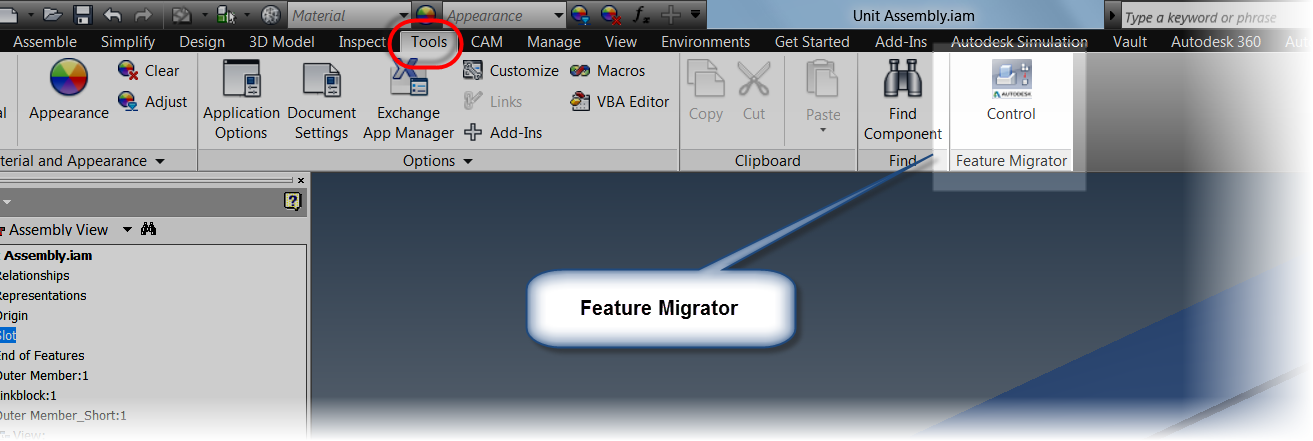
But, once installed, Inventor FeatureMigrator adds a button to the Tool Ribbon in the assembly file.
 |
| Finding the tool. |
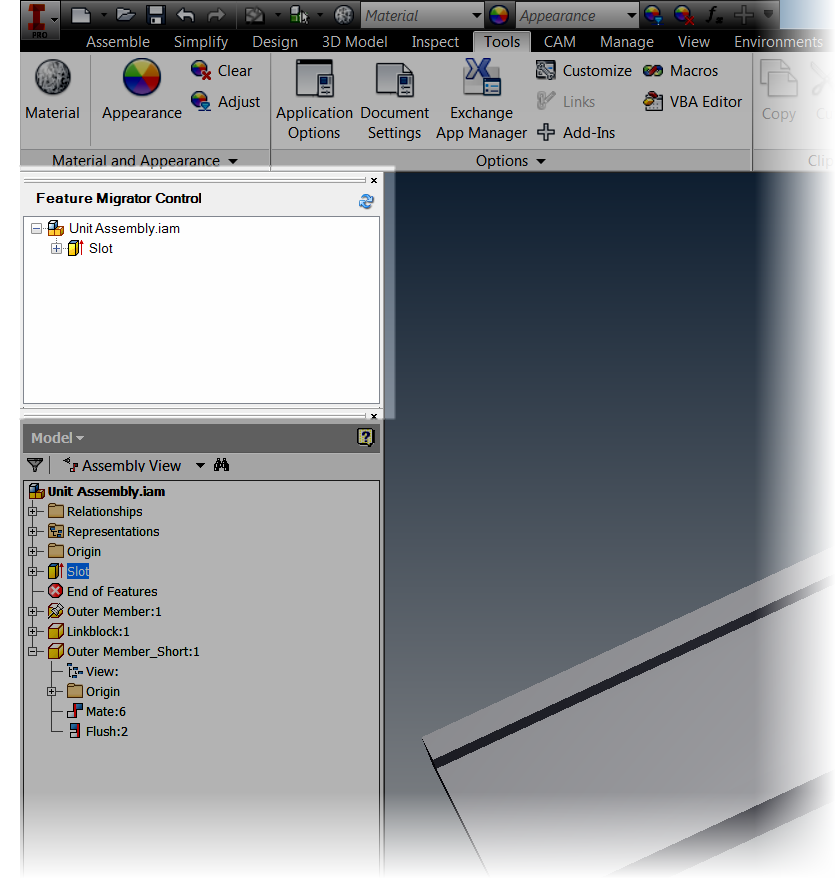
Clicking on this button starts the tool, which appears as a browser style window inside Inventor.
 |
| The "Browser Window" |
Here I can see the assembly level features that are applied to this model, in this case, it's just a single feature I've named "Slot".
To start the process, I right click on the feature I want, and choose "Send to Parts".
 |
| Sending the features to parts |
A dialog box will appear that has options for what to do with the translated assembly level features, such as options for suppression or deletion. There are also options for how to handle "non-healthy" part features, even what render style to use on the part features.
 |
| The Translation Report |
I can also click on the "Detailed Report" button to see more info on the translation.
 |
| The Detailed Report |
Hitting OK will complete the process. The Slot I created at the assembly level is now pushed down to the part level. To confirm this, each part can be opened and checked.
There are a couple of interesting quirks, in this little utility. They don't bother me, but it wouldn't be right for me not to mention them.
1) It creates new copies of the components it affects, adding a "_1" to the filename. I presume this is to make sure that sweeping modifications when a part use across multiple assemblies is modified.
2) The sketches it creates aren't fully constrained to the new geometry. So it may be beneficial to constrain (or fix), the geometry in each part.
For me, these are things are just curiosities for the advantages I gain, but I leave it for each user to decided. If you think this tool is useful, Swing by the Autodesk Exchange App website and take a look!
I also like the Feature Recognition and Thread Modeler apps, so feel free to take a look at those too!


No comments:
Post a Comment