
John Singer Sargent
A few weeks ago, I found myself training an Autodesk Inventor course. As with any class, I always try to throw in a few of the "simple" tips. They're the little things, but things that can be used every day, in just about every Inventor session that lasts more than a few minutes.
So as I thought about this post, I thought I'd collect a few of the common tips for different aspects of Inventor. And what better place to start, then at the beginning of nearly every Inventor part.
Why not start with sketches?
I won't get wordy on this one. It's time to just go ahead and jump right in. Here are five Inventor sketching tip. The order is random. It's not a ranking. It's just five tips that I like to use.
So here goes!
1. Temporarily turn off automatic constraints
Inventor will try to add constraints as you sketch, such has horizontal, vertical, perpendicular, and parallel. But sometimes, those constraints aren't wanted.
To turn off that functionality, hold down the Ctrl key. Automatic constraints are turned off as long as the Ctrl key is held down!
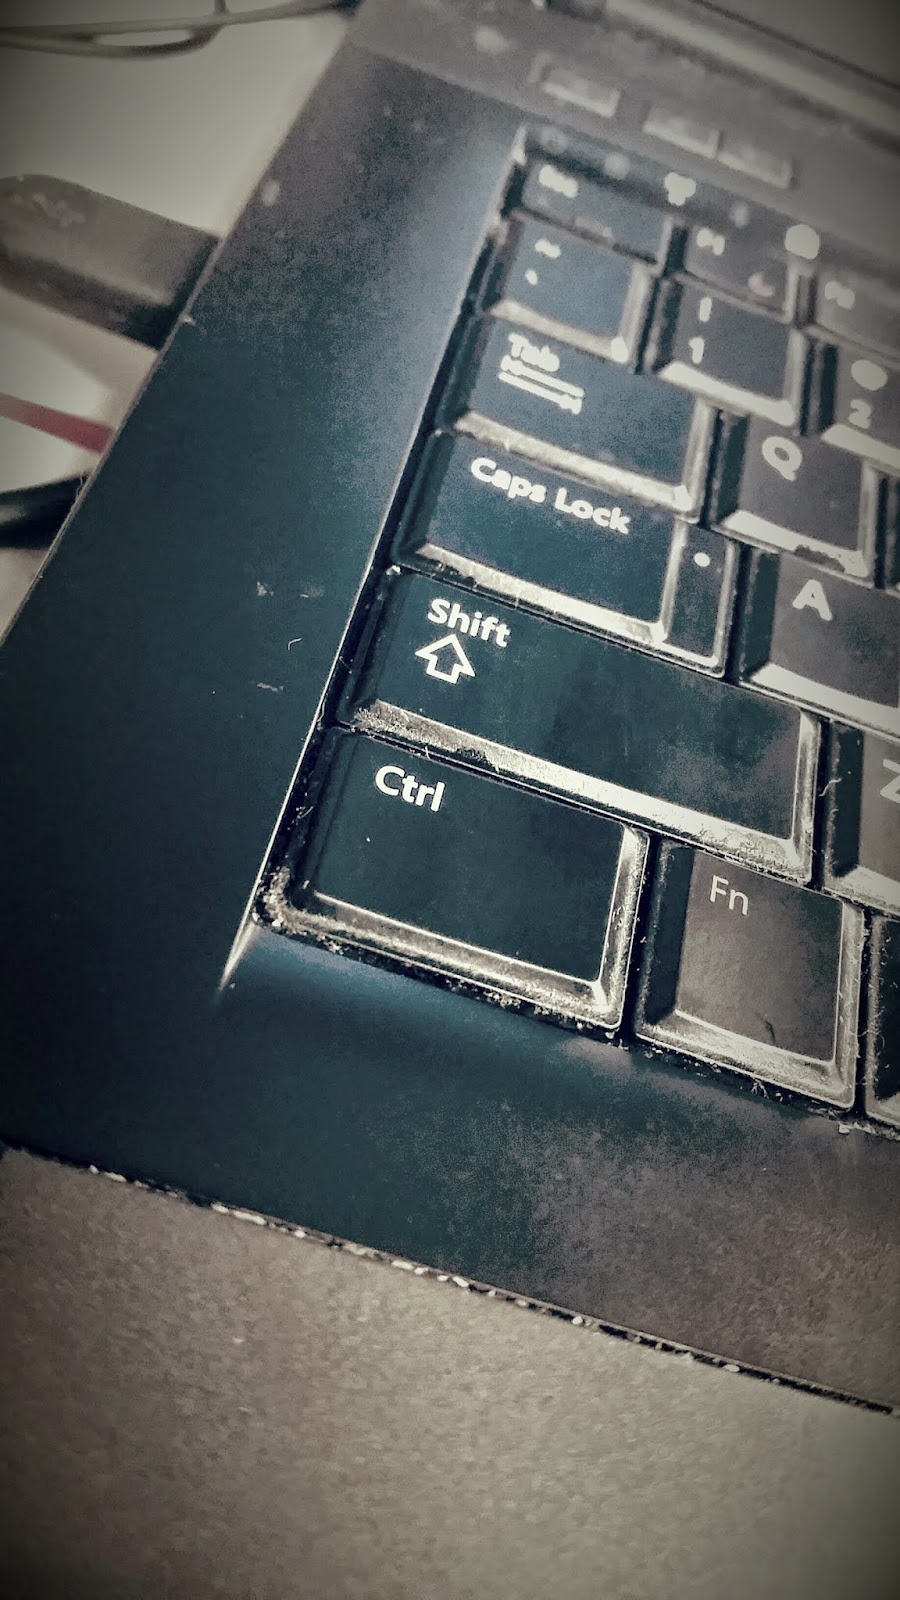 |
| That's my high mileage, very dirty Control key. |
2. Change what geometry Inventor is automatically creating constraints between
When sketching, Inventor automatically creates constraints between the geometry being created, and existing geometry. At times this can seem to be arbitrary. But did you know that if you "scrub" the desired piece of geometry with your cursor, you can change what geometry Inventor is constraining to. Just remember to rub the geometry with the mouse cursor, don't click!
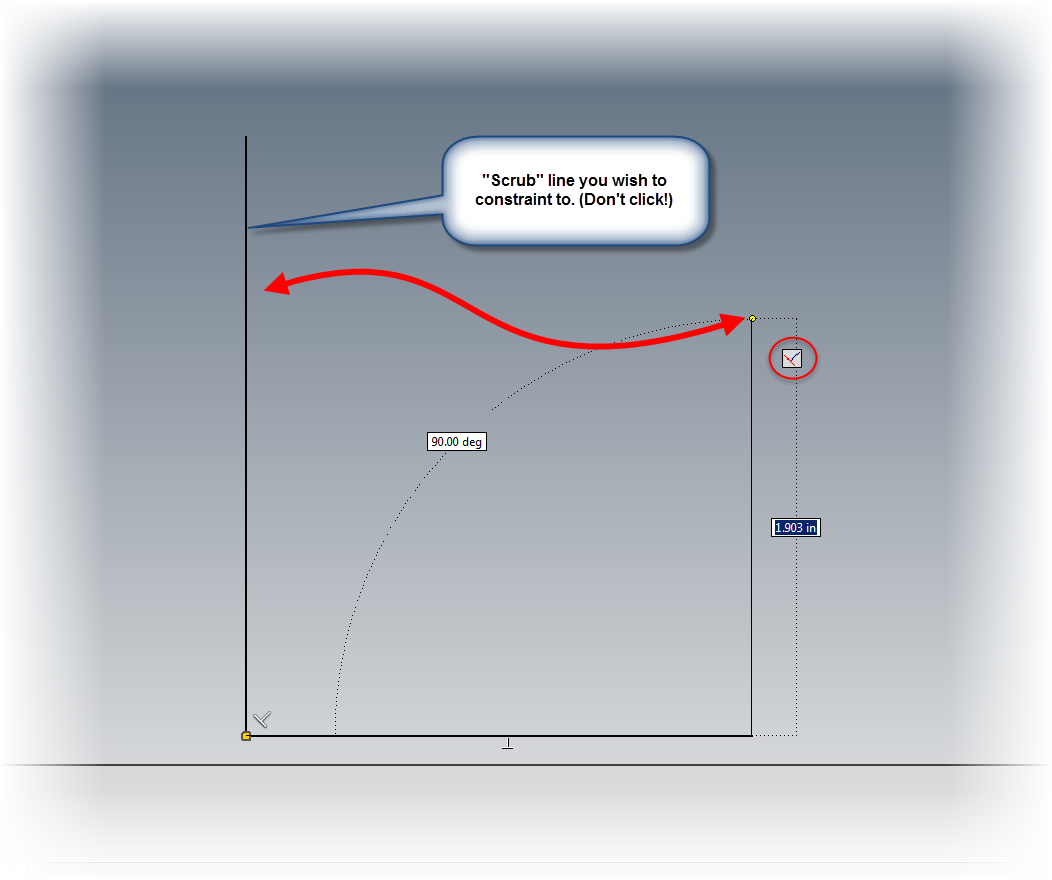 |
| First scrub the desired geometry |
 |
| And enjoy the result! |
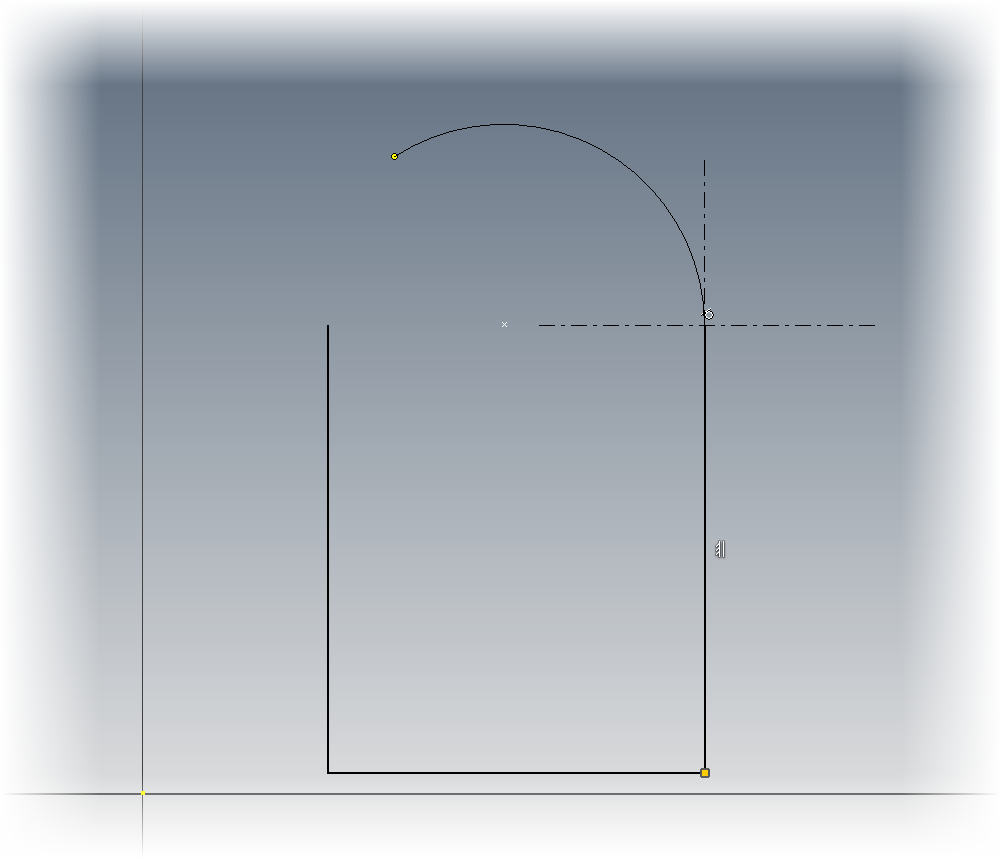
3. Creating an arc while still using the line tool.
I compare this Inventor function as being similar to AutoCAD's polyline function, which is creating an arc while still using the line command. This tool takes a certain "feel" and a dash of patience, but I think it's worth it.
When still in the line tool, click on the end of the line where the starting point of the arc is desired. Now hold the mouse button down, and imagine your drawing the arc with your mouse cursor. An arc will appear!
 |
| Creating a drag arc |
As long as the mouse button is held down, the arc can be changed. Dragging perpendicular to the line creates a perpendicular line, dragging in a tangent direction creates a tangent line. Lifting the mouse places the arc.
Give it a try. It may take a bit to get used to, but it's worth it!
4. Closing a sketch with a right click.
Another command that heralds back to AutoCAD's polyline functionality! When ready to close out a loop of sketch geometry, right click. In the right click menu, there's an option to Close. Save a few clicks by letting Inventor close the sketch!
 |
| Close a loop of geometry |
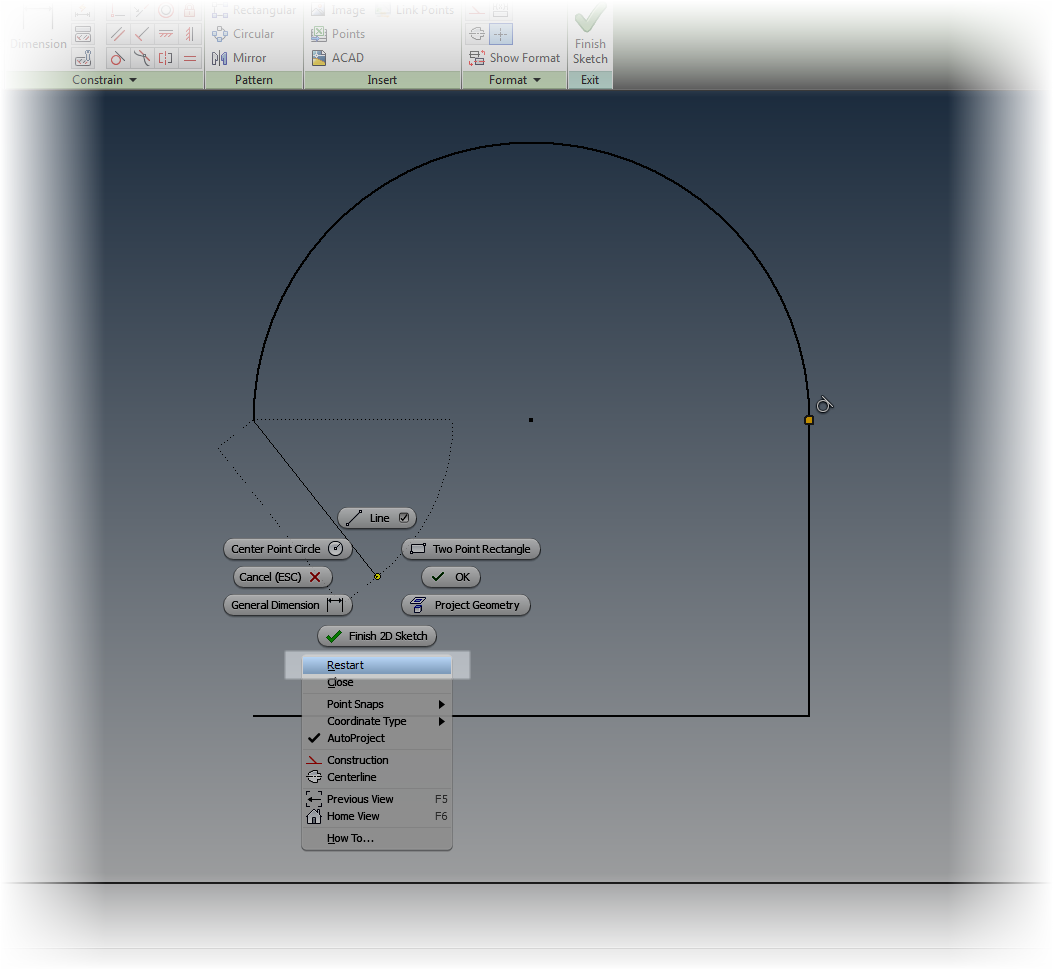
5. Restart a line without restarting the command!
There may be times when a continuous sketch may not be needed. But that doesn't mean that the line command has to be completely exited and started over. To create a line starting in a different location, right click, and choose Restart. The line can be started elsewhere without restarting the command!
 |
| Restart without exiting the command |
No comments:
Post a Comment