 |
| Solid rivets joining two pieces of aluminum together. |
And while these pieces are amazing in both their simplicity and effectiveness, like anything, they are not without their drawbacks.
They're inexpensive, but they require a certain amount of skill to properly set. Proper riveting takes practice, and I found if I don't do it for a while, I have to shoot a few practice rivets to get "back into the groove."
The other problem is access to both sides of the part are required. The rivet has to be "shot" with a tool from one side of the part, and "bucked" or set, from the other.
If you're curious about seeing how solid rivets are set, the Experimental Aircraft Association has a great video explaining that here!
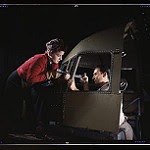
Moreso, it's likely that one person won't be able to reach both sides of the parts to be joined. That means that two people are needed to set the rivet, a "bucker" and a "shooter".
 |
| Two workers setting solid rivets. |
The blind rivet, also known as a "pop" rivet or "Cherry-Max" rivet solves both of these issues. 'For trivia's sake, the name "Cherry-Max" is derived from Cherry Aerospace, a prominent maker of blind fasteners.
These rivets have a metal stem (mandrel) that is drawn through the rivet by a special tool. The metal stem expands the rivet as it's pulled expanding the rivet and setting it in place. The stem breaks off inside the rivet, adding to the rivets strength.
 |
| A blind rivet diagram. Image from FAA Advisory Circular AC43.13-1Bhttps://www.faa.gov/documentLibrary/media/Advisory_Circular/AC43.13-1b.pdf |
The advantage of these rivets is they don't require the skill that a solid rivet requires. They also don't require that the part be accessible from both sides. The drawback of these rivets is they are much more expensive than their solid counterparts.
 |
| A blind rivet tool, with unset blind rivets under the "Design Differently" sticker on my laptop. |
If you're curious about how to set blind rivets, here's a link to a great video here.
For more information on selecting blind rivets, check out the process guide provided by Cherry Aerospace at the link here.
I leave it to them to provide the info for you! Mostly because I have to review it myself to refresh in my own memory!
But there you have a few of the "wheres and whys" of rivets. I hope the info I've compiled here helps you out!
Photo Acknowledgements:
photo credit: The Library of Congress Riveting team working on the cockpit shell of a B-25 [i.e. C-47] bomber at the plant of North American Aviation, Inc., Inglewood [i.e. Douglas Aircraft Company, Long Beach], Calif. (LOC) via photopin (license)

No comments:
Post a Comment