
Monty Python
In a previous post, I talked about migrating Styles from a previous release of Autodesk Inventor into Autodesk Inventor 2014.
The simplest way, of course, is just to open each file in Inventor and save it. This will migrate the files.
And it does have it's advantages. Opening the file would allow for an "inspection". Old styles could be inspected and purged, new styles can be added, and general clean up could be performed.
But another way to quickly migrate files would be to use Inventor's Task Scheduler. This tool allows for the templates (and any other file for that matter), to be migrated in batch, hands off.
Note! Before migrating any templates, make sure you've backed everything up! I've never had a problems with migration, but you only have to be wrong once!
To access Task Scheduler, go to Windows Start>All Programs>Autodesk Inventor 2014>Tools. Task Scheduler will be in there.
 |
| Finding Task Scheduler |

With the Migrate Files dialog open, now the settings for migration can be configured.
There are several settings that can be changed for this dialog. Some of the major ones, and my preferences for this task
Project: The project under which the files will be migrated
Vault: Migrates the files out of Vault - Since my templates are not in Vault, I won't be using this setting
Folder icons: Are the files going to be added individually, are folders going to be added, or is an entire project going to be migrated? I'm going to use folders
Under Task properties, it's also possible to give the task a name (I just use default), and schedule the task for a given time. Since my templates aren't particularly large, I'm going to run them immediately.
 |
| The Migrate Files dialog. |
In the dialog below, I've added the folder to migrate, and completed my settings. I also like to click on options, and have the Task Scheduler Skip Files with Unresolved References, Purge Old Versions, and Compact Model History.
If these were parts with features, I'd also compact the model history, but these are mostly empty templates.
 |
| Setting up options |
Once the settings are ready, I can close the Migration Options, click OK, and start the migration.
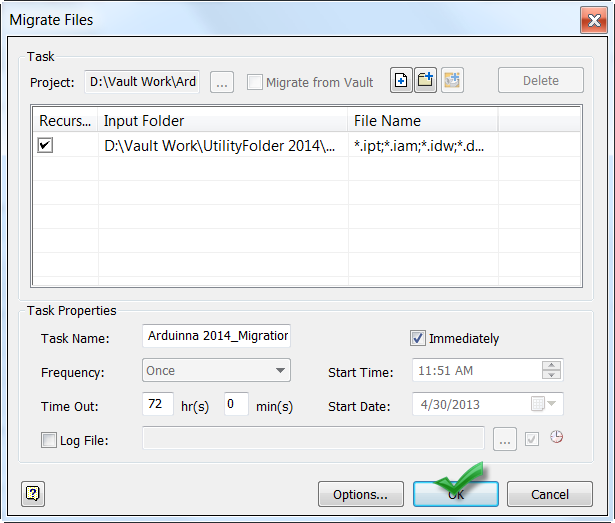 |
| Committing the migration |
The migration will begin running. For templates, this typically takes a few minutes, but it does depend on how many files are being migrated, so that has to be taken into consideration before starting.
Once the notification is completed, right clicking on the task will allow for a report to be generated that will show which files were successful, and which files failed and why.
 |
| Finished! |
If you prefer the video form, just take a look below!
No comments:
Post a Comment