
Every Autodesk Inventor part and assembly contain valuable properties, called iProperties by the Inventor folks. A savvy user can place critical information into iProperties. These properties are passed from the part, into the assembly, and ultimately into the drawing.".
This information can be critical to making sure your finished product comes together properly.
I would be the first to tell you that, in a perfect world, any Inventor iProperties you need filled out should be filled out before you place the part in the assembly. You should also set the material as well.
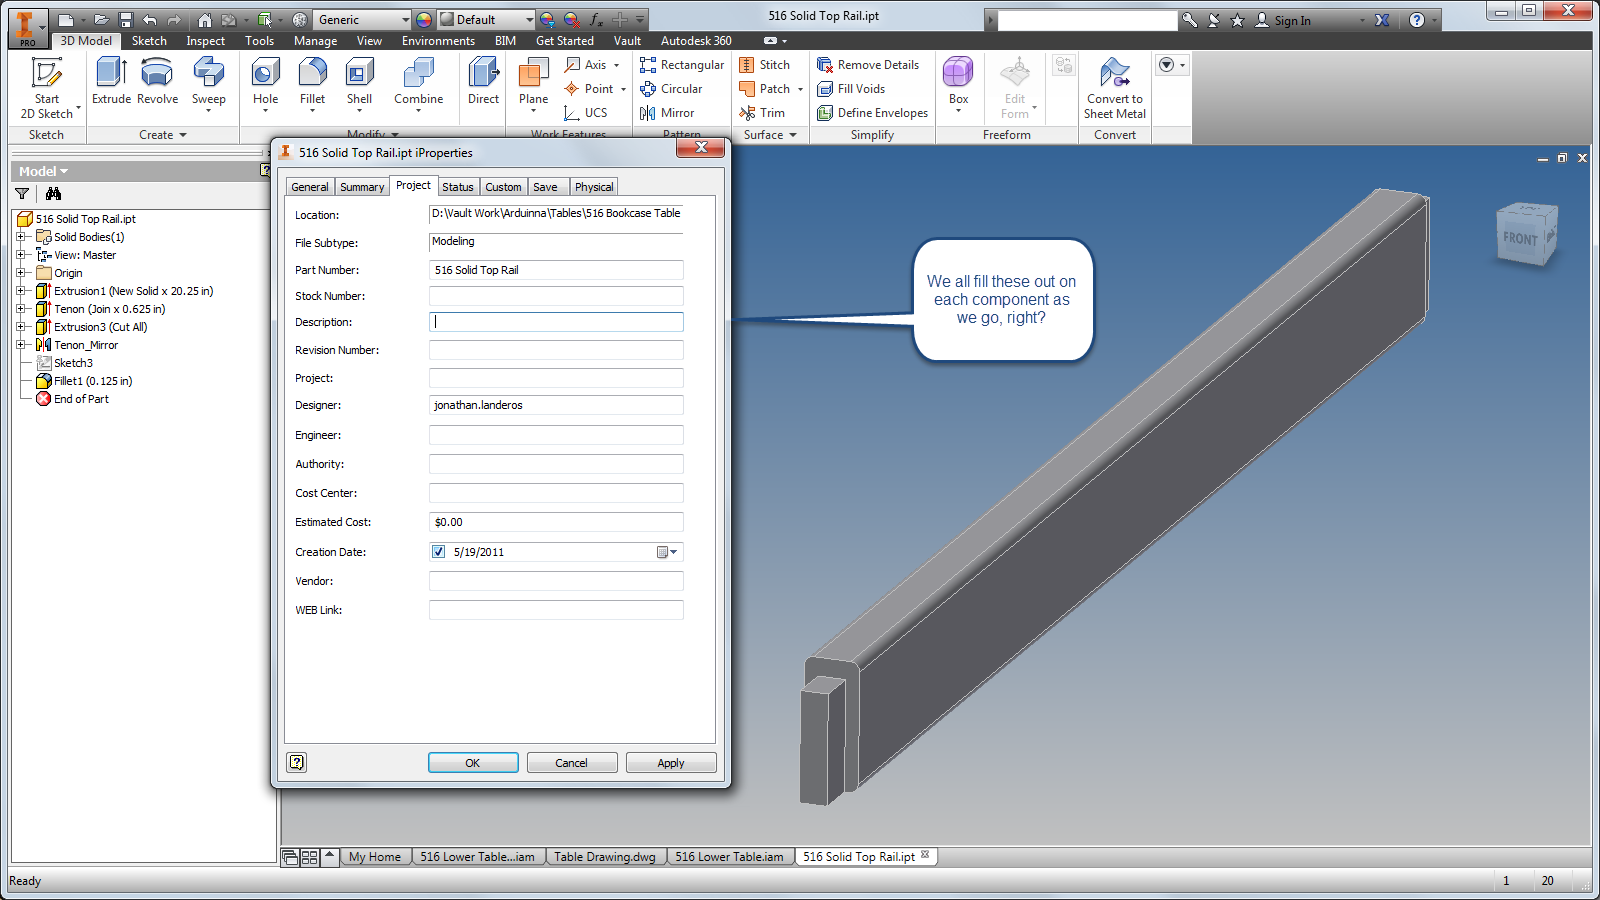
But I also admit that the phrase "Perfect World" comes with an asterisk and small print that reads. "You don't live in a perfect world".
With that being said, do I diligently set my iProperties and materials at the part, long before I place it in an assembly?
That's a big fat NOOOO!
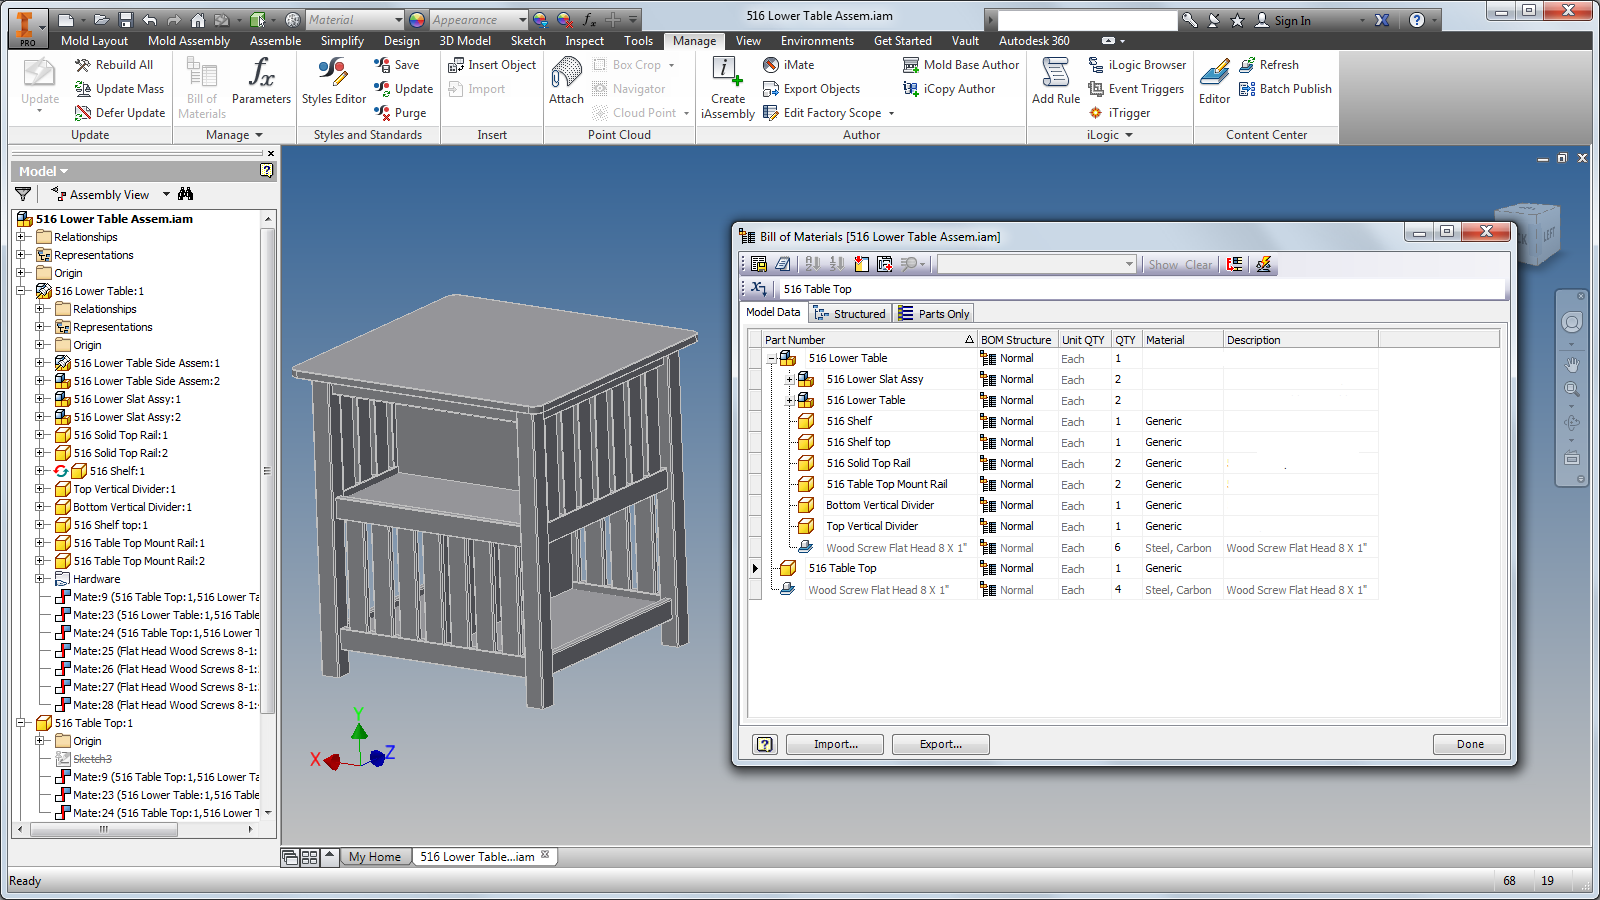 |
| This is usually what I've done. The assembly has been created, but the descriptions and materials haven't been set |
That's right. I'm as guilty as anyone out there. I may even be more guilty. That's me, sticking it to the man, breaking the rules.
I'll fill out those properties whenever I darn well please Muhahahaha!
Why don't I take my own advise? Part of it is bad habit. I always want to jump into building the models. The fun part. Documentation? That's just as important, but it's also boring.
Is it a good excuse? No. It's just part of a bad habit I haven't quite shaken yet.
That leaves me with the self inflicted challenge of having to go back and return to my models at a later date, often when they're nearly finished, to add in the properties and set the materials I need. That task is at best tedious. At worst, it's time consuming and painful.
But fortunately, I know a nice tool that allows me to change my properties and materials from the assembly, in one convenient dialog box.
The result is like you opened each part and subassembly individually and made these changes, but you don't actually have to do that!
Who needs a perfect world!
The tool of which I speak is the assembly Bill of Materials, which can be found on the Management tab in the assembly.
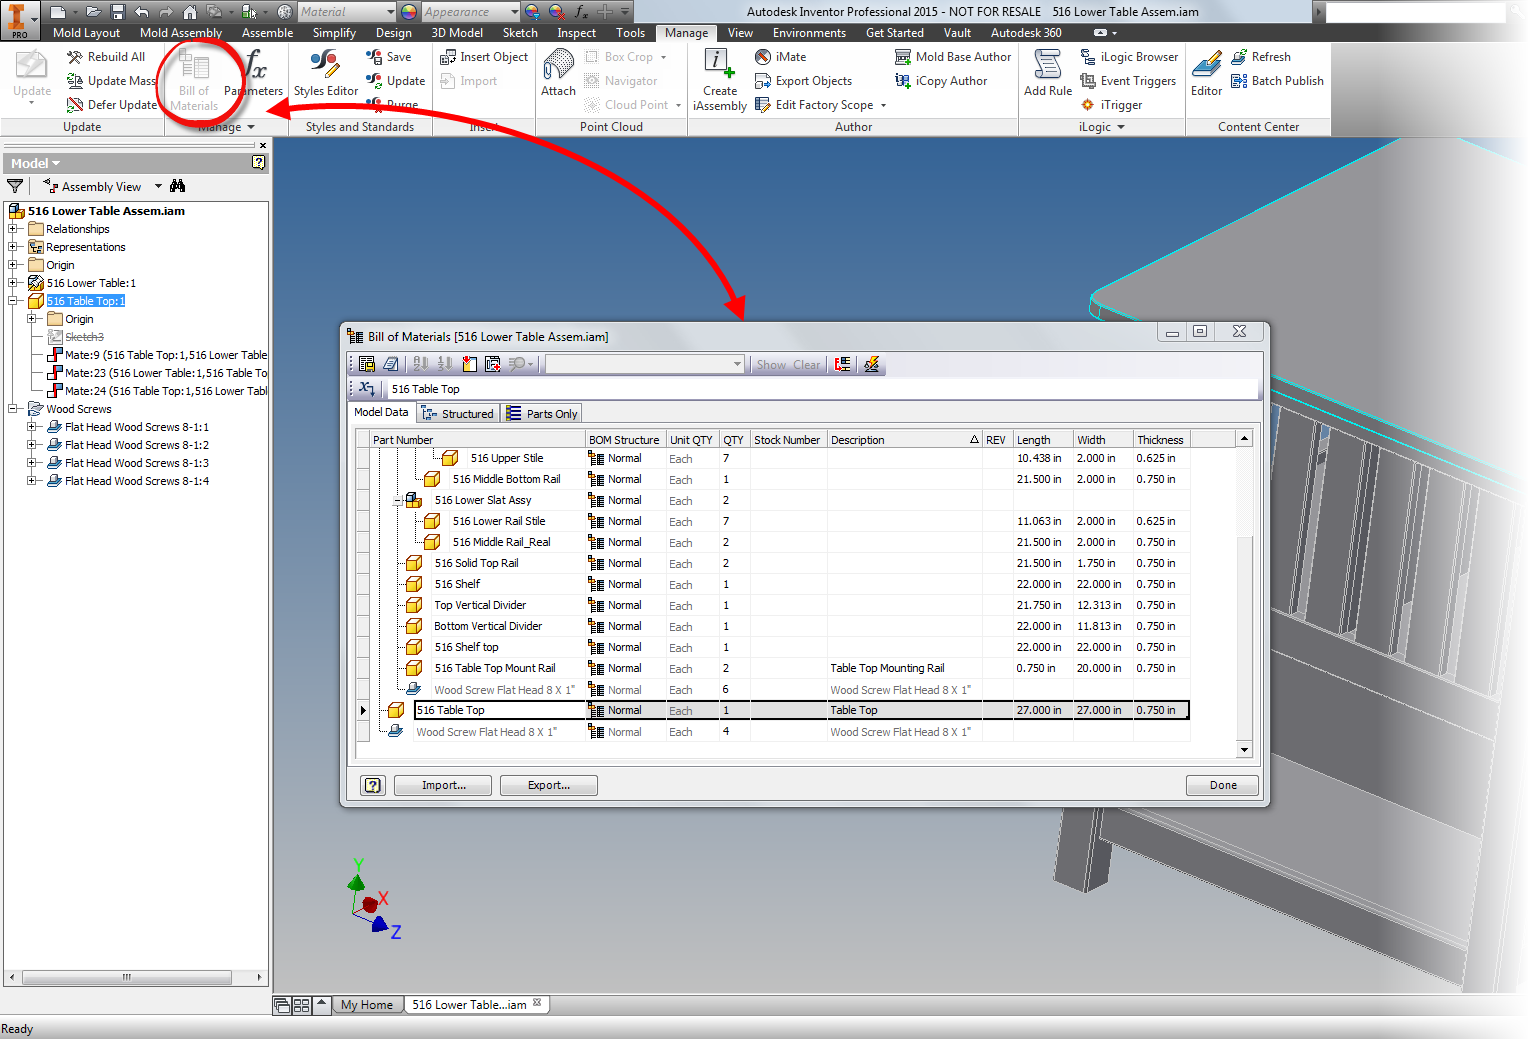 |
| Accessing the BOM Manager. The Bill of Materials icon is grayed out because the BOM Manger is already open. |
But what if you don't see the components you want?
To add columns, select the Choose Columns icon and drag the field you want and place it in the title bar.
 |
| Adding a column using the "Choose Columns" tool. |
To remove a column drag it from the title bar to the middle of the screen. Release the mouse when the "X" appears.
 |
| Removing a column from the BOM manager. |
You can add or remove however many columns you need.
Now with the columns you want configured, now you can start filling out your iProperties, as well as selecting what materials you want for your components.
 |
| That's more like it! |
This is definitely a tool worth taking a look at, if you spend a lot of time editing properties and changing materials, this should be a big part of your toolkit!
I know there's some of you that prefer video tips! If you do, I've created another video for the YouTube channel here!
Another brilliant video, great presentation, straight to the point, no waffling but a little humour just what I want to learn Inventor ! Thank you very much !
ReplyDeleteThank you, Phillip! I love sharing Inventor tips, and I'm glad they're heplful!
Deletegreat
ReplyDelete